A reminder: I’m participating in the ‘One Room Challenge’ (ORC), hosted by Linda from Calling It Home, that challenges home and design bloggers to make over a room in their house from start to finish in 6 weeks. We have decided to tackle our living room. Here’s what you missed: The Before and Vision and The Design Plans.
Finally, I’m starting to make some progress on my living room vision. This week I introduced lots of patterns, personalization and some creative solutions.
When we moved into this home two years ago, one of the first rooms I decorated was my son’s. It’s where inspiration struck first, and I had so much fun creating custom framed engineer prints, pallet art, and industrial pendant lighting. I loved everything about it, and declared his room, “done.”
However, he has since graduated to a bigger bed…which required new bedding…and while I was at it, I decided his room was missing color, and elements that better reflect his personality.
My design style, if I had to describe it, is an eclectic mix of colorful, vintage and updated traditional. Today I’m going to reveal his colorful / preppy / rustic / vintage big boy room.
I’ve always loved this book by Bernadette Rossetti-Shustak, and all of my kids have, too.
It’s hard to believe this little ‘ol blog is more than two years old now. I created it shortly after my third baby was born as a creative outlet for my craftiness. Today, my baby is a toddler and will be transitioning into her “big girl” room soon!
Recently, I converted the design I created for Baby ‘Belle’s baby announcement to create this printable artwork for her current nursery / soon-to-be big girl room.
When I see this hanging in her room, it reminds me of the baby she was, and of course these sweet words I want her to remember always.
In celebration of the two year anniversary of my blog, I’m making this art available by free download to my readers! If you take the time to print this for your sweet little girl’s room, please take a moment to tell me about it below. Even better – share your snap with me! I love to see my artwork in your homes!
I recently posted a photo of our family room on Instagram and got lots of notes asking me about the space. I had friends tell me it looked like something out of a magazine. What a compliment!
I was really surprised by the reaction I got, though. The truth is, anyone can make a space look amazing in just one photograph. Our home is a work in progress. Most of our home is not decorated. I finish little areas of a room and wait to finish the rest of the space as inspiration strikes me. That means there are uglier areas of the room that don’t get shown in photos – like the comfortable, oversized, slightly worn leather chair the corner where it doesn’t quite fit. The lamps that don’t quite match but that continue to live on in the room until I find the perfect lights that fit my budget.
I’m not very confident as a decorator, so I just go by my gut feeling. If I put a rug in the space and I find that I don’t feel comfortable, it’s not the right fit for me. If I put a wild throw pillow on the couch and it makes me want to sit down and enjoy the space – it was the right design choice for me.
Here are the design tips I follow in my home:
Start with high quality, neutral furniture This means a great neutral couch with clean lines, a high quality rug and furniture in the space. Keep the colors neutral so they can last – both in structure and in design taste – for many years. Like all things in life, when you get the foundation right everything works much better!
Bring in texture In our home, we add lots of texture with mixed leathers, deep rich woods and distressed reclaimed woods, too. It means sleek cool mirrors and hard metal vases and decor juxtaposed with wild flowers and dried wild grasses. We use fabrics with varying textures, too – but they must always, always be comfortable and soft! Make sure your throw pillows are filled with down, too. They will look 100% better and will be more comfortable, too.
Add pops of color For me, this means bold colors and patterns, as you can see with our throw pillows. I love all of these colors and patterns, and somehow when I mix them all they come together perfectly to me.
Personalize This is my most important design rule. Nothing makes an environment more sterile than lack of personalization. I like to decorate with lots of pictures. Some I keep in their frames forever for nostalgia. For our main wall, I use updated family photos every year.
Keep it versatile One of my favorite tips when buying mats and frames is to buy square or symmetrical frames, and have the mat cut to the size of photos you plan to use. Here’s why this is genius: if your favorite photo this year was portrait – oriented, inevitably you’ll one day have a favorite that is landscape – oriented. Instead of buying a new frame and re-hanging the photos on your wall to fit, you just turn the frame on its side, and you’re in business. See how I have examples of both portrait and landscape photos on my wall?
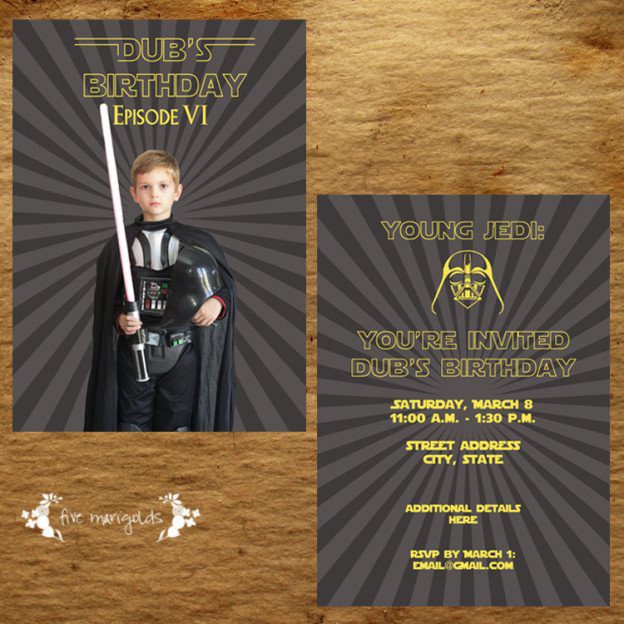
My final post in the Star Wars birthday party series is to share the custom invitations and thank you cards I designed.
Each year, I’ve been lucky that my children have chosen Halloween costumes that match their birthday party themes for the following year. Dub chose to be Darth Vader, so I used his Halloween costume for the front of the invitation. I created a simple background in PhotoShop, and used the free Star Jedi font.
I used the same background on the back, added the party details, and created a Darth Vader silhouette.
During the birthday party, I made sure to get one shot of all of the kids in the photo booth, wearing their jedi robes and using photo booth props. I used this image for a custom thank you postcard. On the back, I created a simple template that Dub could fill in himself. I love the idea of the postcard because it helps him learn the proper etiquette of showing thankfulness. Sincere, personal, and to the point! And, it’s a little less expensive to mail 🙂
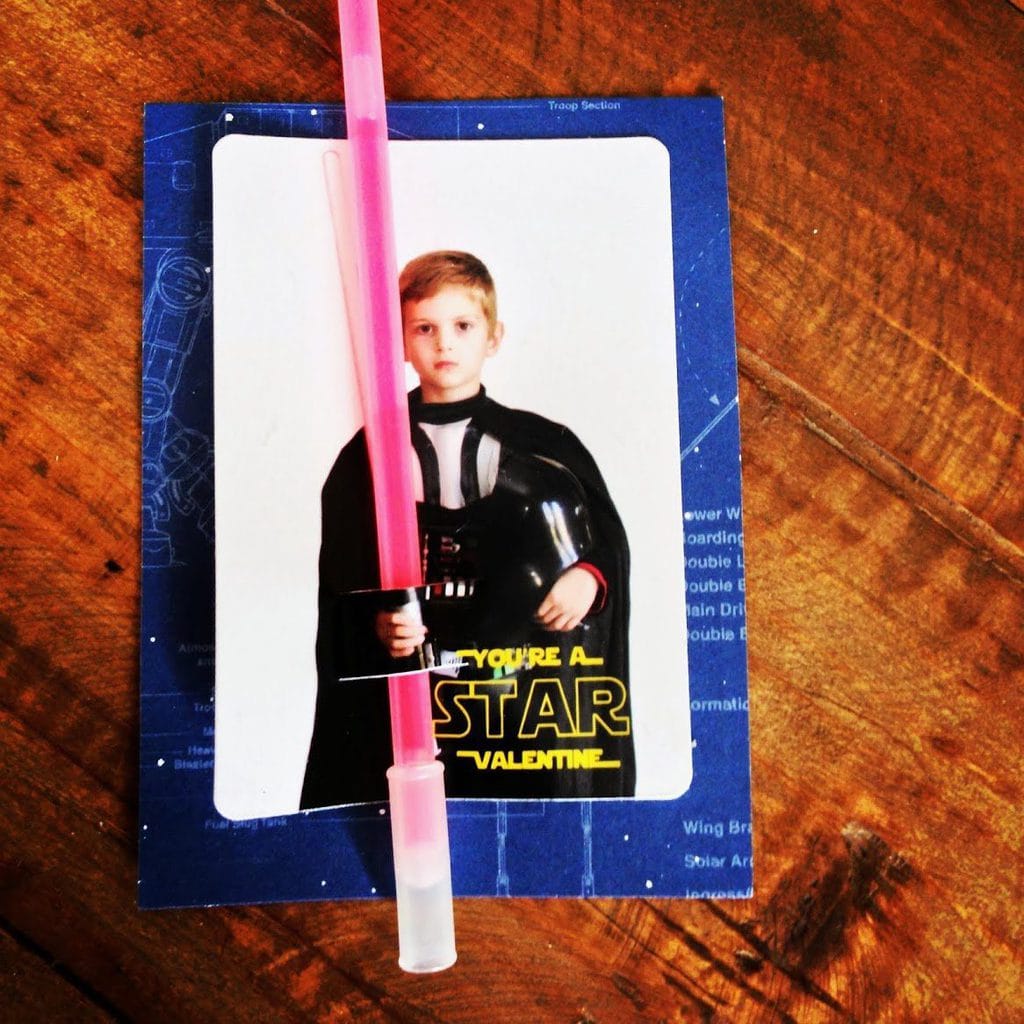
Finally, just to prove how much I utilize those Halloween photos, I also used it for Dub’s Valentine’s card. I wonder if he’ll be sick of Darth Vader by this Halloween?