
Category: Home
Master Bathroom Mini Makeover
One Bathroom, Styled Two Ways for spring
This shop, Master Bathroom Mini Makeover, has been compensated by Collective Bias, Inc. and its advertiser. All opinions are mine alone. #GotItFree #MrsMeyersBodyWash #CollectiveBias
Today I’m excited to share with you our master bathroom, styled two ways for spring.

Modern Farmhouse Holiday Decor
christmas home tour
Many of my readers started following me for my home decor content, but I’ve really fallen behind this year on updating my home as much as I would like. I plan to change that in 2018 with some updates I have planned, with no more indecision to stymie me!
For now, I’m sharing a small home update in the form of a Christmas Home Tour.
Affordable and Chic Thanksgiving Decor
easy fall centerpiece on a budget
This shop has been compensated by Collective Bias, Inc. and its advertiser. All opinions are mine alone. #EverydayCraftMoments #CollectiveBias
You may have noticed I haven’t yet refreshed my dining area as planned.
My usual design paralysis took hold, and I couldn’t stop thinking about Thanksgiving. What do the holidays have to do with home design? Well, everything.
The more I thought about it, the more I couldn’t come up with a wallpaper and concept that I was confident I’d love year round. As it turns out, I’m content with my minimalist dining area for now, and I think it really shines when I decorate for a gathering.
I decided to set the table for an inexpensive and easy, but glam fall meal.
I set the table with items I already had on hand: some gold chargers, white dishes, and leftover white pumpkins from Halloween.
I then added eucalyptus branches and pretty fall florals to add a pretty pop.

The Great Living Room Makeover
The One Room Challenge
Hi Friends! So, I’m doing something a little a lot crazy. I’ve always wanted to take part in Calling It Home’s One Room Challenge – a design challenge for bloggers to make over a room within six weeks. However, I’m jumping in right in the middle, which means I want to try to complete it in just three weeks!. Can I pull off a feature wall and redesign in 3 weeks? We shall see!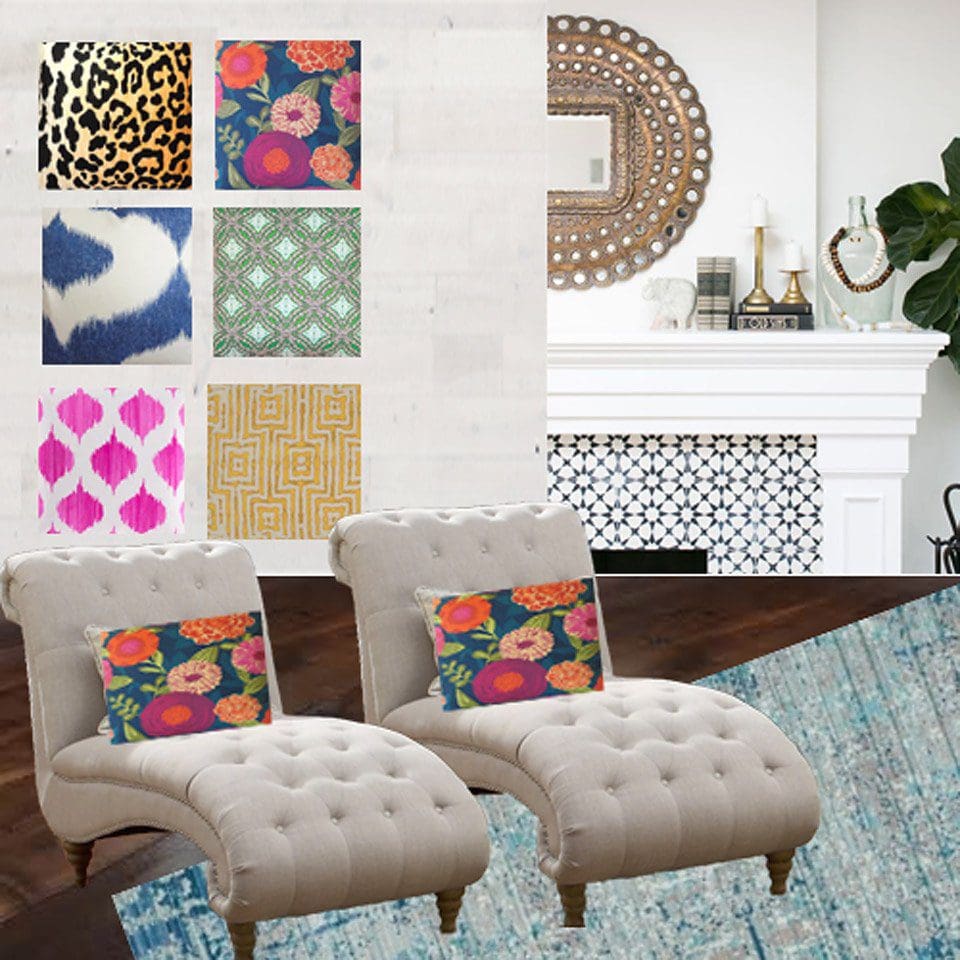
Reversible Upcycled Kitchen Sign: Self Serve Only!
It’ s been awhile since I’ve shared on the blog. I ran out of steam there for awhile, but I’m back with a project I’ve been planning for some time, and finally got around to: my self serve sign for the kitchen.
We’re slowly but surely making some changes to our builder grade home, like a new back splash that we love. Still, I thought the kitchen needed a little more character.
Easter Lunch Tablescape for Kids
There are only two weeks until Easter, and I kicked off the season with a casual Easter lunch for the kids.
The menu was very fancy: PB&J, applesauce, string cheese, and milk.
The table was a little fancier. We used their Easter baskets as centerpieces, and filled them with some Easter things we bring out each year: books, little stuffed animals, bunny ears, and some (empty) plastic eggs.

Turn Fall Leaves into Roses
I recently posted an Instagram photo of a “rose” I’d created out of fall leaves. I had several of you message me to ask how I’d done it. It’s easy! However, I can’t take credit for this idea – I saw this in my Facebook feed one day and decided to follow it:
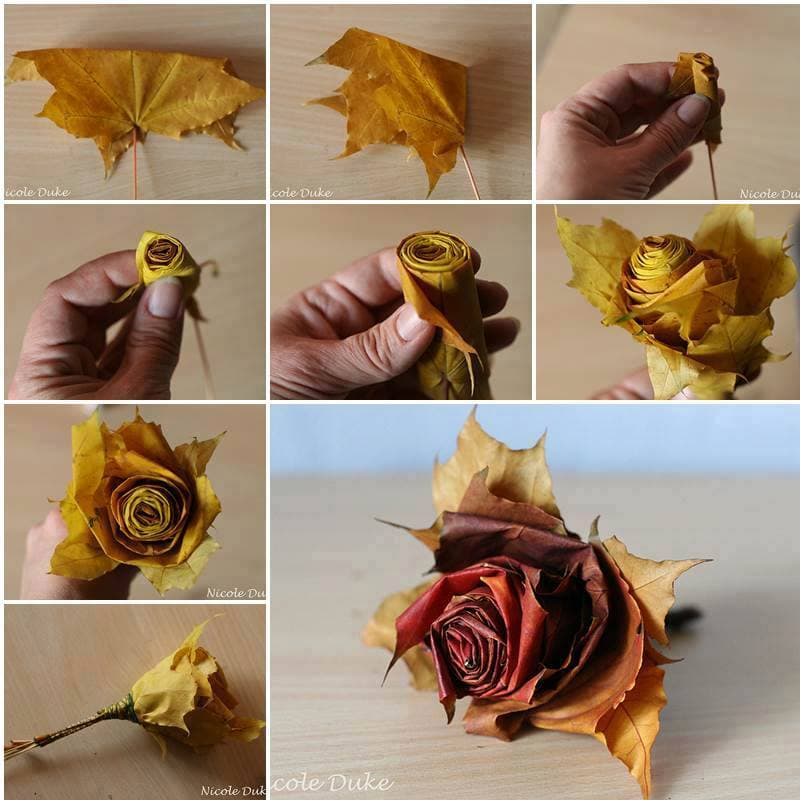
Photo tutorial c/o Nicole Duke – unfortunately I can’t find her to link you to her online.
Collect around 10-15 of the prettiest fall leaves you can find, ranging from small to large. I put the kids in charge of this. Starting with one of the smallest leaves, fold the “points” or tips of the leaves down, making sure the colorful side is on the outside.
Then, roll it from left to right into a tight tube, with the stem pointing down. Take your next leaf and do the same, but this time wrapping it around the first leaf. Repeat this over and over, wrapping looser with each leaf.
With your final 3-6 leaves, leave the points up and wrap them around the outside. Doesn’t it resemble a beautiful rose?

In addition to the fab blogs in the right sidebar, this was also linked up at Tatertots and Jello,Savvy Southern Style, Live, Laugh Rowe, Nap Time Creations The Turquoise Home.and The Scoop.
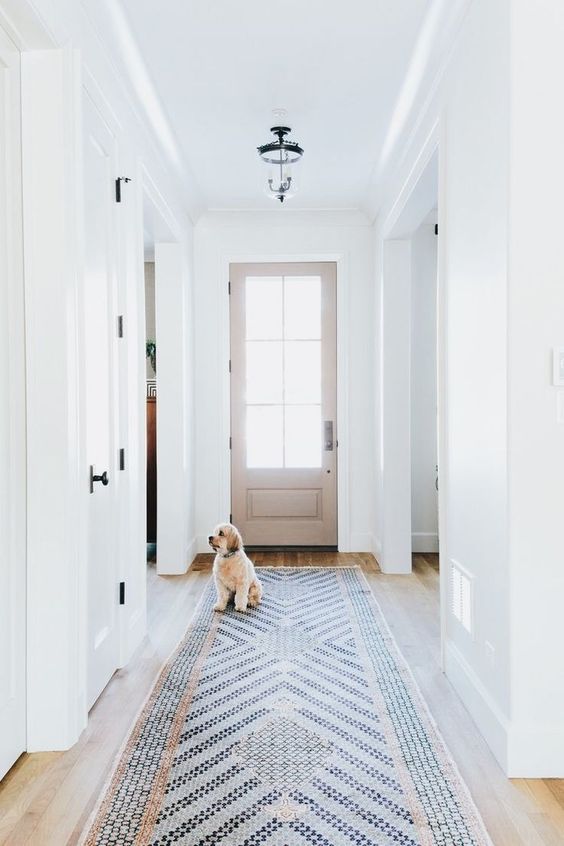
Bring Life and Personalization to a Neutral Family Room
I recently posted a photo of our family room on Instagram and got lots of notes asking me about the space. I had friends tell me it looked like something out of a magazine. What a compliment!
I was really surprised by the reaction I got, though. The truth is, anyone can make a space look amazing in just one photograph. Our home is a work in progress. Most of our home is not decorated. I finish little areas of a room and wait to finish the rest of the space as inspiration strikes me. That means there are uglier areas of the room that don’t get shown in photos – like the comfortable, oversized, slightly worn leather chair the corner where it doesn’t quite fit. The lamps that don’t quite match but that continue to live on in the room until I find the perfect lights that fit my budget.
I’m not very confident as a decorator, so I just go by my gut feeling. If I put a rug in the space and I find that I don’t feel comfortable, it’s not the right fit for me. If I put a wild throw pillow on the couch and it makes me want to sit down and enjoy the space – it was the right design choice for me.
Here are the design tips I follow in my home:
- Start with high quality, neutral furniture This means a great neutral couch with clean lines, a high quality rug and furniture in the space. Keep the colors neutral so they can last – both in structure and in design taste – for many years. Like all things in life, when you get the foundation right everything works much better!
- Bring in texture In our home, we add lots of texture with mixed leathers, deep rich woods and distressed reclaimed woods, too. It means sleek cool mirrors and hard metal vases and decor juxtaposed with wild flowers and dried wild grasses. We use fabrics with varying textures, too – but they must always, always be comfortable and soft! Make sure your throw pillows are filled with down, too. They will look 100% better and will be more comfortable, too.
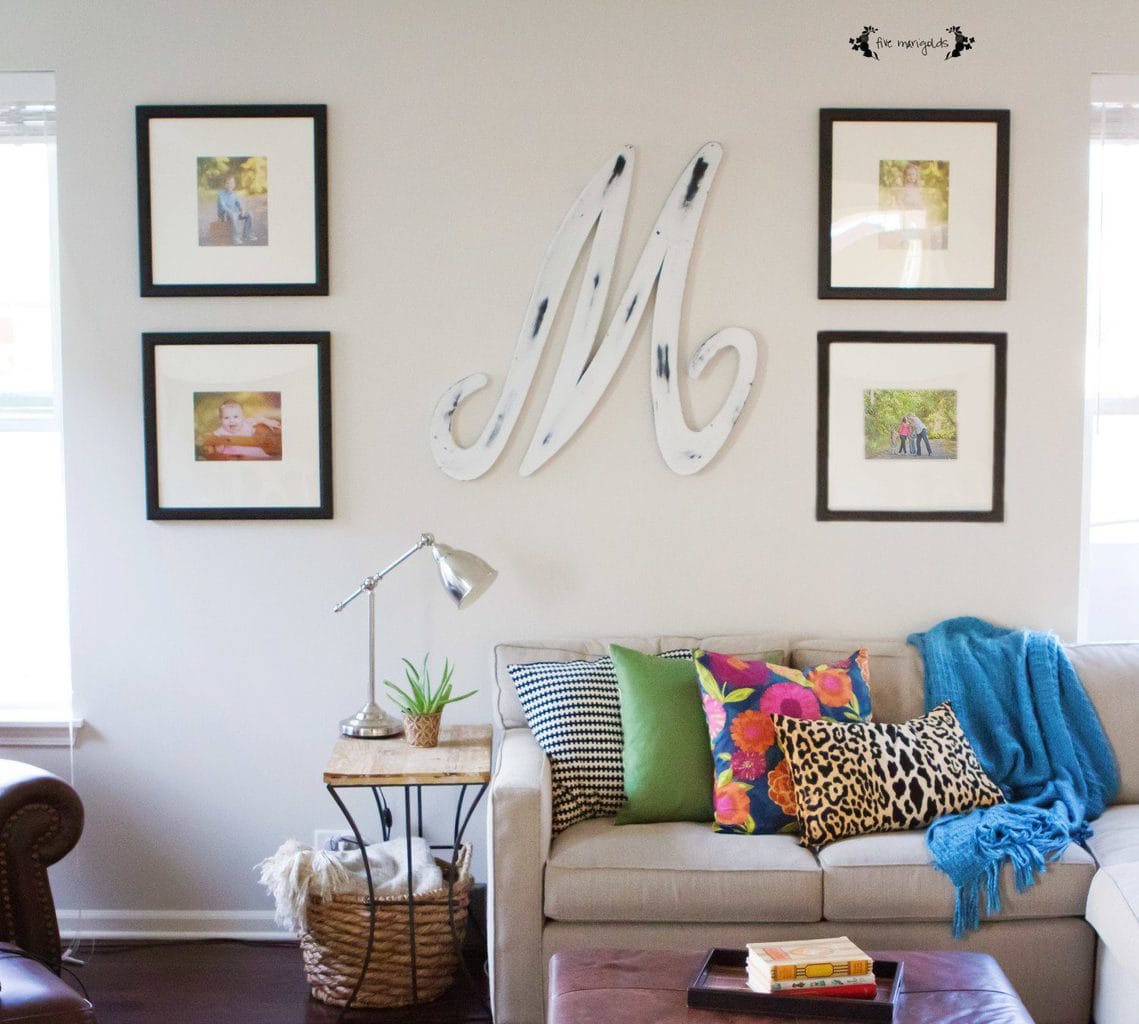
- Add pops of color For me, this means bold colors and patterns, as you can see with our throw pillows. I love all of these colors and patterns, and somehow when I mix them all they come together perfectly to me.
- Personalize This is my most important design rule. Nothing makes an environment more sterile than lack of personalization. I like to decorate with lots of pictures. Some I keep in their frames forever for nostalgia. For our main wall, I use updated family photos every year.
- Keep it versatile One of my favorite tips when buying mats and frames is to buy square or symmetrical frames, and have the mat cut to the size of photos you plan to use. Here’s why this is genius: if your favorite photo this year was portrait – oriented, inevitably you’ll one day have a favorite that is landscape – oriented. Instead of buying a new frame and re-hanging the photos on your wall to fit, you just turn the frame on its side, and you’re in business. See how I have examples of both portrait and landscape photos on my wall?
Sources:
- Sectional: Carson’s Furniture
- Ottoman: Restoration Hardware (old) similar here
- End Tables: HomeGoods (old) similar here
- Lamp
- Pillows, similar: animal print, black/white geo, floral pillow made with Robert Allen fabric
- Throw: HomeGoods (old) similar here
- Wall Monogram: HomeGoods (old) similar here
- Wall frames and mats
- Rug
Free Art Prints for Boy’s Room
I’m slowly going room by room and decorating where inspiration strikes. That only happens to be working in the kids’ areas, but I’m embracing it!
Next up is Dub’s bathroom. I love the idea of making it an all-boy kind of space – I absolutely love decorating really boyish spaces – but I want it to be somewhat neutral since it will be shared with overnight guests.
I railroaded Dub into the blue color for his room – I’d rejected the crazy bright aqua color he really wanted (I just couldn’t…) so I let him choose the paint for this space himself.
I tried to convince him that a steel blue color would be great. I go for neutrals everywhere else, so I was hoping this would be a room with some color. However, he really liked the idea of a silvery gray for the space. Out of 5 grays, he chose Sherwin Williams Gray Screen because of the slightly blue tint and light tone. Nice choice!
Here is the working Mood Board I’m using to inspire the makeover.
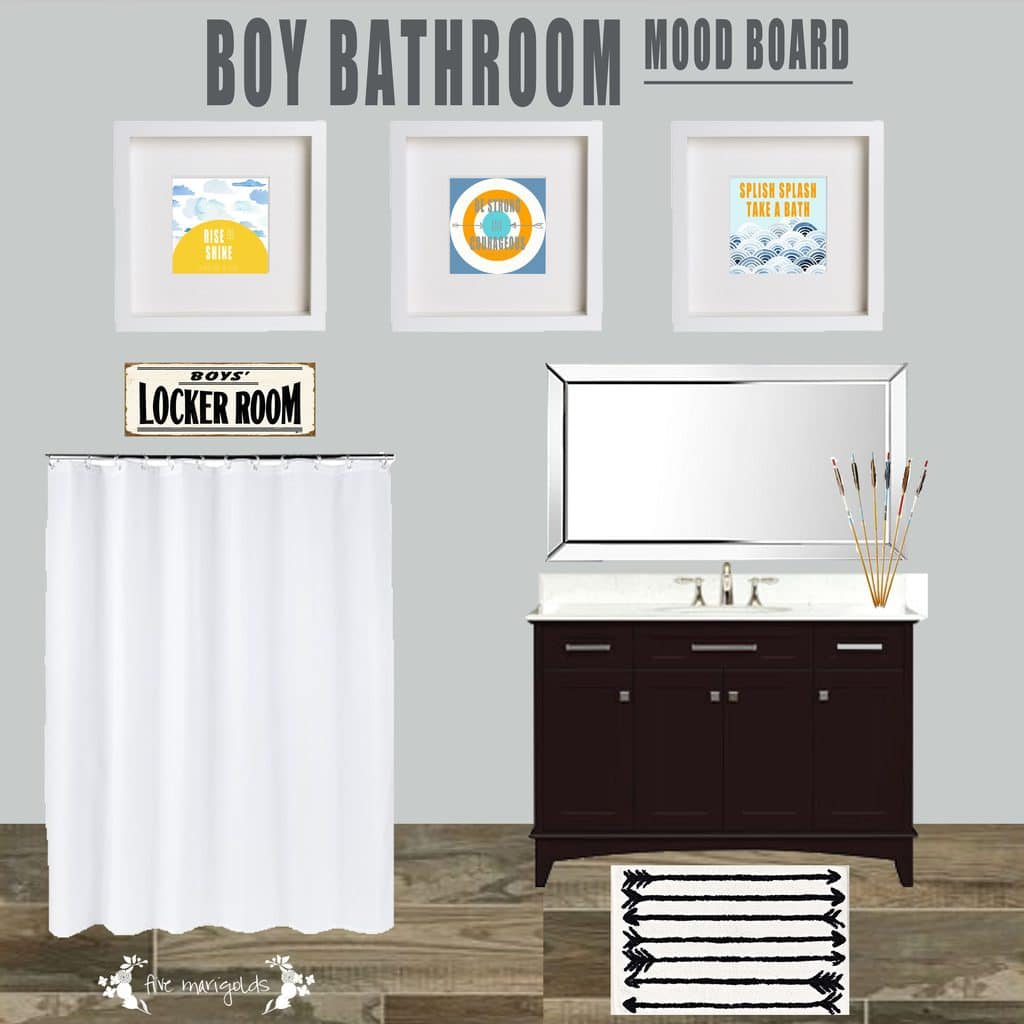
I designed artwork to add some color to the otherwise neutral, rustic space. I’m not 100% sure on this scheme, but since the artwork is free (I already have the IKEA RIbba frames on hand from a failed attempt to use it elsewhere), I’m going with it for now.


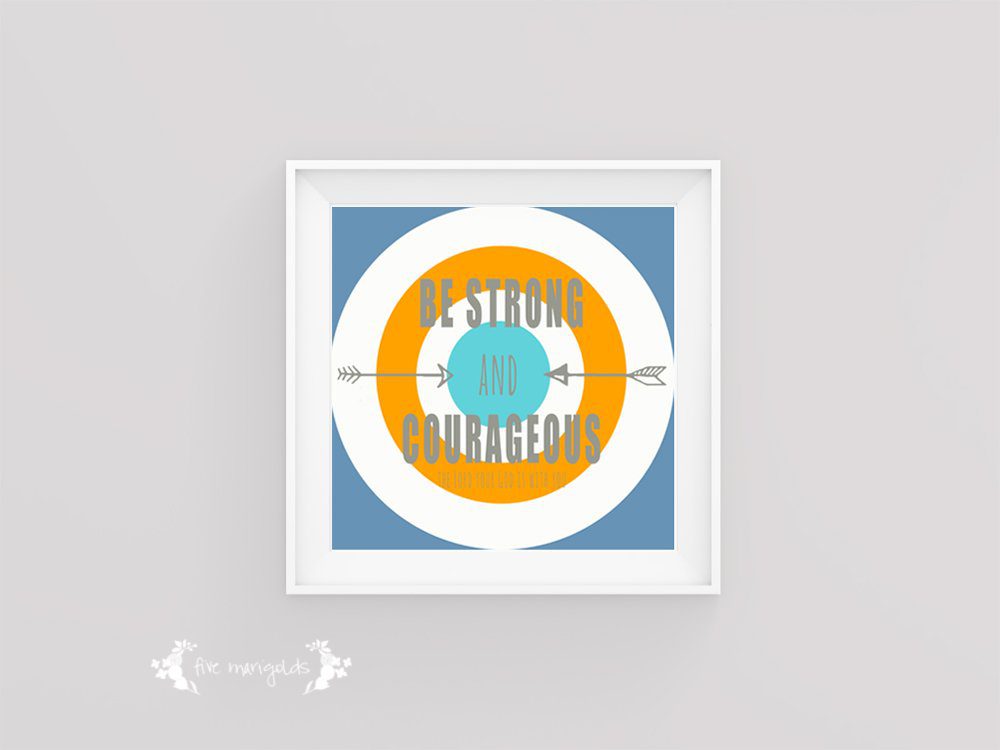
And just because I couldn’t decide…I’m sharing a few variations I worked on: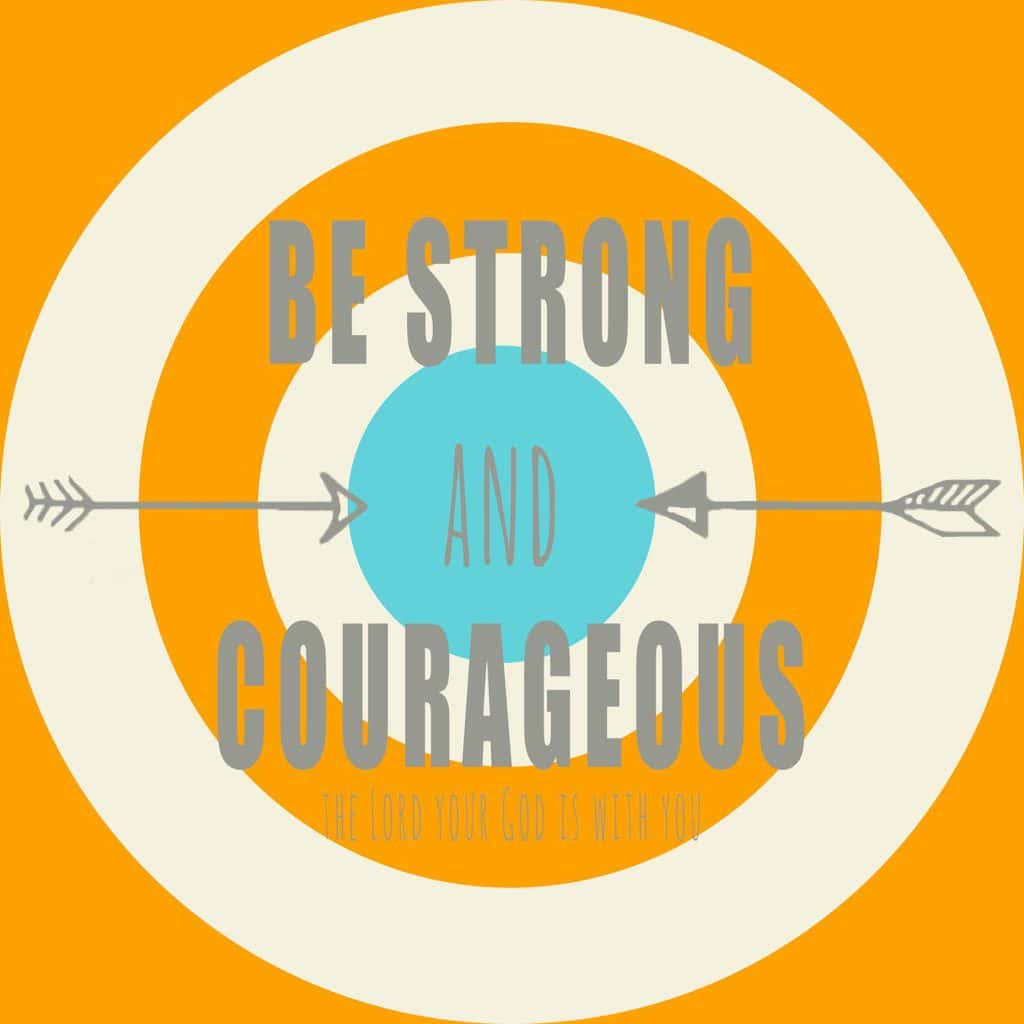

What do you think? I’m hoping this inspires others to add some color to their spaces, so I’m making several of them available to you for free!
- Rise and Shine
- Be Strong and Courageous blue and orange version
These 12×12 printables are designed to work with the Ribba frame, so you’ll want to get them printed at the copy store.
If you download these, please take a moment to tell me about it below. Even better, share photos of them in use. I’d love to see these prints getting used and enjoyed!
Bible Verses About Home: Strong foundations for a new house
Bible SCRIPTURES for a New Home
These bible verses about home can be used for a house blessing for new construction, or used to decorate your home with scripture.
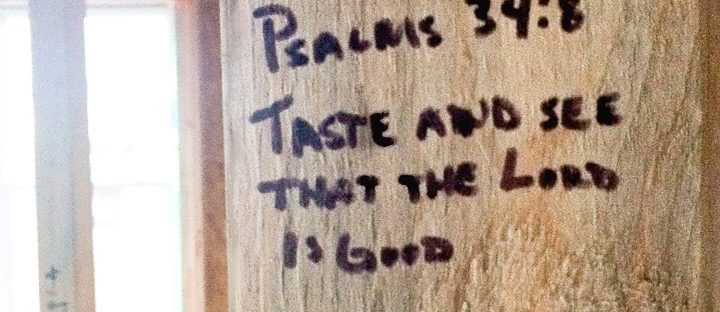
Several weeks ago, we decided to have a little family house dedication on our new home under construction by writing verses that held meaning and hope for our family. A new home blessing, if you will.
I originally got the idea from a young adult Christian book series I read and loved when I was younger – the Glenbrooke series by Robin Jones Gunn, and this per
In the book Wildflowers, the main character is fulfilling her dream of opening a business, and invited all of her friends to the property before renovations for a blessing party.
They prayed, sang worship songs and wrote scripture right on the walls, studs, and sub-flooring.
I absolutely loved the idea that the blessings they wrote and prayed for would forever be etched in their memories.
I knew that if I ever built or renovated a home – I wanted to do something similar.
I love the idea that as we walk through the finished rooms of our home in just a few months, we’ll remember the verses written on the foundation of each room we enter.
And, maybe someday many, many years from now, a different family might have occasion to see the blessings written by us under the carpet or on the wall studs.
Today I’m sharing inspirational bible verses for a new home blessing.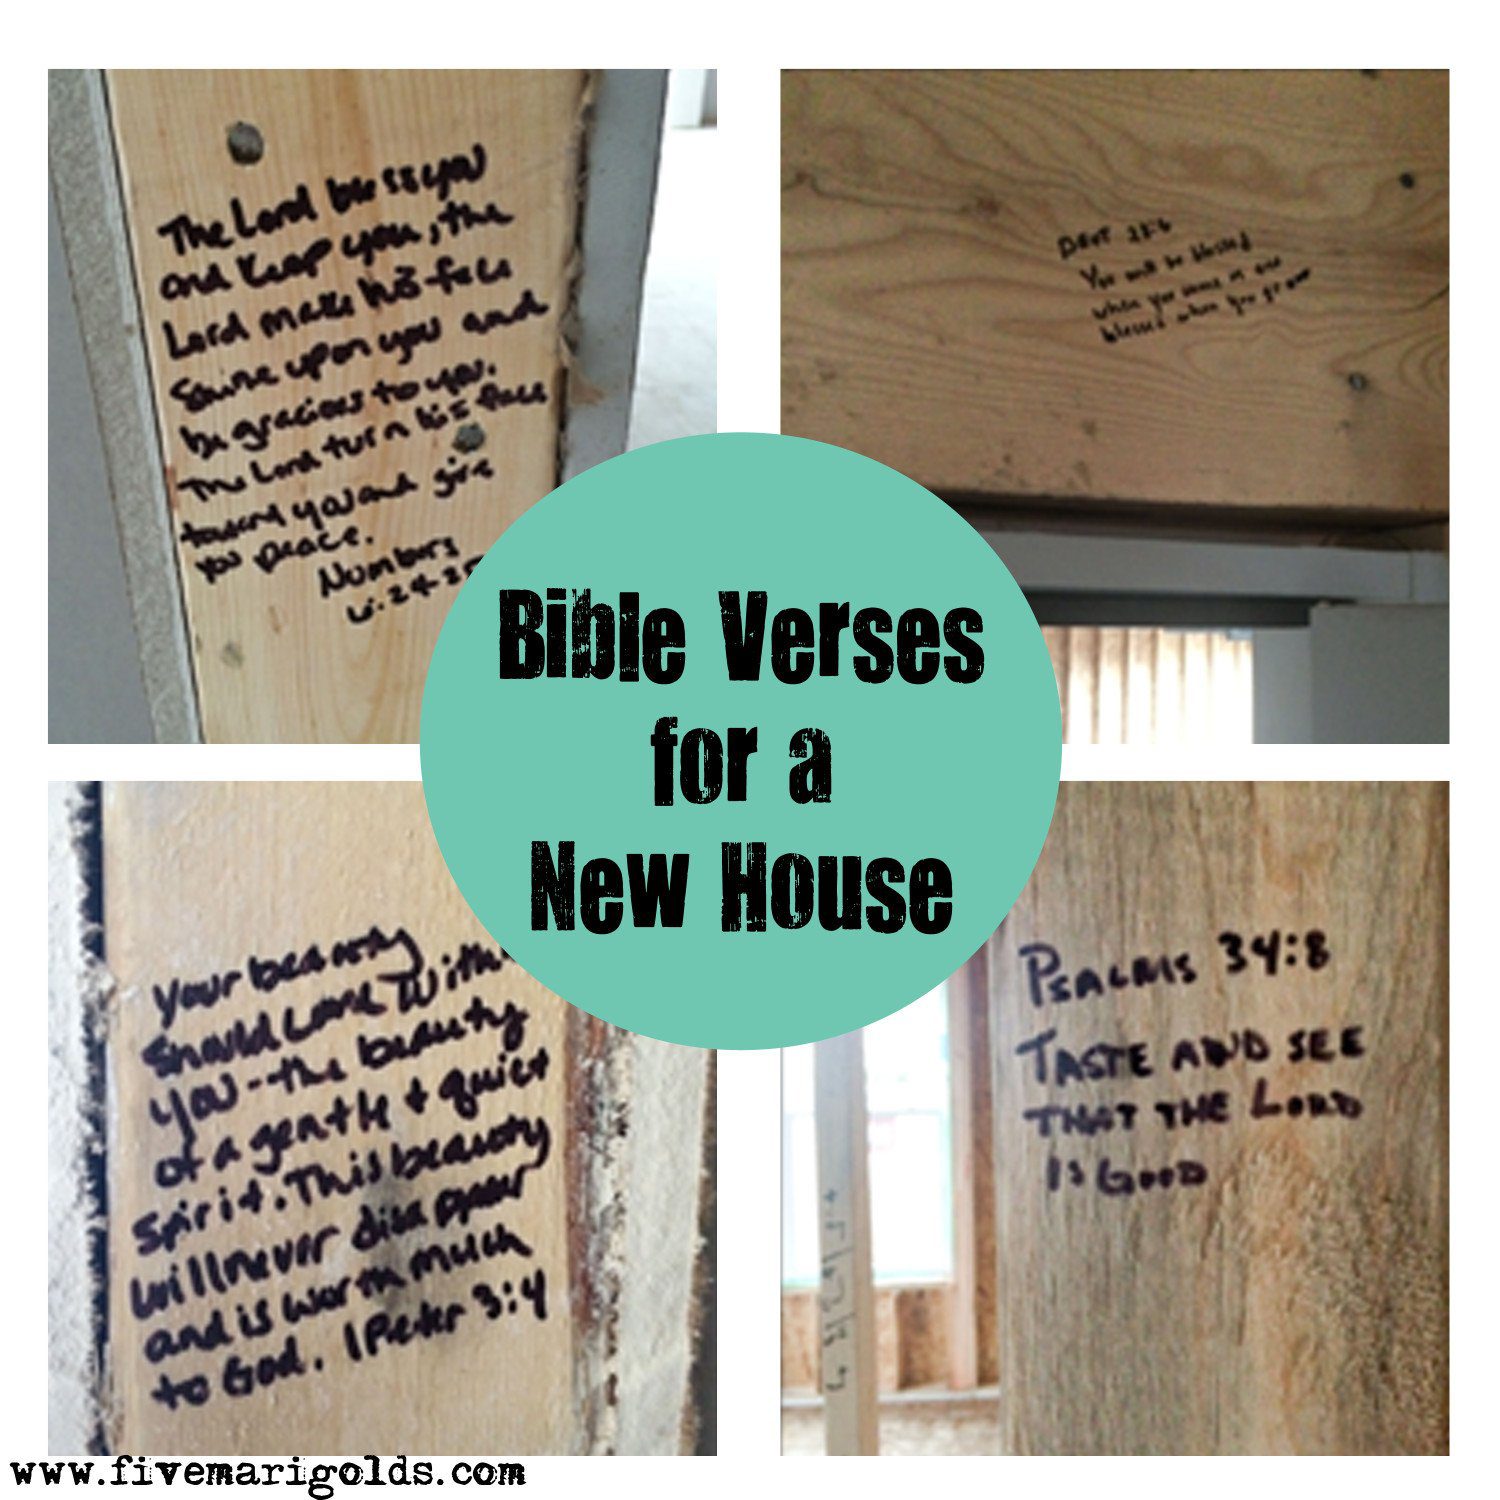
Family Growth Chart for less than $15
We recently made the decision to sell our “starter” home and build a new home that better accommodates our growing family. We bought this home just months before our wedding, had three babies here and many, many precious memories as a family. We’re ready for the next chapter, but this sentimental mom is feeling a bit emotional about it, as well.
The moment we signed the papers to build our new home I was immediately motivated to take on a project I’ve been meaning to for a long time – make a family growth chart that we can take with us – wherever we go. Our former growth chart was done the old fashioned way – with pencil on the wall of our kitchen (that I still can’t bring myself to paint over even since I’ve made this beautiful new chart).
I’d once tried my hand at an embroidered chart that was supposed to be cute and charming, but didn’t end up looking quite as polished as my inspiration. I also found that I was too lazy to embroider once a year. My laziness factor is high.
So I moved on to those cute reclaimed signs I’ve seen all over Pinterest.
I started with a 3/4″x7″x8′ piece of cedar lumber that I purchased at Home Depot for less than $9. First, I enlisted Dub to weather it for me. I gave him chains and a hammer and let him have at it. I stained it with leftover stain that I used on our stairs for our garage makeover.
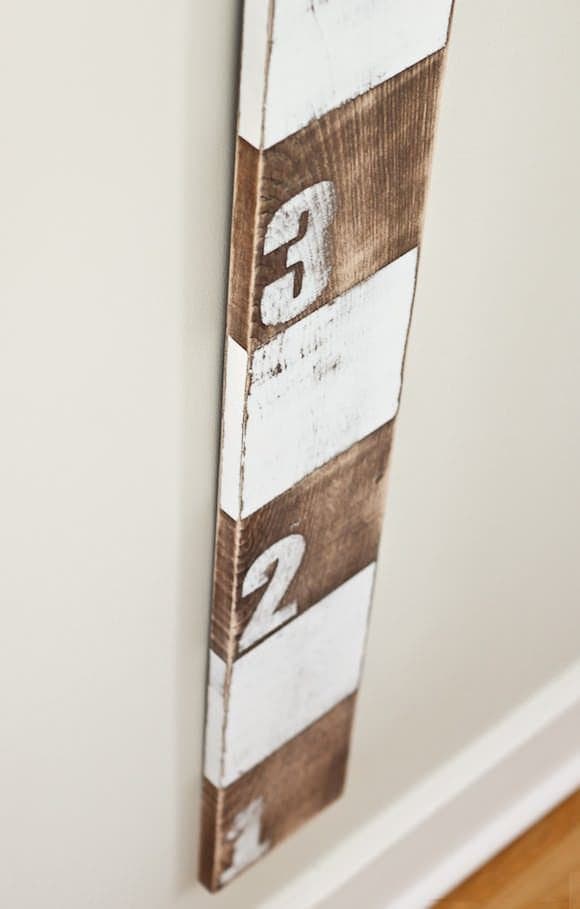
From there, I had to get measuring – my least favorite part. Our family is really tall, so I cut my board to 6′ tall and painted 1′ white stripes using leftover paint from the garage makeover. These are some terrible progress photos, but you get the idea.

I actually liked the way this looked when I was done, but I went ahead and sanded it to give it a more distressed look.

Then, I used my silhouette to create the measurement marks. I barely use my Silhouette but I used it for this, figuring it would make the measuring much easier for me. I measured it on the computer, cut it out on the Silhouette and then used transfer paper to stick it right on the board without having to re-measure.

I’m super happy with the way that it turned out! I can’t wait to hang this measurement chart in our new home next year. I can see keeping this chart in our home forever, and measuring little grandbabies someday.
Postscript: after completing my chart, I stumbled upon this cute version by Handmade Charlotte
If I had to do it over again, I think her way of painting the numbers would be a lot cheaper and easier. However, I’d still want to make the measurement marks so that I could tell visually exactly how tall the kids are. Everytime they get measured they want to know EXACTLY how many feet, inches and centimeters tall they are. Because that matters to 4 and 6 year olds.
What do you think? Do you have a family growth chart in your home?
DIY Budget Garage Transformation
Last weekend I had the DIY bug – I was really in the mood for a project but didn’t want to spend a lot of money. We’re planning to sell our home within the year and don’t want to invest much more into this house. We landed on a garage to mudroom transformation.
