Children’s Artwork Display for Less Than $5

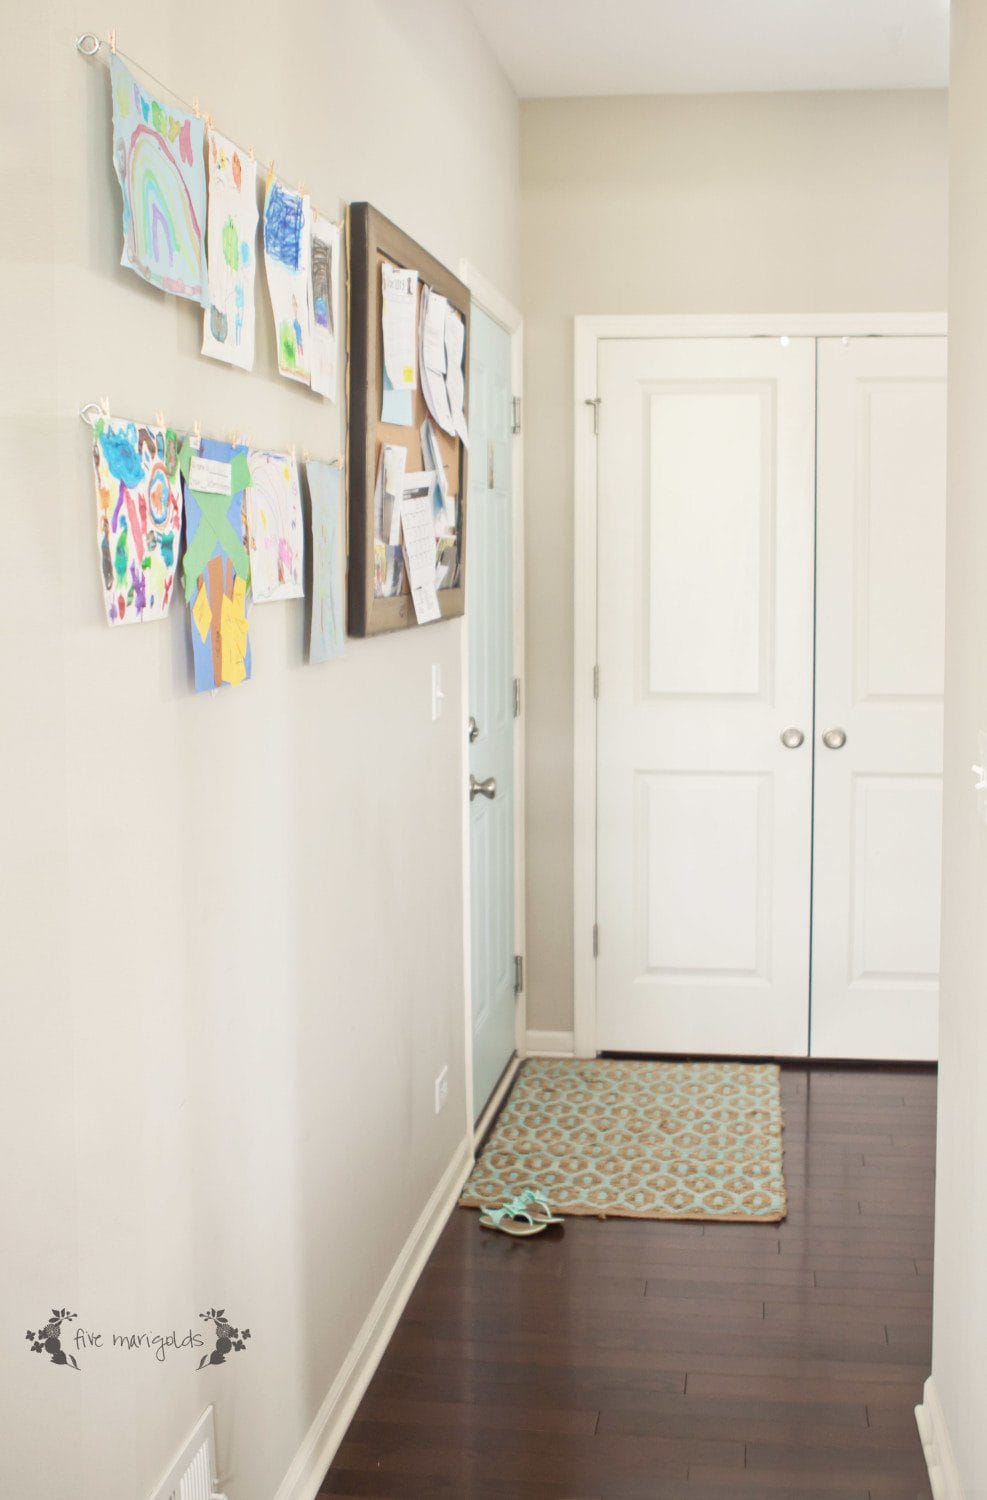
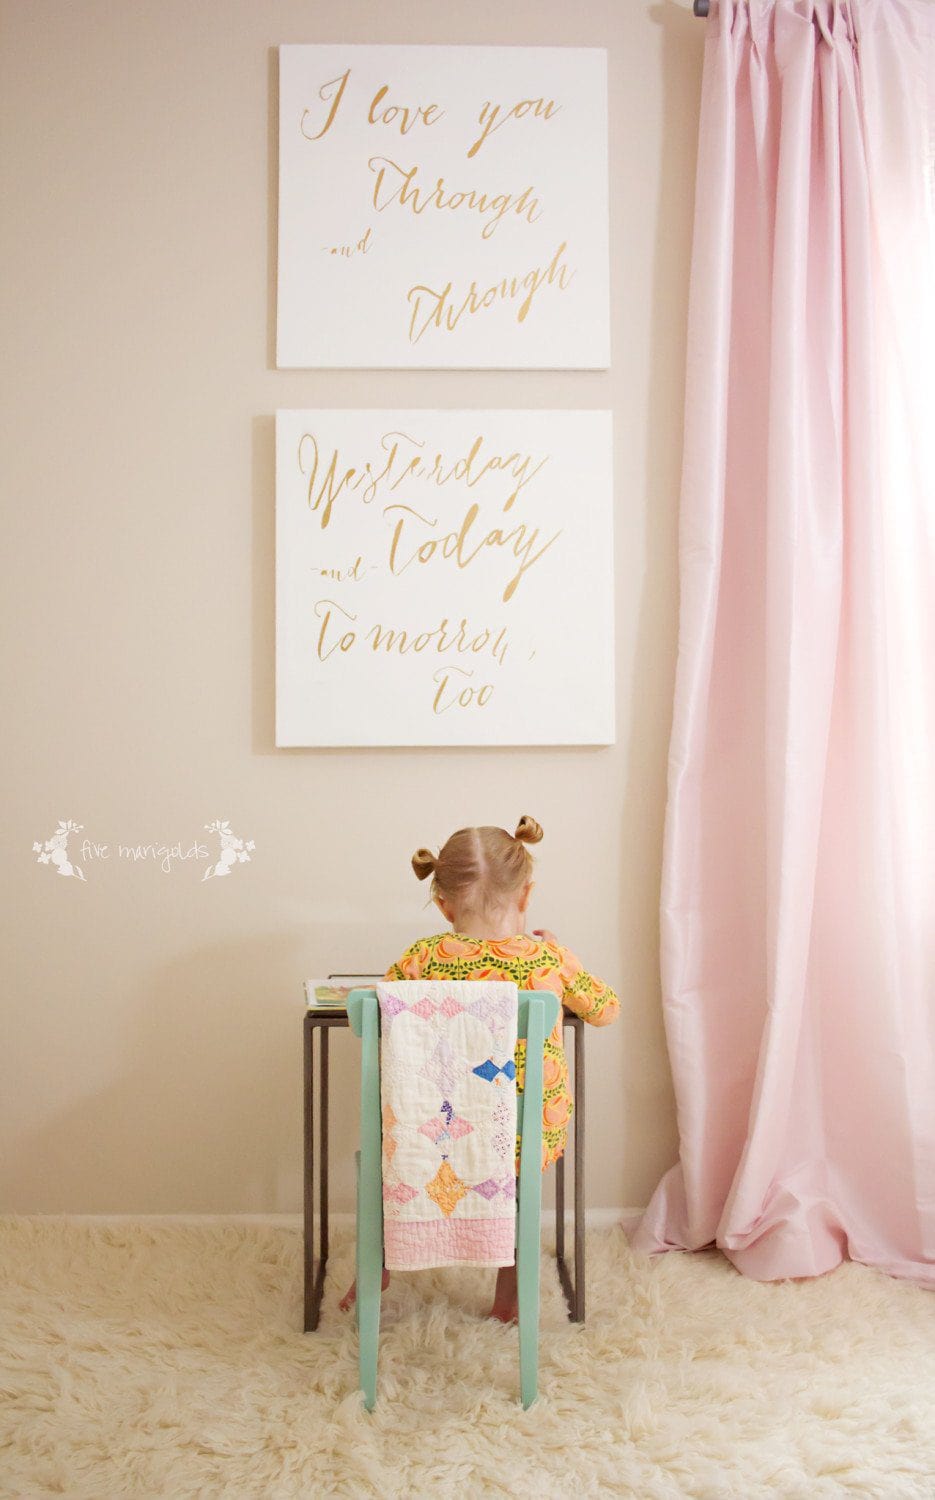
This is one of my favorite projects to date – also the easiest and least expensive: the children’s artwork display located in our Family Command Center  – otherwise known as the mud room.

I wanted plenty of space where the children could hang their artwork and good grades with pride, without that messy cluttered look on the fridge. It also needed to be really flat to the wall, since the area I’d designated is in a space the width of a hallway.

Mud Room Family Command Center DIY Kids' Art Display | Five Marigolds Mud Room Family Command Center DIY Kids' Art Display | Five Marigolds

Here’s how I did it:

  • Buy these eye hook screws and wire at the hardware store for less than $5 total (or spend a few extra bucks and shop Amazon at the links above if you want to save a trip to the store).
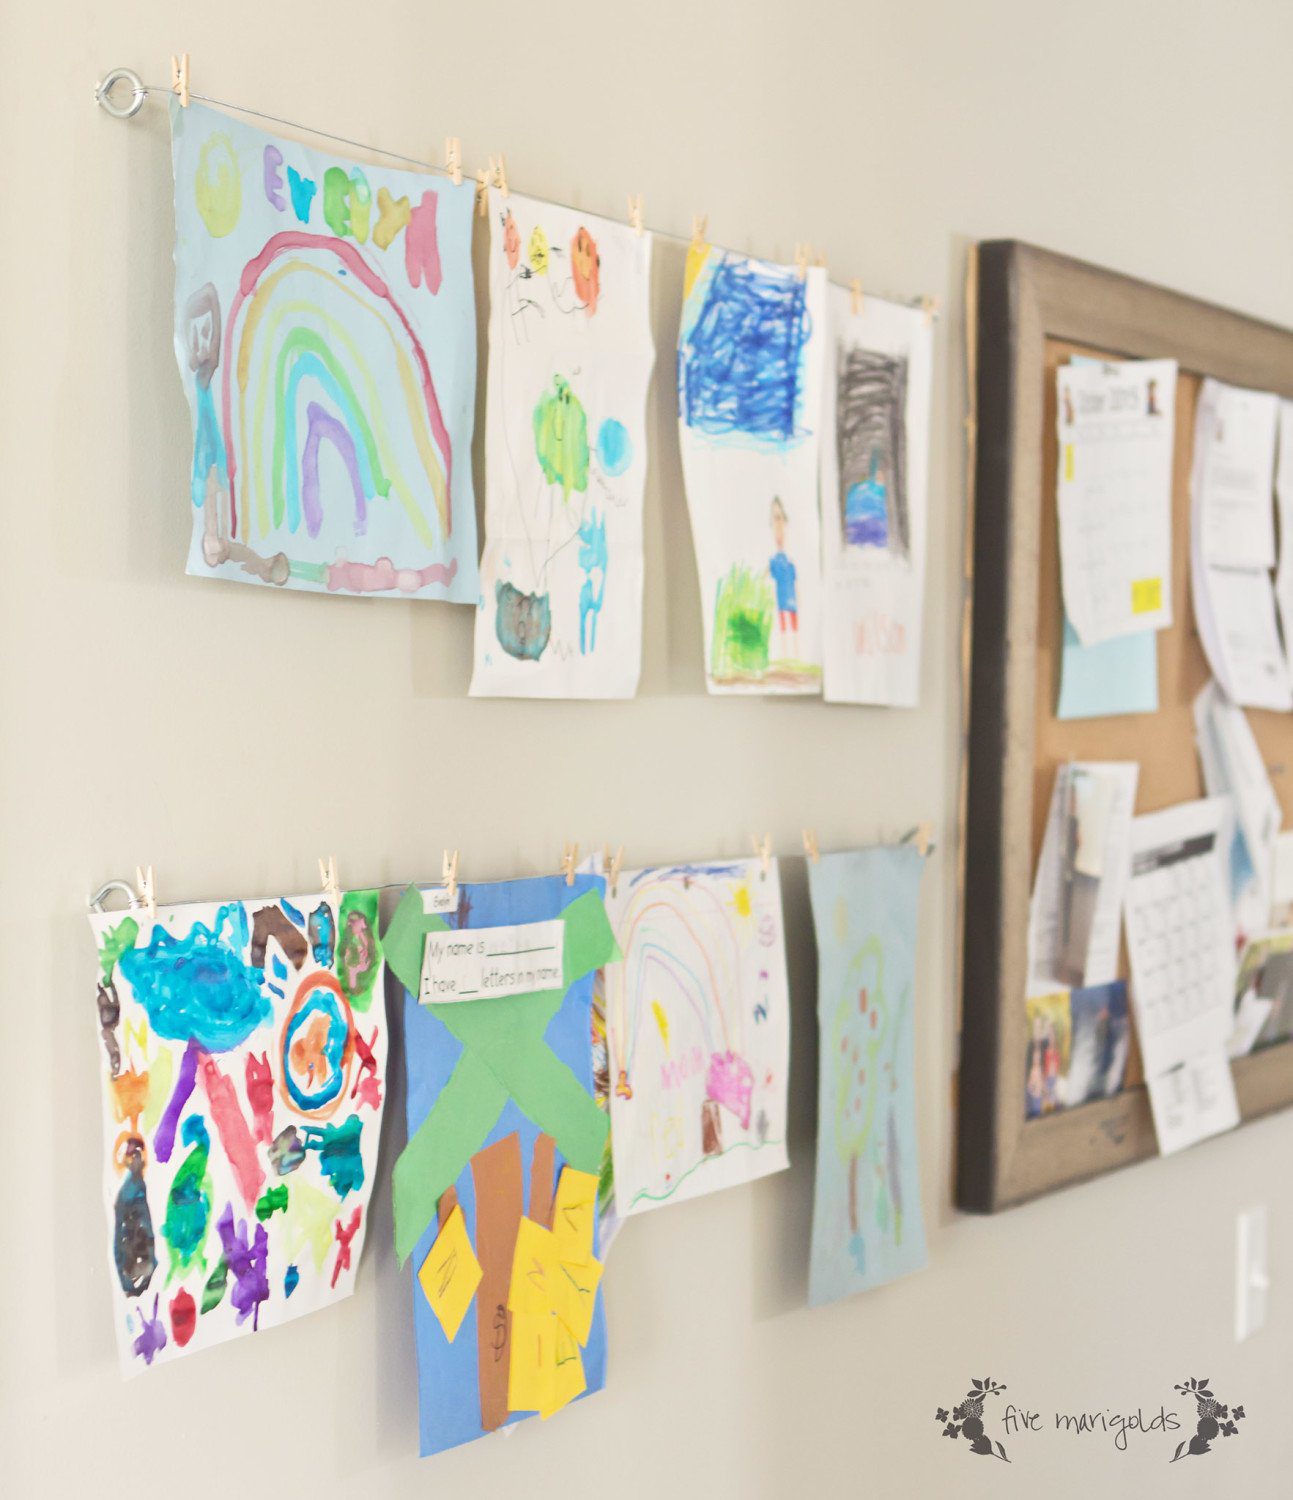
  • Drill holes into the wall where you want your eye hooks to go. Screw the eye hooks into the wall by hand.  Then, wrap your wire around one of the hooks a few times. Stretch it to the other eye hook, pulling and straightening as you go. Wrap it around that eye hook 2-3 times and cut the wire.
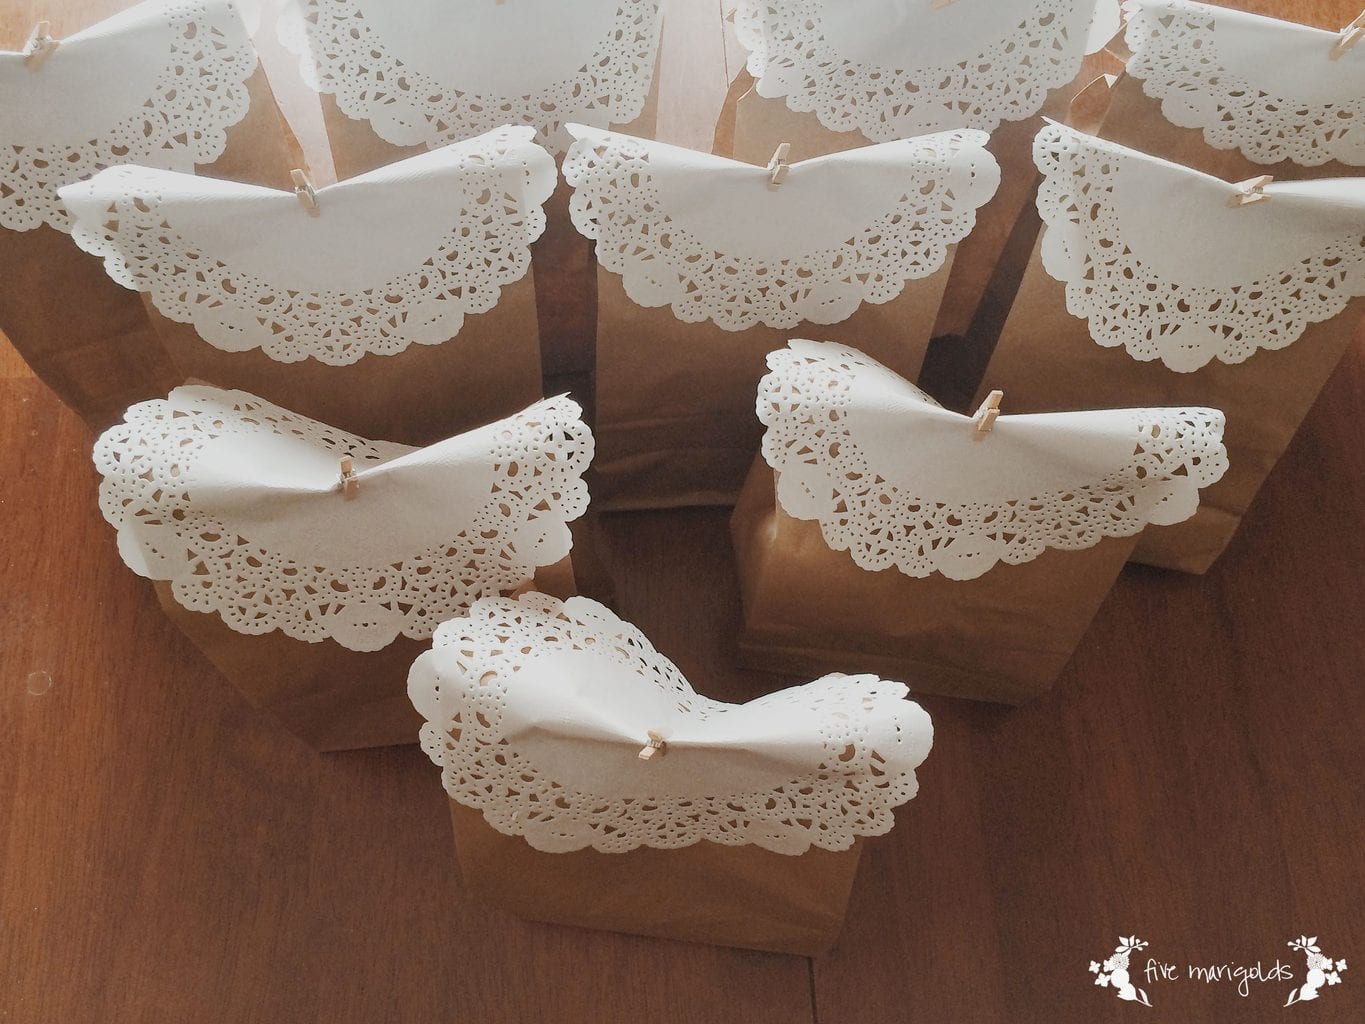
  • I already had these cute little inexpensive clips on hand, leftover from Eve’s party favors.They work great for holding the various art and school papers the kids bring home.
  • Voila! Children’s art center complete in 20 minutes and for less than $5.

Mud Room Family Command Center DIY Kids' Art Display | Five Marigolds

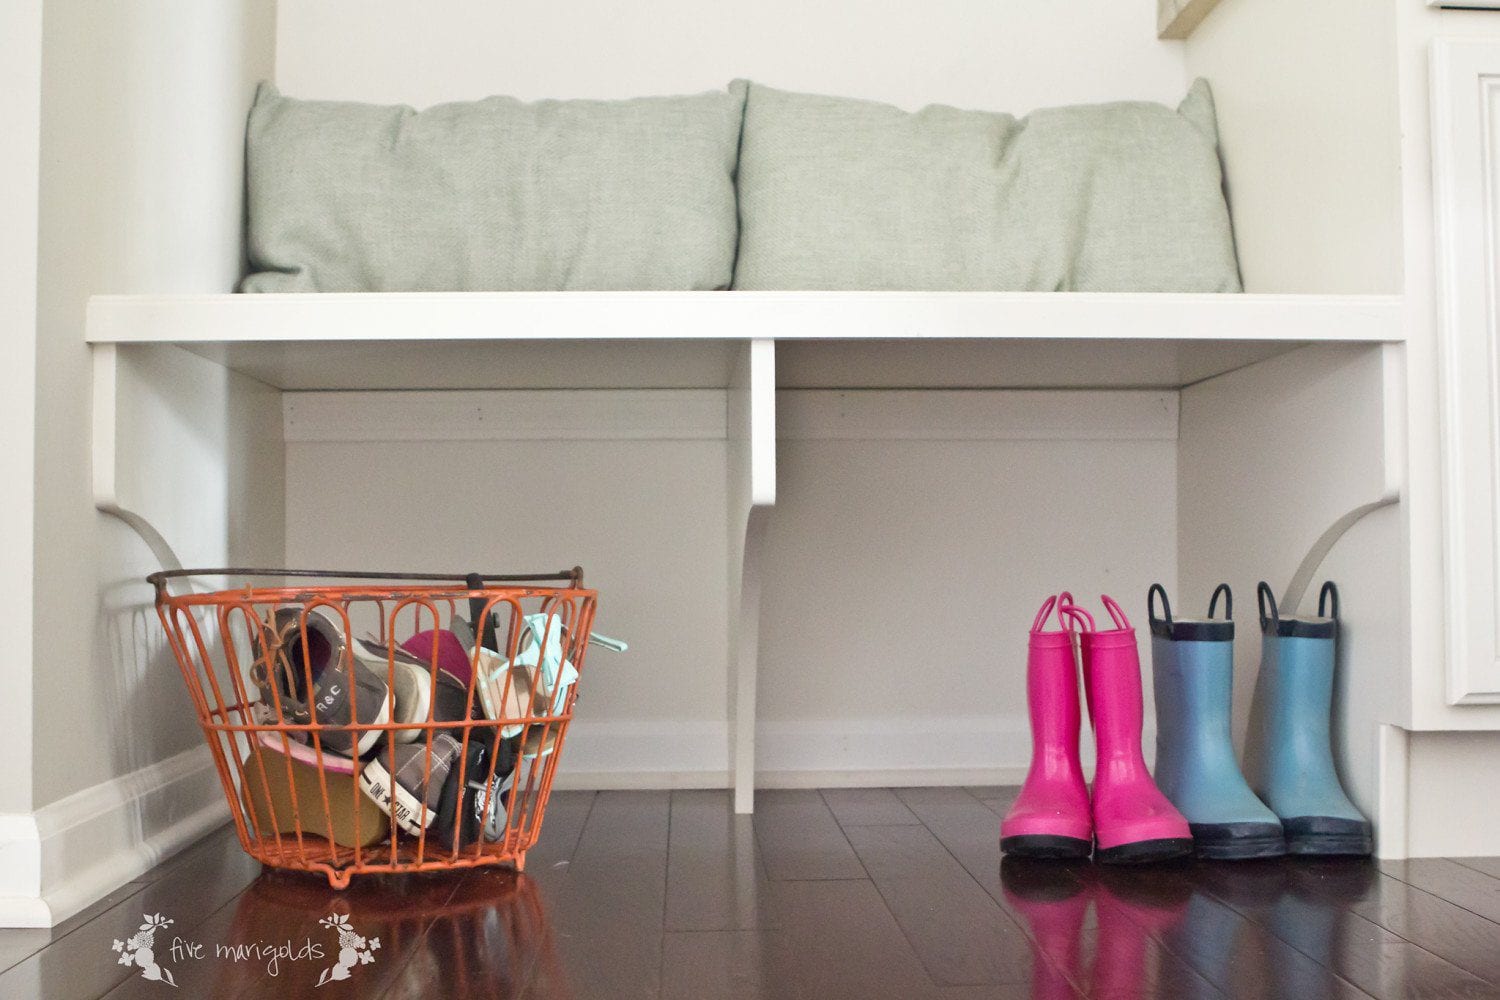
As for the rest of our family mud room command center, it’s still a work in progress. I have dreams for this space!

Mud Room Bench Storage | Five Marigolds

Mud Room Key Drop | Five Marigolds

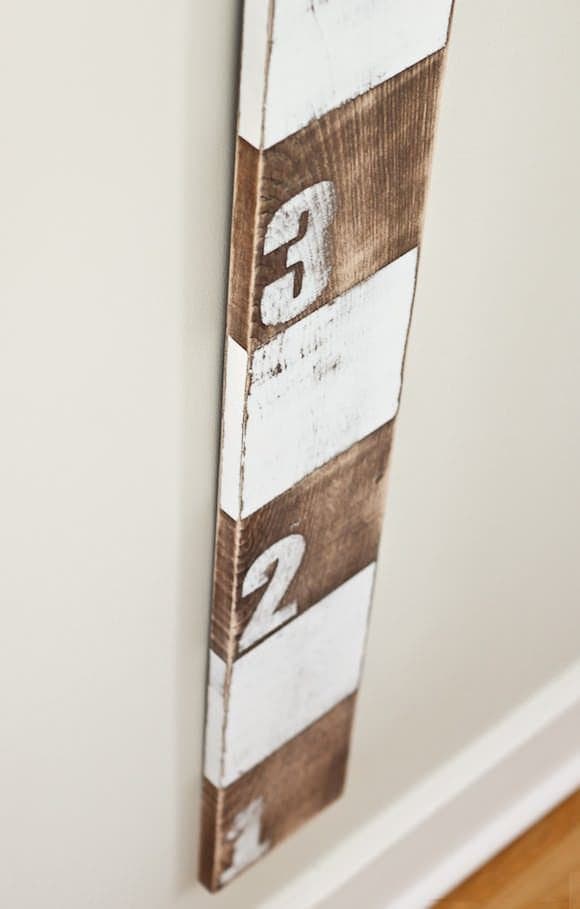
I found that sign at the thrift store. I think it was from a hotel long ago. I just love it!Mud Room Family Command Center Key and Mail Drop

What do you think of my low-tech art center for the kids?

Sources:

  • Rug, Homegoods (similar here and here)
  • Basket, Mary & Martha (similar here)
  • Door Paint, Sherwin Williams Tidewater
  • Walls, Benjamin Moore Revere Pewter
  • Drawer Pulls and Knobs, Restoration Hardware
  • Key Hook Sign, thrifted (similar here, here,  here and here)

Turn Fall Leaves into Roses

I recently posted an Instagram photo of a “rose” I’d created out of fall leaves. I had several of you message me to ask how I’d done it. It’s easy! However, I can’t take credit for this idea – I saw this in my Facebook feed one day and decided to follow it:

Turn colorful autumn leaves into a rose bouquet - tutorial | Five Marigolds

Photo tutorial c/o Nicole Duke – unfortunately I can’t find her to link you to her online.

Collect around 10-15 of the prettiest fall leaves you can find, ranging from small to large.  I put the kids in charge of this. Starting with one of the smallest leaves, fold the “points” or tips of the leaves down, making sure the colorful side is on the outside.

Then, roll it from left to right into a tight tube, with the stem pointing down. Take your next leaf and do the same, but this time wrapping it around the first leaf. Repeat this over and over, wrapping looser with each leaf.

With your final 3-6 leaves, leave the points up and wrap them around the outside. Doesn’t it resemble a beautiful rose?

Turn colorful autumn leaves into a rose bouquet - tutorial | Five Marigolds

In addition to the fab blogs in the right sidebar, this was also linked up at Tatertots and Jello,Savvy Southern StyleLive, Laugh RoweNap Time Creations The Turquoise Home.and The Scoop.

Sophisticated Nursery Art for $15

Ever since I’d planned my first born daughter’s nursery 7 years ago, I had a vision for adding vintage Barbie prints to the room that they could grow with.

Sophisticated Blush and Gold Baby Nursery with toile accents and Jenny Lind crib | Five Marigolds

My inspiration came from places like Posh Tots, Rosenberry Rooms, and other upscale design stores who were selling the framed prints for upwards of $135 each.

Source www.rosenberryrooms.com

Source www.rosenberryrooms.com

Fast-forward to this year. In the process of moving I realized we had four matted square frames that we’d never used! I think it was one of those things that I thought my husband had returned, and he thought I’d returned. Regardless, it was a sweet score that inspired me to revive this decor idea as we began decorating the kids’ new rooms. This time, I found a way to create this art on the cheap. I scoured Amazon for used vintage print Barbie calendars, and found that there are usually at least two 12×12 calendars available for a reasonable price. I believe I bought mine for around $10.

I spray painted my black frames with Rust-Oleum Metallic spray paint I had on hand (love this stuff), inserted my favorite prints, and voila! Vintage Barbie art for less than $15.

Sophisticated Blush and Gold Baby Nursery with toile accents and Jenny Lind crib | Five Marigolds


I love the look of three frames above the crib, but I’m debating adding the fourth and making it a square formation when Belle moves to a big girl bed. What do you think?

As for the rest of the room…

Sophisticated Blush and Gold Baby Nursery | Five Marigolds

It’s needs some love. I have big plans, but I’m taking my time.

Sophisticated Blush and Gold Baby Nursery | Five Marigolds

Sophisticated Nursery in Blush, Champagne and Toile | Five Marigolds

Details:


DIY Chalkboard Art

I recently tried to convince my husband to paint an entire wall of our dining area with black chalkboard paint. He didn’t quite have the same vision I had, so he asked me to hang a chalkboard until we could come to an agreement.

I agreed. After all, I’ve had a giant frame in storage that’s been waiting to be used for years. I bought it at a garage sale for around $10 which was a steal…but how do you fill such a large frame without spending a fortune? The chalkboard was the perfect solution.

If I hadn’t already had the frame, what I really would have wanted is a rustic wood frame. However, since this was likely temporary, I wanted to make this as easy and inexpensive as possible.

The problem: the frame was gold. Really gold. I debated on what to paint it. Silver? Weathered white? Blue? I haven’t committed to a color scheme in our new home yet, so I went with a safe, muted silver. I spray painted it with Krylon Brushed Metallic paint. I had planned to rub wax or wood stain to bring out the details, but I didn’t love that effect on the test areas so I just left it silver for now.

For the actual chalkboard,  we bought a piece of thin plywood and I sanded it with a hand sander until it was really smooth. After cleaning it with a lint-free cloth, I painted four thin coats of Rust-Oleum Chalk Paint in black, using a foam roller. I sanded lightly between layers when necessary and removed all the dust with a lint-free cloth. When the paint was completely dry, I rubbed entire board with a large piece of sidewalk chalk to cure it, and then rubbed it with a lint-free cloth to erase it.

DIY Chalkboard Art with Rust-Oleum Chalkboard Paint | Five Marigolds

DIY Chalkboard Art | Five Marigolds

You can wipe it clean with a damp cloth for a clean crisp look, or with a dry cloth, which I prefer, for a true, messy chalkboard look.

So far, our family loves this addition to our home. We post fun quotes and verses, and the children love to use it for creating their own art, as well.

DIY Chalkboard Art using Rust-Oleum Chalkboard Paint | Five Marigolds

DIY Chalkboard Wall Art using Rust-Oleum Chalkboard Paint | Five Marigolds

In addition to being shared on the fabulous blogs to the right, this post was also shared on Stone Gable Blog.


*Please read my affiliate disclaimer on the right sidebar. Thank you for your support!


Tutorial: Tinsel Tassel Party Banner

I absolutely love the look of these tinsel tassel banners for party decor. Even better? They’re super easy and inexpensive to make.

Dub really wanted a Minecraft-themed birthday party, but I didn’t want a licensed decor explosion, so I began thinking of ways to decorate with color. With lots of Pinterest inspiration, I decided I wanted to give this a try. However, I was surprised to find there aren’t a lot of tutorials out there so I am sharing a quick and dirty tutorial of my own.

I set to work on this particular banner with four colors of tissue paper, green, lime green, chevron and silver metallic (I linked to some examples because I initially had a hard time finding these).

1) First, I took a stack of 8 sheets of tissue in each color and cut them the short length of the pre-cut sheets (approximately 20″) and cut them about 8″ wide.Tinsel Tassel Banner Tutorial | Five Marigolds

2) I then folded the stack of sheets in half and began cutting them in 1/4″ strips, stopping about 1″ from the fold. I used a rotary cutter and mat to make quick and more precise work of this, but regular scissors will do.

Tinsel Tassel Banner Tutorial | Five Marigolds

Tinsel Tassel Banner Tutorial | Five Marigolds

3) I then unfolded the papers and, taking 2 sheets at a time, began rolling them tightly at the center. Once each set of 2 was rolled at the center I began gently twisting the rolled portion. Once it was lightly twisted I folded it in half and began twisting the rolled portions together. When you’re done it will look something like this. Perfectly imperfect.Tinsel Tassel Banner Tutorial | Five Marigolds

4) Thread the tassels through a string or ribbon. I made a single simple knot at each tassel to keep them in place.

Tinsel Tassel Banner Tutorial | Five Marigolds

All in all, this was a pretty quick and easy project that took me maybe 20 minutes total to complete. I also love that if you source your papers from the dollar store, you could complete three of these banners for just $4! (meaning, each banner is just over $1, with plenty of paper to spare for favors or gifts). I have a feeling various themed tinsel banners will be showing up at more parties around here!

Dub’s party is not for a few more weeks, so I’m letting it hang on our mantle for St. Patrick’s Day. How’s that for multi-purpose party decor?

Find my other Minecraft Birthday Party posts here:

Minecraft Birthday Party on a Budget | Five Marigolds

DIY Minecraft Birthday Party

Minecraft Lego Steve Favors | Five Marigolds

DIY Minecraft Lego Steve Favors


Easy, Inexpensive Favor Bags

Paper Bag Party Favors | Five Marigolds
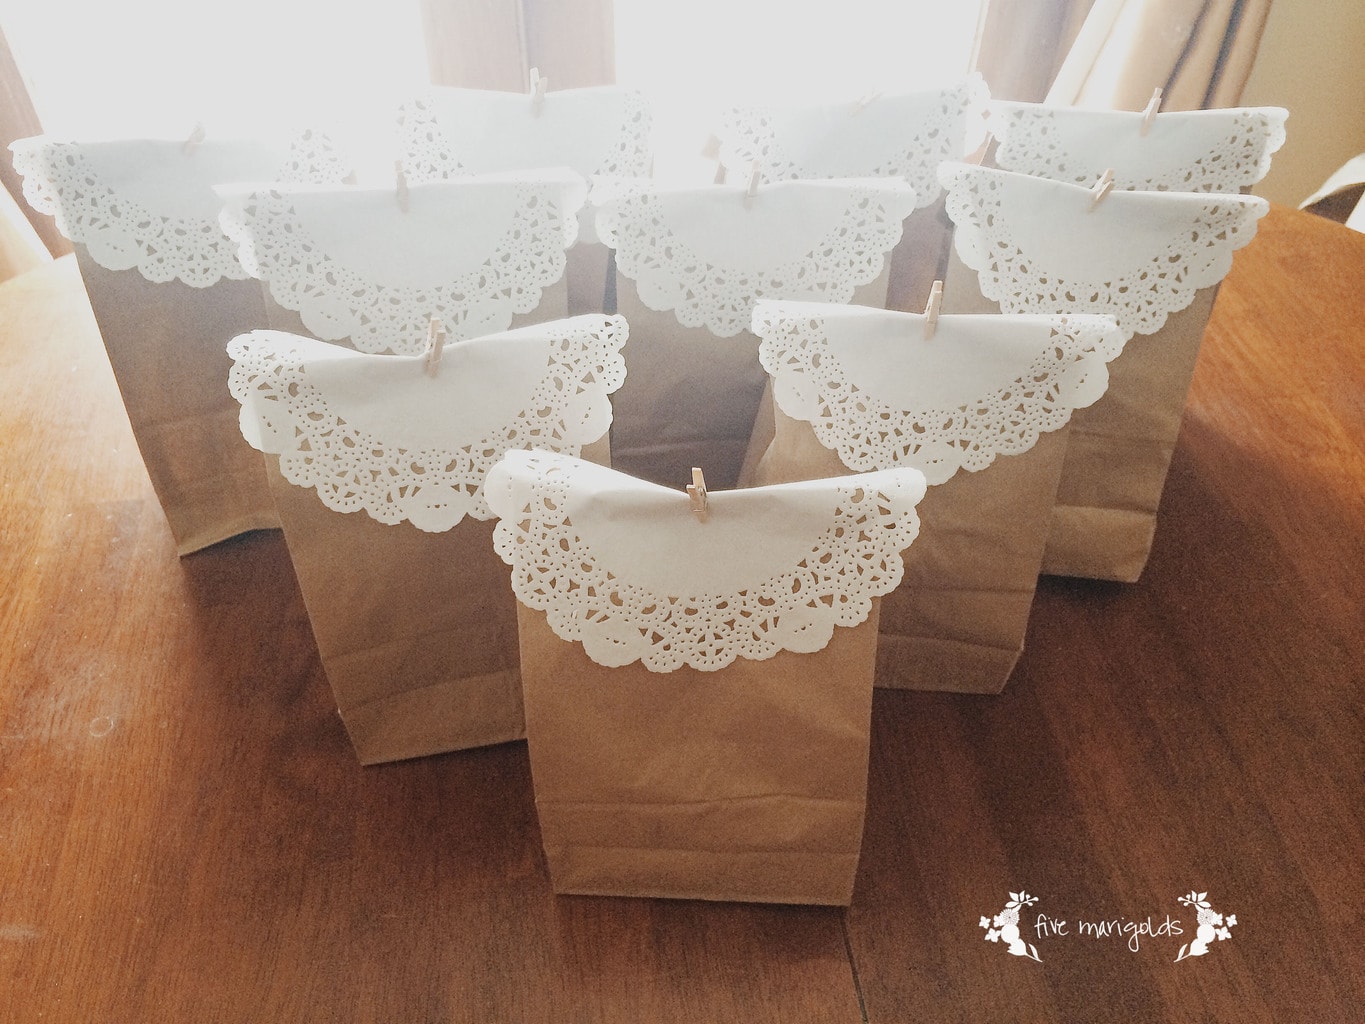
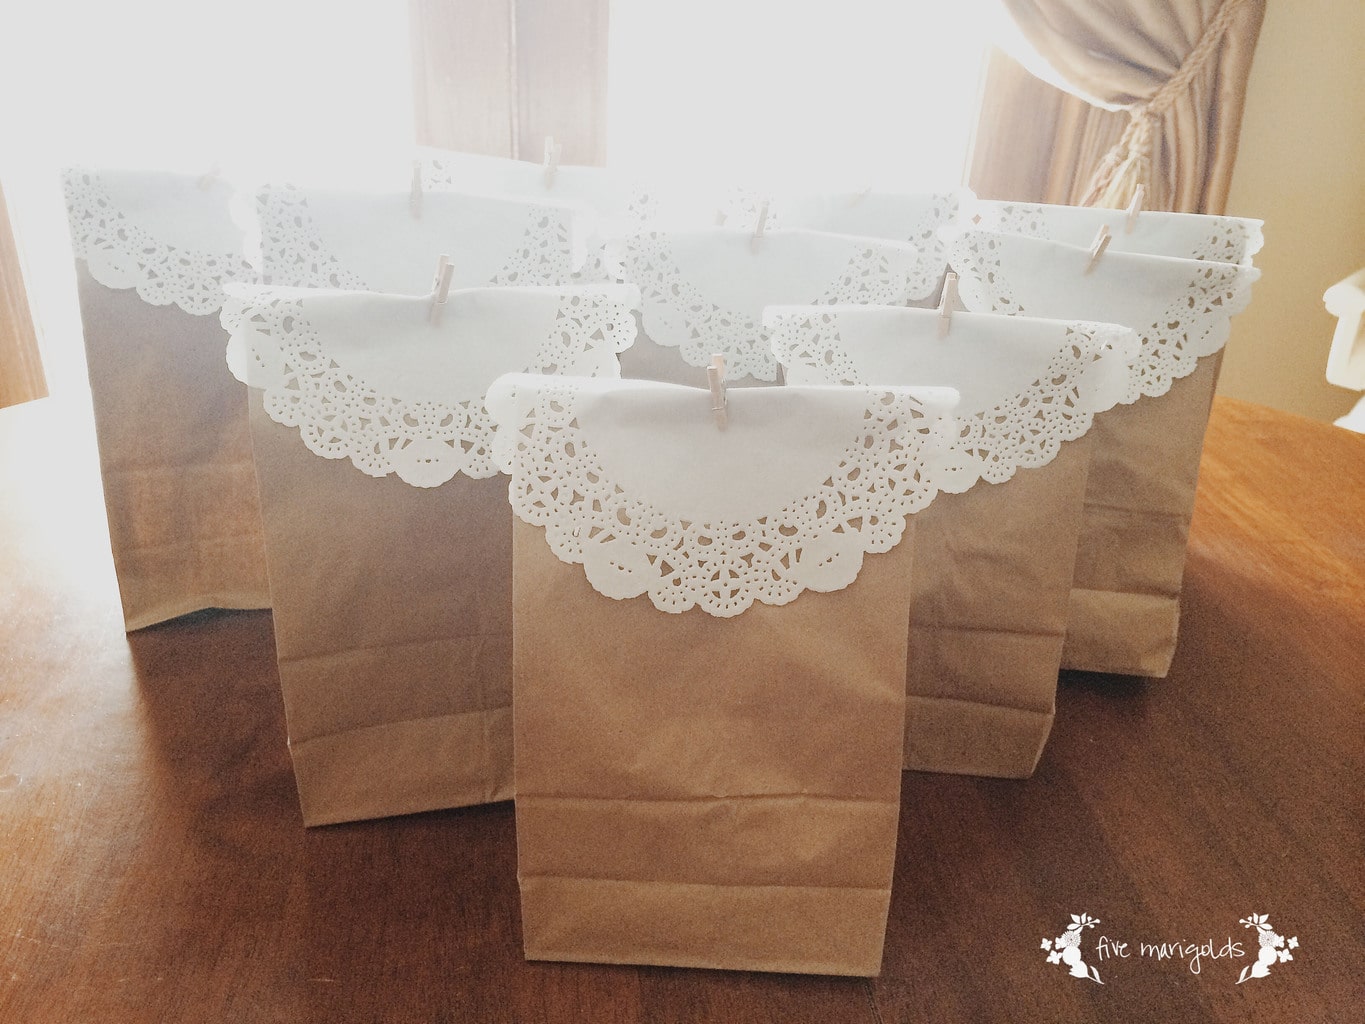
Dress up a common paper lunch bag to be something extra special!  EClaire needed to take favor bags to school for her half birthday (summer birthday problems!). I had a few awkwardly shaped items so I needed a decent-sized bag, but I didn’t want to spend much.

As usual, I headed to the Dollar Tree fro some paper lunch bags and doilies. Then, I secured them with these tiny craft clothespins that you can get at Hobby Lobby or here on Amazon. I love how these turned out, and you can make 40 for just $6. Next time, I love the idea of trying these for birthday party favors with colorful doilies and clothespins.

These would be great for Valentines, Birthday parties or even for quick and easy gift wrap for small gifts.

Paper Bag Party Favors | Five Marigolds  Paper Bag Party Favors | Five Marigolds Paper Bag Party Favors | Five Marigolds


Family Growth Chart for less than $15

We recently made the decision to sell our “starter” home and build a new home that better accommodates our growing family. We bought this home just months before our wedding, had three babies here and many, many precious memories as a family. We’re ready for the next chapter, but this sentimental mom is feeling a bit emotional about it, as well.

The moment we signed the papers to build our new home I was immediately motivated to take on a project I’ve been meaning to for a long time – make a family growth chart that we can take with us – wherever we go. Our former growth chart was done the old fashioned way – with pencil on the wall of our kitchen (that I still can’t bring myself to paint over even since I’ve made this beautiful new chart).growth chart2

I’d once tried my hand at an embroidered chart that was supposed to be  cute and charming, but didn’t end up looking quite as polished as my inspiration. I also  found that I was too lazy to embroider once a year. My laziness factor is high.

So I moved on to those cute reclaimed signs I’ve seen all over Pinterest.

I started with a 3/4″x7″x8′ piece of cedar lumber that I purchased at Home Depot for less than $9. First, I enlisted Dub to weather it for me. I gave him chains and a hammer and let him have at it. I stained it with leftover stain that I used on our stairs for our garage makeover.

From there, I had to get measuring – my least favorite part. Our family is really tall, so I cut my board to 6′ tall and painted 1′ white stripes using leftover paint from the garage makeover. These are some terrible progress photos, but you get the idea.

Family Growth Chart for Less Than $15 | Five Marigolds

I actually liked the way this looked when I was done, but I went ahead and sanded it to give it a more distressed look.Family Growth Chart for Less Than $15 | Five Marigolds

Family Growth Chart for Less Than $15 | Five Marigolds

Then, I used my silhouette to create the measurement marks. I barely use my Silhouette but I used it for this, figuring it would make the measuring much easier for me. I measured it on the computer, cut it out on the Silhouette and then used transfer paper to stick it right on the board without having to re-measure.

Family Growth Chart for Less Than $15 | Five Marigolds

I’m super happy with the way that it turned out! I can’t wait to hang this measurement chart in our new home next year. I can see keeping this chart in our home forever, and measuring little grandbabies someday.growth chart2_1

Postscript: after completing my chart, I stumbled upon this cute version by Handmade Charlotte

growth-chart6-handmade-charlotte-powerofpaint-dot-net

If I had to do it over again, I think her way of painting the numbers would be a lot cheaper and easier. However, I’d still want to make the measurement marks so that I could tell visually exactly how tall the kids are. Everytime they get measured they want to know EXACTLY how many feet, inches and centimeters tall they are. Because that matters to 4 and 6 year olds.

What do you think? Do you have a family growth chart in your home?


Inexpensive, Easy Chore Chart for Kids

This summer is the first summer I’ll be at home most days with the kids since I started my freelance adventure last fall. My 6 and 4 year old are bright, exuberant kids and I knew I’d have to add structure their days if I wanted any sanity. However, with my freelance work I don’t have the ability to be there every moment to guide their day (and who would want to?). It’s also great for fostering their independence as well.

I went to work trying to find chore charts, but none of them were quite right. My 4 year old can’t read the text chore charts, and many of the picture charts were geared toward very little children, or had unattractive graphics.

After doing some research I landed on four requirements:

  • I wanted a photo chart that my four year old could understand and interact with on her own;
  • I didn’t want to spend much money;
  • I wanted the flexibility to change their days up, but I also didn’t want to have to print a new one each week; and
  • I needed something I could mount to the fridge somehow – I didn’t want a chart that required wall space.

I landed on the concept of a magnetic chart with two categories: “Doing” and “Done.” I saw a few examples that I liked and got to work emulating those based on my needs. However, I needed clip art. It was SO hard to find cute clip art that would work for this! That’s when I stumbled upon Audrey Schilaty‘s blog. She had the exact chart I wanted – for free! Really, it’s the nicest free resource I’ve found. She offers both personal care and chore images, and I used a small combination of both (sad but true: I forget to have my children brush their teeth all to often).

I made it my own with a few modifications:

  • I drafted my own simple “Doing” and “Done” text document and used just the images I needed from her selection, so it would all print on one page, saving me money.
  • I printed it on a glossy sheet of photo paper that I had on hand, and then just placed it on an 8.5×11 sheet of adhesive magnet. You can buy packages of adhesive magnet sheets at office supply stores, but I found the most inexpensive option for heavy sheets – I got mine for just $3.59. I cut the small pieces to size, added them to the fridge, and voila – a clean, easy and inexpensive chart.

Magnetic Chore Chart | Five Marigolds

The kids woke up the first day and had moved two magnets over before I had a chance to remind them about it! So far, it’s been a great success.

DIY Magnetic Chore Chart | Five Marigolds

I encourage everyone to check out Audrey’s great blog. And, if you’d like a copy of the 1-page version of the printable I used to create my chart using her images, just click the image below!

Chore chart printable | Five MarigoldsThere you have it – a chore chart for just $3.59. What are your tips for keeping the kids structured in the summer? Let me know in the comments below.


*This post contains affiliate links. Please read my full disclaimer on the right sidebar. Thank you for your support!


Shop your own closet for these 5 DIY Halloween Costumes

DIY CLassic HALLOWEEN LOOKS FOR FREE

Looking for last-minute Halloween costume ideas?  Here are 5 inexpensive DIY Halloween costumes you can shop your own closet for.  Or, follow the links to shop these exact looks for yourself!

Where’s Waldo

waldo

Bank Robber

robber

Holly Golightly – Breakfast at Tiffany’s

breakfastattiffanys

Mary Poppins

marypoppins

Sheldon and Amy from The Big Bang Theory

bigbang

I think my favorite is the “Shamy” couple costume from one of my favorite shows, “The Big Bang Theory.” Which is your favorite?

LOOKING FOR MORE LAST-MINUTE HALLOWEEN COSTUME INSPIRATION? FIND MORE IDEAS FOR SHOPPING YOUR OWN CLOSET HERE AND HERE.