There’s just something about Candy Buttons. These nostalgic candies are surprisingly easy to make, and are perfect for birthdays, party favors, or just a fun sweet treat.
To make Candy Buttons, all you need to do is prepare a simple royal icing recipe. You can use the recipe listed on the can of Meringue Powder, but I used the following recipe, inspired by Sweet Sugarbelle:
What you’ll need:
- 1 lb. confectioner’s sugar (4 3/4 cups)
- Meringue powder (about 1/4 cup)
- 1/3-1/2 cup water
- 1-2 tablespoons flavored extract (I used almond extract because it’s what I had on hand, but there are tons of fruity flavors at the craft store that would be fun to try!)
- Food coloring
- Electric mixer
- Freezer paper
- Icing bag and small round tip (or a resealable bag with a tiny corner cut off would work in a pinch)

To prepare:
- Whisk the dry ingredients together.
- In a separate measuring cup, mix the flavored extract into the water.
- Slowly begin pouring the liquid mixture into the powder mixture while it mixes.
- Mix the frosting on medium-high speed until the frosting forms stiff peaks (around 7 minutes)
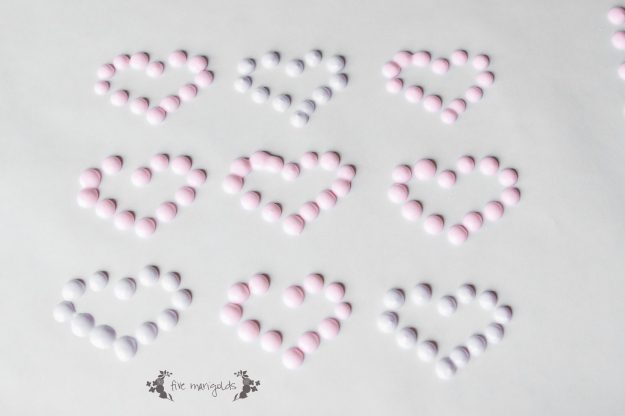
- Add food coloring to achieve desired color. (I first made pink frosting, and later added a few drops of blue to make purple to get two colors out of one batch.)
Next, tear off a sheet of freezer paper – large enough that you can fit a large batch of buttons on (you won’t cut the paper until these are dry).
Fill your pastry bag (I used my Pampered Chef Decorator Bottle Set*) with frosting and twist the top, removing excess air. Now, simply pipe evenly sized dots across the paper. If possible, print a template in advance and place it below the freezer paper. Be sure that the design will fit into your final packaging. If you’re using pretzel bags for your packaging, your design will need to be approximately 2.15 x 5″ to fit the pretzel bags I would be placing them in.
 Let the Buttons sit overnight to dry. Any excess frosting will keep in a resealable bag refrigerated for two weeks.
Now for the fun! Once the Buttons have set up overnight, you can begin cutting the freezer paper to your desired shapes.
Package your Candy Buttons for the occasion. I placed them in Wilton pretzel bags that I got at JoAnn’s for $1.37 using my 40% off coupon. Think of the possibilities! Birthday party favors, Valentines, and more!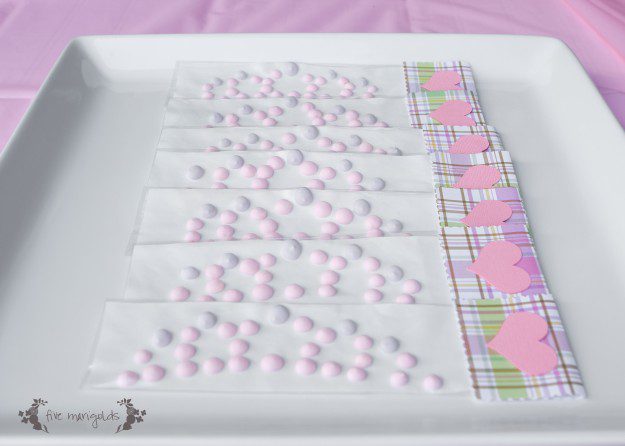

In addition to being featured on the fab blogs listed on the right of this blog, this post was also featured on Huckleberry Love.