Bring Life and Personalization to a Neutral Family Room

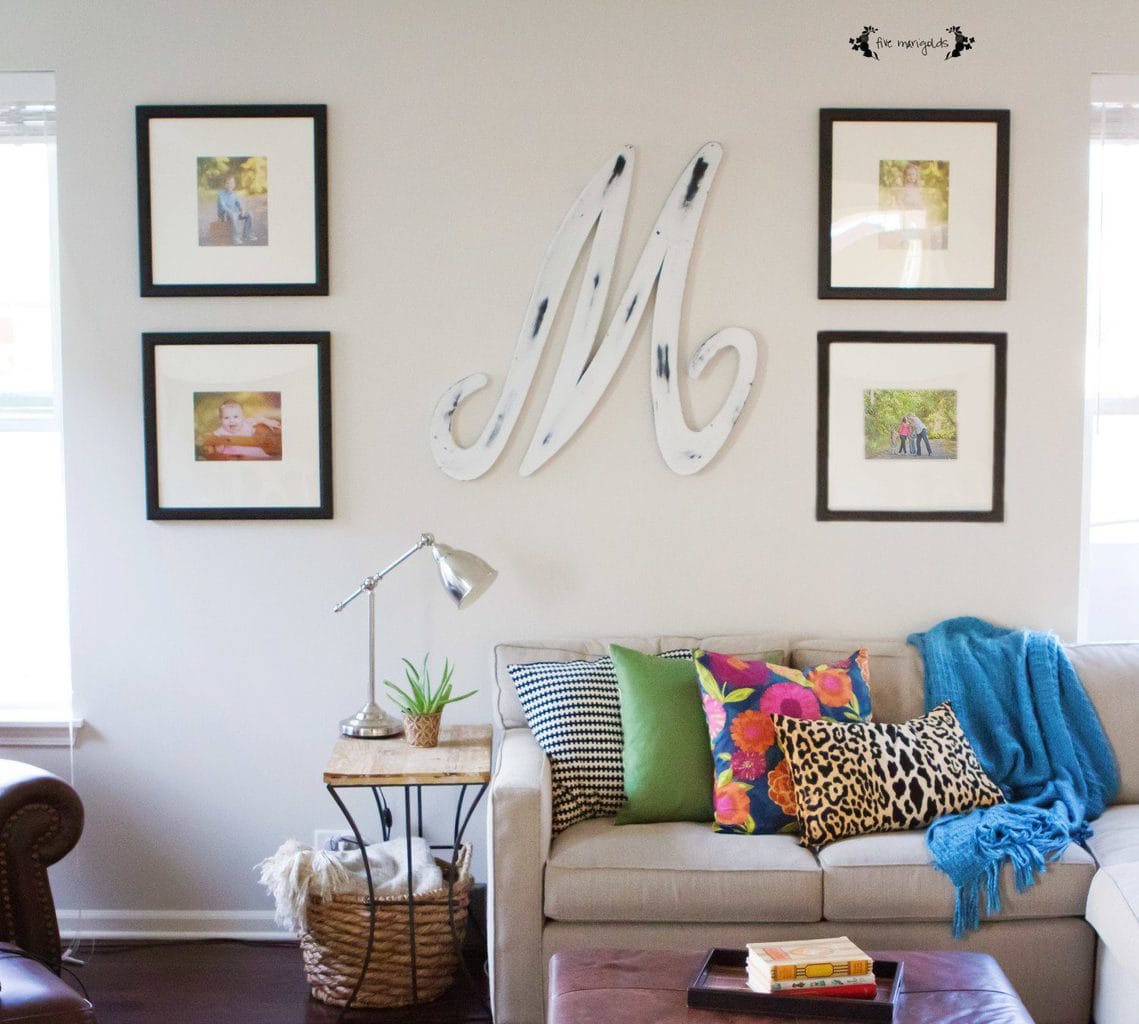
I recently posted a photo of our family room on Instagram and got lots of notes asking me about the space. I had friends tell me it looked like something out of a magazine. What a compliment!

Neutral Family Room with Bold Pops of Color | Five Marigolds

I was really surprised by the reaction I got, though. The truth is, anyone can make a space look amazing in just one photograph. Our home is a work in progress. Most of our home is not decorated. I finish little areas of a room and wait to finish the rest of the space as inspiration strikes me. That means there are uglier areas of the room that don’t get shown in photos – like the comfortable, oversized, slightly worn leather chair the corner where it doesn’t quite fit. The lamps that don’t quite match but that continue to live on in the room until I find the perfect lights that fit my budget.

I’m not very confident as a decorator, so I just go by my gut feeling. If I put a rug in the space and I find that I don’t feel comfortable, it’s not the right fit for me. If I put a wild throw pillow on the couch and it makes me want to sit down and enjoy the space – it was the right design choice for me.

Here are the design tips I follow in my home:

  1. Start with high quality, neutral furniture This means a great neutral couch with clean lines, a high quality rug and furniture in the space. Keep the colors neutral so they can last – both in structure and in design taste –  for many years. Like all things in life, when you get the foundation right everything works much better!
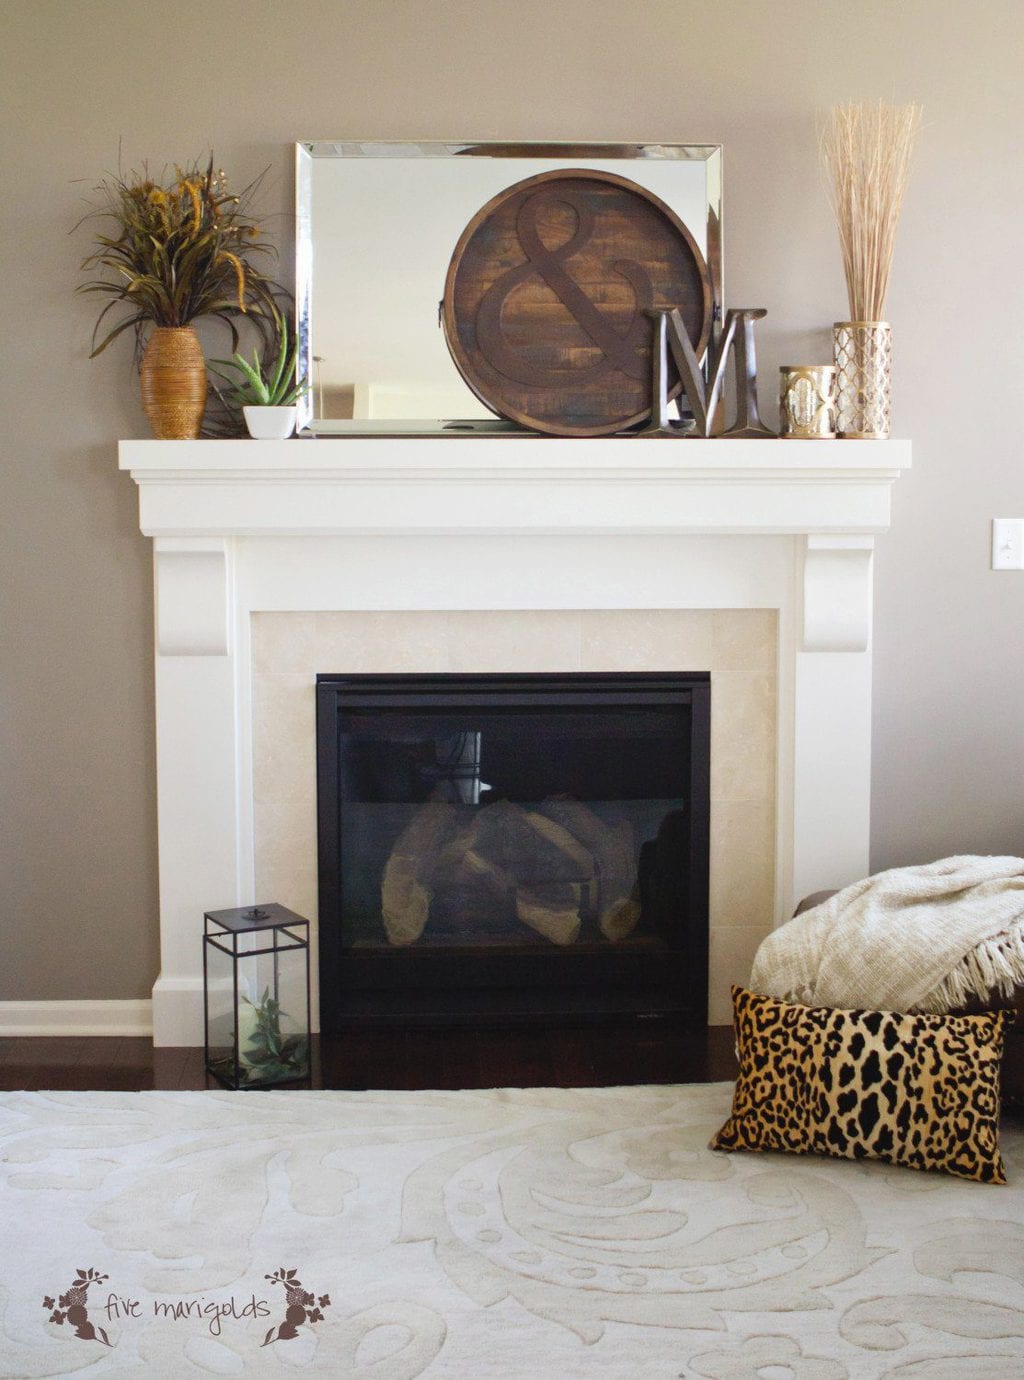
  2. Bring in texture In our home, we add lots of texture with mixed leathers, deep rich woods and distressed reclaimed woods, too. It means sleek cool mirrors and hard metal vases and decor juxtaposed with wild flowers and dried wild grasses. We use fabrics with varying textures, too – but they must always, always be comfortable and soft! Make sure your throw pillows are filled with down, too. They will look 100% better and will be more comfortable, too.
  3. Add pops of color For me, this means bold colors and patterns, as you can see with our throw pillows. I love all of these colors and patterns, and somehow when I mix them all they come together perfectly to me.
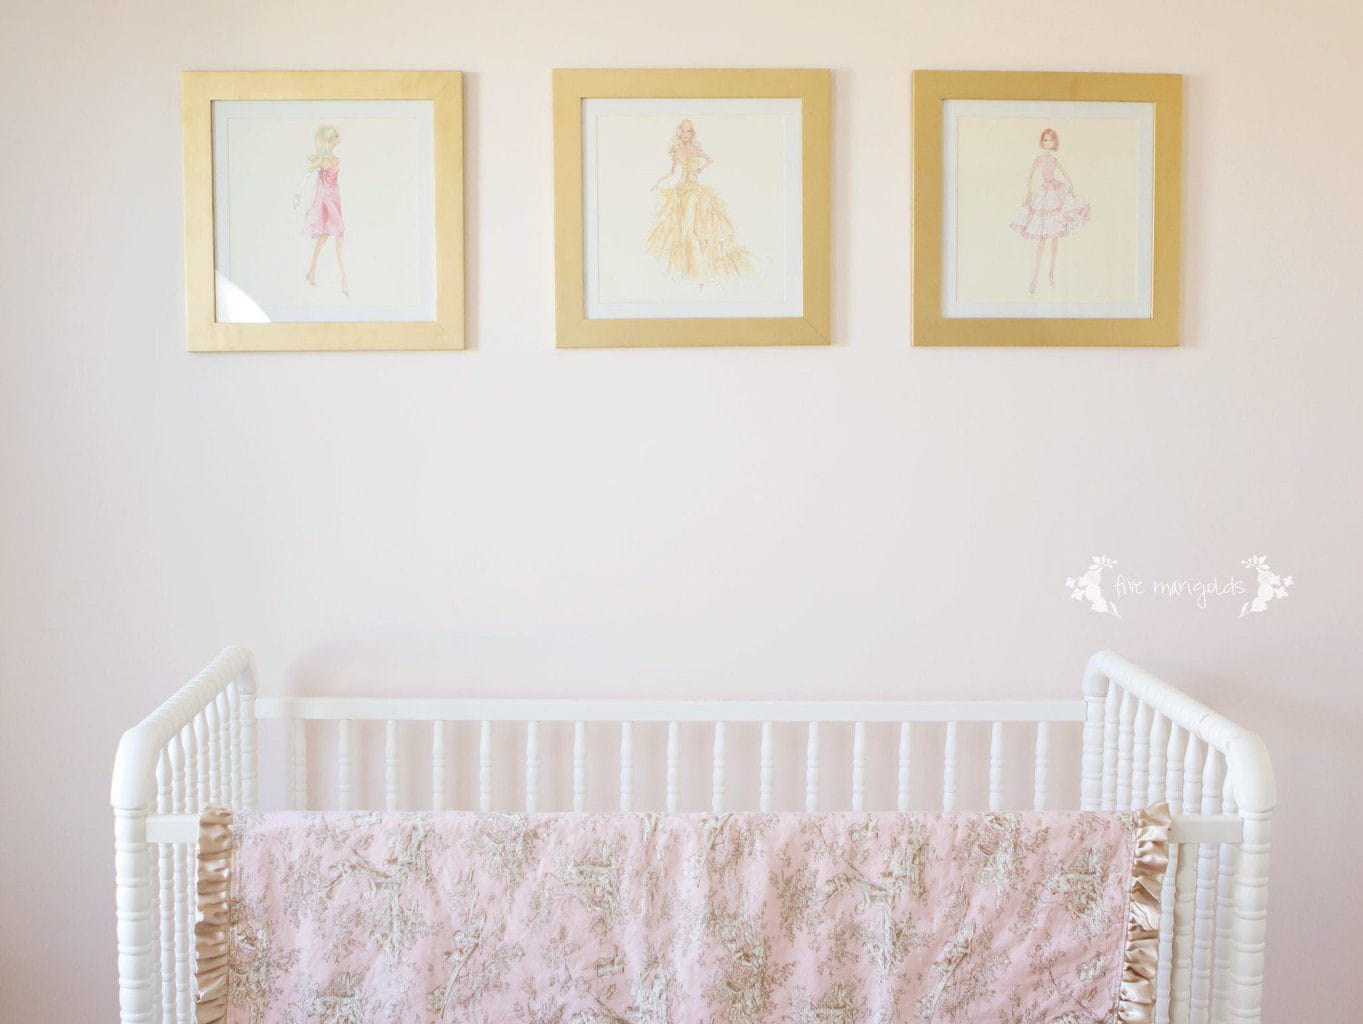
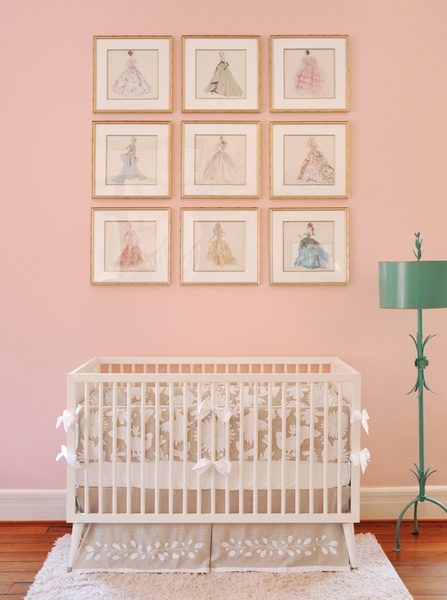
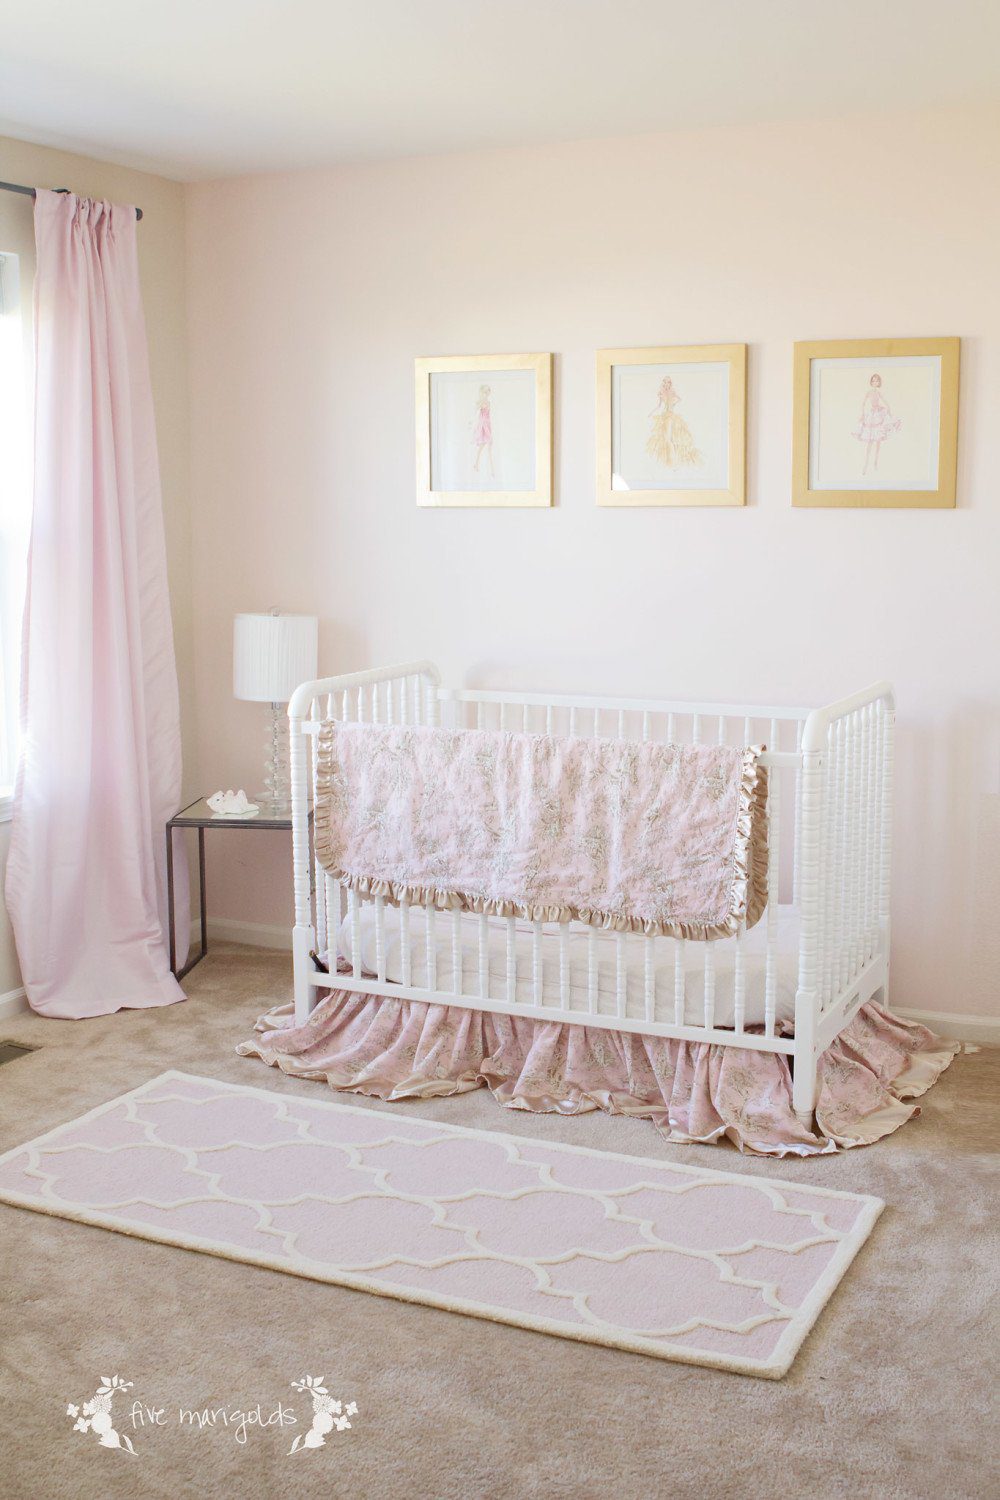
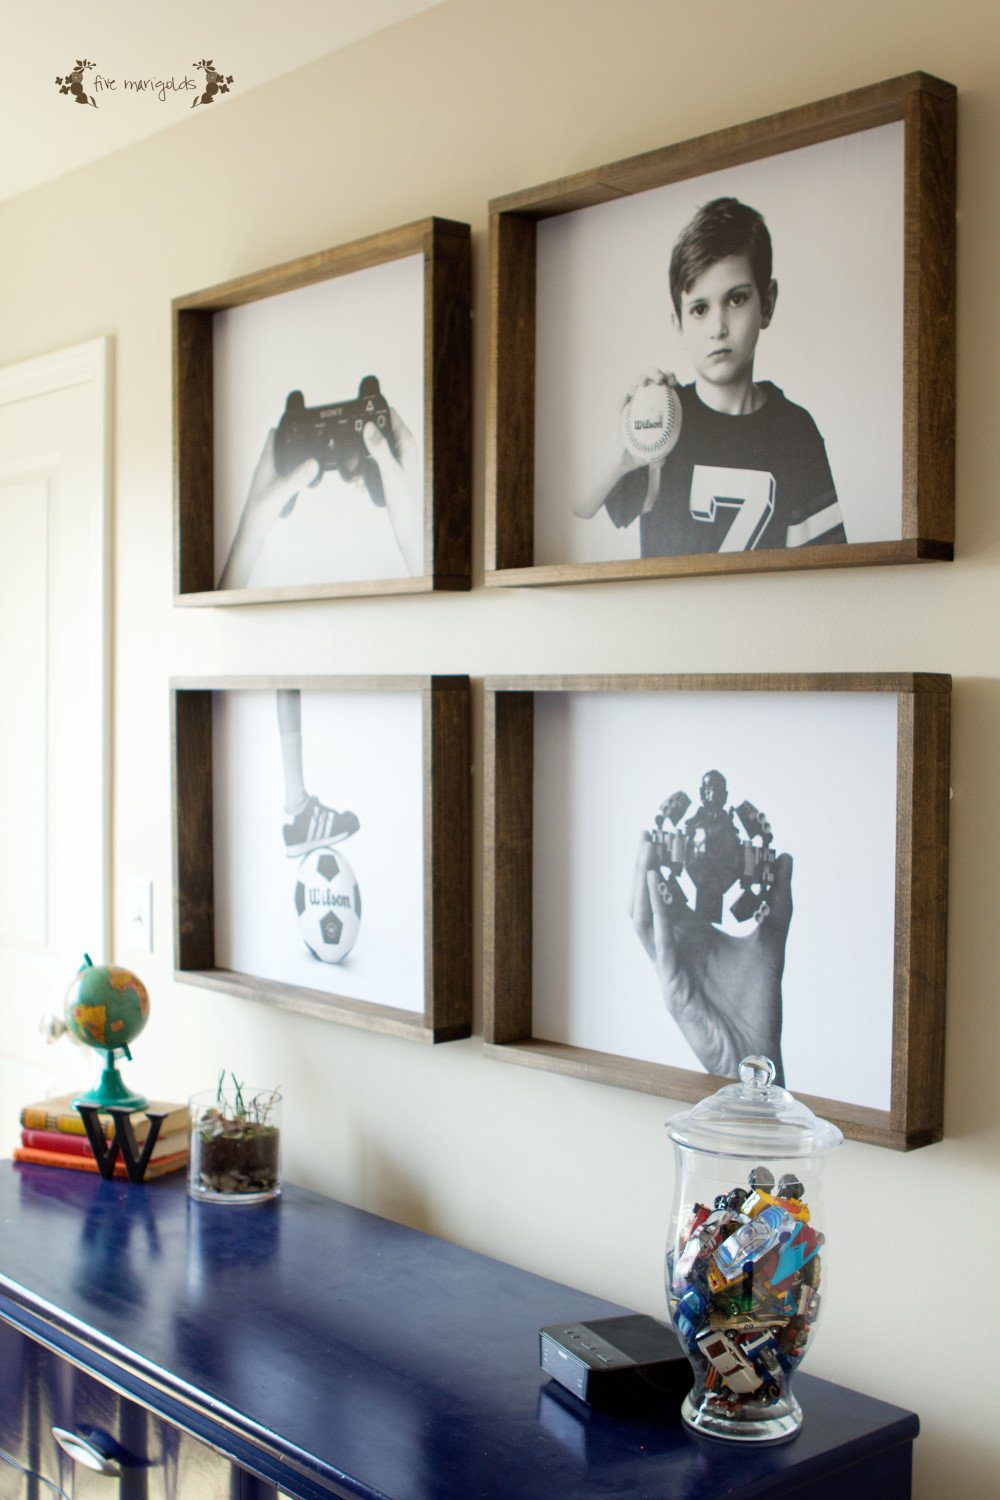
  4. Personalize This is my most important design rule. Nothing makes an environment more sterile than lack of personalization. I like to decorate with lots of pictures. Some I keep in their frames forever for nostalgia. For our main wall, I use updated family photos every year.
  5. Keep it versatile One of my favorite tips when buying mats and frames is to buy square or symmetrical frames, and have the mat cut to the size of photos you plan to use. Here’s why this is genius: if your favorite photo this year was portrait – oriented, inevitably you’ll one day have a favorite that is landscape – oriented. Instead of buying a new frame and re-hanging the photos on your wall to fit, you just turn the frame on its side, and you’re in business. See how I have examples of both portrait and landscape photos on my wall?

Sources:

  • Sectional: Carson’s Furniture
  • Ottoman: Restoration Hardware (old) similar here
  • End Tables: HomeGoods (old) similar here
  • Lamp
  • Pillows, similar: animal print, black/white geo, floral pillow made with Robert Allen fabric
  • Throw: HomeGoods (old) similar here
  • Wall Monogram: HomeGoods (old) similar here
  • Wall frames and mats
  • Rug

No-Carve Family Halloween Pumpkins

Family Halloween Pumpkins

Do you want some pumpkin decorating ideas that do not require you to carve them up first? I have the best no carve pumpkin decorating ideas the whole family will love! 

At our home, we don’t really “do” spooky Halloween. We have fun, dress-up, and eat lots of sweets on Halloween. So this year, I thought it would be fun to make a pumpkin representing each member of our family that we could bring back out year after year – in addition to carving Jack-O-Lanterns in real pumpkins, of course.

THE BEST NO CARVE PUMPKIN DECORATING IDEAS

Frozen (or cinderella?) no-carve pumpkin

For this pumpkin, you will need:

5 No-Carve Pumpkin Ideas that don't suck! This Cinderella / Frozen pumpkin is super easy to make!

You will want to paint the pumpkin with the aqua matte spray, and allow it to dry.

Then, spray a light coat of the diamond dust spray, and allow it to dry. 

To make it, I used Krylon aqua matte spray paint to painT a white craft pumpkin.

I then layered  Krylon opulent opal glitter spray paint on top.  I was super bummed with this though. It was gorgeous going on, but within moments it stopped working. I figured the glitter was clogging the nozzle and I tried multiple solutions to no avail. What a waste!

Frozen Cinderella Halloween Pumpkin | Five Marigolds

I went back and purchased Krylon glitter blast diamond dust spray paint. It was also beautiful and the can worked much better.

Once completely dry, decorate as desired with self-stick rhinestone gems. Top with a fun princess tiara, if desired.

Hello Kitty no carve pumpkin

For this pumpkin, you will need:

  • Pinter
  • Clear contact paper
  • Black and pink acrylic paint
  • Hair bow

Simply print out a Hello Kitty face on the printer, and place it over the clear contact paper as a stencil. 

Paint the stencil in with the paint and allow it to dry. Add a fun hair bow to complete this look.

Hello Kitty Halloween Pumpkin | Five Marigolds

Minecraft Creeper NO CARVE pumpkin

For this pumpkin you will need:

  • Black craft pumpkin
  • Krylon emerald green spray paint
  • Printer
  • Clear contact paper
  • Black acrylic paint
  • Black craft pumpkin

To make this painted pumpkin, cut out a square in the black craft pumpkin, and paint the inside green with the green spray paint. Print out the Creeper face, and place it over the contact paper to use as a stencil. Place the stencil inside the dry pumpkin and paint on the Creeper face with the black acrylic paint.

Minecraft Creeper Halloween Pumpkin | Five Marigolds

Stud NO CARVE Pumpkin

For my pumpkin, I just picked up this black studded pumpkin from JoAnn’s I just love it!

Black Stud Halloween Pumpkin | Five Marigolds

For my husband, well…

Decorating Family Pumpkins | Five Marigolds

He’s a long-suffering Chicago Bears fan (as am I). Da Bears!

What do you think of our no-carve Family Halloween Pumpkins? Looking for more easy Halloween ideas? Check out my Lazy Mom’s Guide to a Halloween theme dinner.

Lazy Mom's Guide to Spooky Halloween Theme DInner | Five Marigolds

Then, check out my free printable Halloween emoji nail decals here.

What a neat idea! Use tattoo paper to make nail art. Halloween Emoji nails.


Which Hardware? Boy Bathroom Progress

I’ve been working on Dub’s bathroom from some time now. My vision keeps changing as I find little treasures here and there, and it’s becoming kind of an eclectic hodgepodge instead of a well thought-out theme. I guess that’s about perfect for a boy’s space, right?

I’d started out planning to use this artwork I designed (check out the free printables), but then remembered the vintage Star Wars metal art I’d picked up at Hobby Lobby awhile ago and thought it would be fun to frame it for this space. I bought custom mats and framed them with Ikea Ribba frames.

Vintage Star Wars Boy Bathroom Art | Five Marigolds

I wasn’t sure what to put above the towel rack, but when I was out thrifting and found this Wax & Polish sign, I just had to have it!

Vintage Star Wars Boy Bathroom. | Five Marigolds

I love the crisp clean lines of the gray walls and white frames against the rustic barn wood vinyl floors and vintage finds.

Vintage Star Wars Boy Bathroom | Five Marigolds

Now I’m on the hunt for cabinet hardware. I’d really had my heart set on using these utility pulls from the hardware store. I just love this look. Unfortunately, they are just a little wide for the cabinet trim so I need to find a new option.

Which pulls do you think would be the right option for this space?


  1.  These are a shorter version of the same utility pulls – they are only 3 3/8″ inches, but would fit the width of our cabinet trim.

Utility Pull Hardware for a Boy Bathroom | Five Marigolds

2.   Or these more modern and streamlined pulls?

Utility Pull Hardware for a Boy Bathroom | Five Marigolds


Let me know what you think in the comments below!


Source list:

  • Paint: Sherwin Williams Gray Screen
  • Rug: Target
  • Star Wars Comic Tin Art and metal basket: Hobby Lobby
  • Frames: Ikea Ribba


In addition to the fabulous blogs listed on the sidebar, this post was linked up at Remodelaholic.


*This post may contain affiliate links. Please review my full affiliate disclaimer in the sidebar.


Free Art Prints for Boy’s Room

I’m slowly going room by room and decorating where inspiration strikes. That only happens to be working in the kids’ areas, but I’m embracing it!

Next up is Dub’s bathroom. I love the idea of making it an all-boy kind of space – I absolutely love decorating really boyish spaces – but I want it to be somewhat neutral since it will be shared with overnight guests.

I railroaded Dub into the blue color for his room – I’d rejected the crazy bright aqua color he really wanted (I just couldn’t…) so I let him choose the paint for this space himself.

I tried to convince him that a steel blue color would be great. I go for neutrals everywhere else, so I was hoping this would be a room with some color. However, he really liked the idea of a silvery gray for the space. Out of 5 grays, he chose Sherwin Williams Gray Screen because of the slightly blue tint and light tone. Nice choice!

Here is the working Mood Board I’m using to inspire the makeover.

Boys Bathroom Mood Board | Five Marigolds

I designed artwork to add some color to the otherwise neutral, rustic space. I’m not 100% sure on this scheme, but since the artwork is free (I already have the IKEA RIbba frames on hand from a failed attempt to use it elsewhere), I’m going with it for now.

Splish Splash Take a Bath artwork for IKEA Ribba Frame | Five Marigolds

Rise and Shine Free Printable Artwork | Five Marigolds


Be Strong and Courageous Free Printable | Five Marigolds

And just because I couldn’t decide…I’m sharing a few variations I worked on:Be Strong and Courageous Free Printable | Five Marigolds

Rise and Shine Free Printable Artwork | Five Marigolds


What do you think? I’m hoping this inspires others to add some color to their spaces, so I’m making several of them available to you for free!

These 12×12 printables are designed to work with the Ribba frame, so you’ll want to get them printed at the copy store.

If you download these, please take a moment to tell me about it below. Even better, share photos of them in use. I’d love to see these prints getting used and enjoyed!


Sophisticated Nursery Art for $15

Ever since I’d planned my first born daughter’s nursery 7 years ago, I had a vision for adding vintage Barbie prints to the room that they could grow with.

Sophisticated Blush and Gold Baby Nursery with toile accents and Jenny Lind crib | Five Marigolds

My inspiration came from places like Posh Tots, Rosenberry Rooms, and other upscale design stores who were selling the framed prints for upwards of $135 each.

Source www.rosenberryrooms.com

Source www.rosenberryrooms.com

Fast-forward to this year. In the process of moving I realized we had four matted square frames that we’d never used! I think it was one of those things that I thought my husband had returned, and he thought I’d returned. Regardless, it was a sweet score that inspired me to revive this decor idea as we began decorating the kids’ new rooms. This time, I found a way to create this art on the cheap. I scoured Amazon for used vintage print Barbie calendars, and found that there are usually at least two 12×12 calendars available for a reasonable price. I believe I bought mine for around $10.

I spray painted my black frames with Rust-Oleum Metallic spray paint I had on hand (love this stuff), inserted my favorite prints, and voila! Vintage Barbie art for less than $15.

Sophisticated Blush and Gold Baby Nursery with toile accents and Jenny Lind crib | Five Marigolds


I love the look of three frames above the crib, but I’m debating adding the fourth and making it a square formation when Belle moves to a big girl bed. What do you think?

As for the rest of the room…

Sophisticated Blush and Gold Baby Nursery | Five Marigolds

It’s needs some love. I have big plans, but I’m taking my time.

Sophisticated Blush and Gold Baby Nursery | Five Marigolds

Sophisticated Nursery in Blush, Champagne and Toile | Five Marigolds

Details:


DIY Chalkboard Art

I recently tried to convince my husband to paint an entire wall of our dining area with black chalkboard paint. He didn’t quite have the same vision I had, so he asked me to hang a chalkboard until we could come to an agreement.

I agreed. After all, I’ve had a giant frame in storage that’s been waiting to be used for years. I bought it at a garage sale for around $10 which was a steal…but how do you fill such a large frame without spending a fortune? The chalkboard was the perfect solution.

If I hadn’t already had the frame, what I really would have wanted is a rustic wood frame. However, since this was likely temporary, I wanted to make this as easy and inexpensive as possible.

The problem: the frame was gold. Really gold. I debated on what to paint it. Silver? Weathered white? Blue? I haven’t committed to a color scheme in our new home yet, so I went with a safe, muted silver. I spray painted it with Krylon Brushed Metallic paint. I had planned to rub wax or wood stain to bring out the details, but I didn’t love that effect on the test areas so I just left it silver for now.

For the actual chalkboard,  we bought a piece of thin plywood and I sanded it with a hand sander until it was really smooth. After cleaning it with a lint-free cloth, I painted four thin coats of Rust-Oleum Chalk Paint in black, using a foam roller. I sanded lightly between layers when necessary and removed all the dust with a lint-free cloth. When the paint was completely dry, I rubbed entire board with a large piece of sidewalk chalk to cure it, and then rubbed it with a lint-free cloth to erase it.

DIY Chalkboard Art with Rust-Oleum Chalkboard Paint | Five Marigolds

DIY Chalkboard Art | Five Marigolds

You can wipe it clean with a damp cloth for a clean crisp look, or with a dry cloth, which I prefer, for a true, messy chalkboard look.

So far, our family loves this addition to our home. We post fun quotes and verses, and the children love to use it for creating their own art, as well.

DIY Chalkboard Art using Rust-Oleum Chalkboard Paint | Five Marigolds

DIY Chalkboard Wall Art using Rust-Oleum Chalkboard Paint | Five Marigolds

In addition to being shared on the fabulous blogs to the right, this post was also shared on Stone Gable Blog.


*Please read my affiliate disclaimer on the right sidebar. Thank you for your support!


Proverbs 31 Canvas Wall Art for Girl Room

DIY Large Wall Art + verses for the bedroom

When we moved into our new home, we dedicated it with bible verses for each room of the house. I’ve been dreaming of this Proverbs 31 canvas wall art  for Eve’s bedroom for some time now, but when I recently realized I already had the materials, I got moving.

I had a thrift store canvas that I’d previously tried (and failed) to artistically repurpose, so I painted it using a paint sample I already had on hand. Besides the price, the best part of repurposing a canvas is that you get fabulous texture under your new creation.

I used my Silhouette SD to cut the verse onto clear contact paper. I make so many mistakes that I’ve found this to be a cost saving way to use the Silhouette. I used a slightly imperfect font that would give me grace should the painting not go as I hoped.

Proverbs 31 canvas art | Five Marigolds

After spending way too long placing the many pieces of contact paper on the canvas and lining it up just so, I spray painted it with my favorite Rust-Oleum metallic gold spray paint.

I was worried it would get under the contact paper. but as long as I made sure the paper was adhering around the letters I had absolutely no trouble.

To build the frame, I used a similar technique as with Dub’s  big kid room wall gallery, but I used wood that wasn’t quite as deep, since I wanted this particular frame flush with the art.

I used Minwax stain in Early American, which is lighter IRL and gives it the right amount of color and rustic vibe.

Proverbs 31 Canvas Art using clear contact paper and Silhouette SD. Stain is Minwax Early American. | Five Marigolds

I debated (and am still debating) taking a tiny bit of wood stain on a rag and dry rubbing the canvas for a subtle shabby chic look.

I’ve also considered dry rubbing a tiny bit of the white paint over the frame very lightly for the same reason. But, at this point I’m afraid to ruin it!

Proverbs 31 Canvas art | Five Marigolds

I’m so happy with how this Proverbs 31 canvas wall art  turned out. I love the contrast of metallic gold and ivory against the rustic frame, and the sweet reminder my little girl will wake up to each day.

I’m already dreaming of how I might create a variation for Belle’s room 🙂

Additional bible verses that would be great for the girls’ bedrooms include:

God is with her; she will not fail. Psalm 46:5

He fills my life with good things. Psalm 103:5

I am fearfully and wonderfully made. Psalm 134:14

He calls me beautiful one. Song of Solomon 2:10

She is far more precious than jewels. Proverbs 31:10

Proverbs 31 Canvas wall Art.. | Five Marigolds

Details:

  • Lamp – Anthropologie (old)
  • Curtains – Simply Shabby Chic
  • Quilt – Handmade by grandma 🙂
  • Paint color – Behr Seed Pearl

Interested in more upcycled DIY Wall art? Check out my other projects here:

DIY Canvas Wall Art for Baby Nursery: I Love You Through and Through | Five Marigolds

I Love You Through & Through Paired Canvases

DIY Engineer Prints for Big Boy Room | FIve Marigolds

Framed Engineer Prints Wall Gallery

Industrial Boy's Bedroom Design. | Five Marigolds

Monogrammed Pallet Art

DIY Chalkboard Art with Rust-Oleum Chalkboard Paint | Five Marigolds

DIY Chalkboard using Garage Sale Frame


Review: Target Brookline Counter Stools

When I was shopping for stools for our new home, I wanted something that looked sophisticated, yet was comfortable and fairly inexpensive. I found what I was looking for in Target’s Brookline Counter Stools in Sandstone. But, buying furniture online is tough, and there weren’t many helpful reviews on this particular product – so I’m sharing mine here.

Target Brookline Stools Review | Five Marigolds

Price – The major reason I bought these stools was the price. They were the most inexpensive upholstered stools I could find that were available at counter height.

Target Brookline Stools Review | Five Marigolds

Color – Online, it was difficult to tell what I’d really be getting, but I’m happy with the neutral, slightly greige color to these stools.

Target Brookline Stools Review | Five Marigolds

Comfort – There is really no way to test these stools out. They have samples of 1-2 colors at my local target, but you can’t take them off the shelf to sit on them. So this was a gamble, too.  Overall, these are reasonably comfortable stools, with a nice cushion on the seat and back.

Durability – With three kids ages 2 through 7, I needed these to be fairly durable. I knew choosing a neutral upholstered chair would be a test on even the highest quality furniture, which is why I chose the least expensive stools that fit the style I was going for. That way, even if we destroy these, I reasoned I would learn my lesson with less to lose. My husband put these chairs together quickly and easily. If he found that one wobbled, he simply adjusted it until it was level. We then taped off the wood legs and I sprayed  two coats of Scotchgard over the next several hours.

Getting it done: I used painter tape and a garbage bag to protect the wood legs from the Scotchgard.

Getting it done: I used painter tape and a garbage bag to protect the wood legs from the Scotchgard.

The kids sit on these stools for breakfast, drawing and doing homework, but we don’t eat all of our meals here. However, they have had their fair share of food smears from sticky hands, and so far they’ve wiped clean every time, even if it takes a little fabric cleaner for the extra ground-in, dried messes.

Overall, we’ve been happy with these chairs. I hope this review helps anyone else who is on the hunt for new stools for their home!


*This post contains affiliate links. Please read my full disclaimer in the right sidebar. Thank you for your support!

Big Boy Room Custom Engineer Prints

engineering prints = Inexpensive large wall art

Engineer prints are a great way to design a boy bedroom, bringing custom touches through large photo prints on a budget.

I’m very slowly beginning the process of decorating our new home, and focusing on the areas where inspiration strikes me the most. Dub’s room is the one I have the most concrete vision for, and I knew exactly where I wanted to start when I saw this idea for engineer prints for a boy’s room.

I immediately set out taking images of the things most important to Dub. He loved being able to be a part of it in this way.

He loves Legos, video games, and the Wilson brand holds special inside meaning for us

I was able to order the engineering prints online by sending  the images to the FedEx Kinkos copy store.

I ordered 18×24 engineer prints. DIY Engineer Prints for Big Boy Room | FIve Marigolds

Continue reading

Tutu Birthday Party for my Two year-old

What could be better than a tutu birthday party for your little ballerina’s two year-old birthday?

For baby ‘Belle’s party, I wanted to do something that conveyed her love of dancing and tutus and looked special, but that was simple and inexpensive to put together.

First, for my $3 backdrop, I took 3 white plastic tablecloths from the dollar store for my backdrop.  I simple folded them in half length wise, then began rolling them up toward the fold. Once the cloth was rolled approximately 10″ from the fold, I began cutting the rolled tablecloth in strips approximately 3″ apart. Easy!Tutu Ballerina Birthday Party | Five Marigolds

I finished it off with the vintage bunting we re-use for the girls’ parties each year. I love how this small investment adds something special to every party we have for them.

Next, I layered the table with two tablecloths, sandwiched with some tulle. I had planned to make this an inexpensive “tutu tablecloth” but it didn’t quite turn out that way! No problem though – I still love the effect of the pink tulle as the focal point of the table. To finish it off, I placed the tablecloth over the top and bustled it at the center to better highlight the tulle.

Tutu Ballerina Birthday Party. | Five Marigolds

Finally, I placed a trifle bowl upside down and I placed her own baby tutu around the bowl. Then, I just placed the cake on top. Tutu Ballerina Birthday Party. | Five Marigolds

I’d ordered a the cake to looks similar this:

Frilly Cake

So, I was a little disappointed in the finished result from my local Target bakery.However, I really can’t complain for such an inexpensive cake…and really it looks so cute when it’s all propped out with this gold “2” candle and bunting.

Tutu Ballerina Birthday Party. | Five Marigolds

We served ballerina punch, pink Jelly Bellys and dipped marshmallows for a birthday-worthy sugar buzz.

I hope you like ‘Belle’s tutu party fit for a two year-old ballerina. Thanks for stopping by!

Tutu Birthday Party | Five Marigolds

Tutorial: Tinsel Tassel Party Banner

I absolutely love the look of these tinsel tassel banners for party decor. Even better? They’re super easy and inexpensive to make.

Dub really wanted a Minecraft-themed birthday party, but I didn’t want a licensed decor explosion, so I began thinking of ways to decorate with color. With lots of Pinterest inspiration, I decided I wanted to give this a try. However, I was surprised to find there aren’t a lot of tutorials out there so I am sharing a quick and dirty tutorial of my own.

I set to work on this particular banner with four colors of tissue paper, green, lime green, chevron and silver metallic (I linked to some examples because I initially had a hard time finding these).

1) First, I took a stack of 8 sheets of tissue in each color and cut them the short length of the pre-cut sheets (approximately 20″) and cut them about 8″ wide.Tinsel Tassel Banner Tutorial | Five Marigolds

2) I then folded the stack of sheets in half and began cutting them in 1/4″ strips, stopping about 1″ from the fold. I used a rotary cutter and mat to make quick and more precise work of this, but regular scissors will do.

Tinsel Tassel Banner Tutorial | Five Marigolds

Tinsel Tassel Banner Tutorial | Five Marigolds

3) I then unfolded the papers and, taking 2 sheets at a time, began rolling them tightly at the center. Once each set of 2 was rolled at the center I began gently twisting the rolled portion. Once it was lightly twisted I folded it in half and began twisting the rolled portions together. When you’re done it will look something like this. Perfectly imperfect.Tinsel Tassel Banner Tutorial | Five Marigolds

4) Thread the tassels through a string or ribbon. I made a single simple knot at each tassel to keep them in place.

Tinsel Tassel Banner Tutorial | Five Marigolds

All in all, this was a pretty quick and easy project that took me maybe 20 minutes total to complete. I also love that if you source your papers from the dollar store, you could complete three of these banners for just $4! (meaning, each banner is just over $1, with plenty of paper to spare for favors or gifts). I have a feeling various themed tinsel banners will be showing up at more parties around here!

Dub’s party is not for a few more weeks, so I’m letting it hang on our mantle for St. Patrick’s Day. How’s that for multi-purpose party decor?

Find my other Minecraft Birthday Party posts here:

Minecraft Birthday Party on a Budget | Five Marigolds

DIY Minecraft Birthday Party

Minecraft Lego Steve Favors | Five Marigolds

DIY Minecraft Lego Steve Favors


big boy room

big boy room

Assembly Home gray rug
urbanoutfitters.com

Aidan Gray storage basket
laylagrayce.com

Jonathan Adler throw pillow
bloomingdales.com

Home decor
$41 – cottonon.com

Metal wall art
craftcuts.com

Pottery barn furniture
potterybarn.com

White chair
ikea.com

FUFFLA
ikea.com


Bible Verses for a new home. Dedicate your home with scripture.

Bible Verses About Home: Strong foundations for a new house

Bible SCRIPTURES for a New Home

These bible verses about home can be used for a house blessing for new construction, or used to decorate your home with scripture.

Several weeks ago, we decided to have a little family house dedication on our new home under construction by writing verses that held meaning and hope for our family. A new home blessing, if you will.

I originally got the idea from a young adult Christian book series I read and loved when I was younger – the Glenbrooke series by Robin Jones Gunn, and this per

In the book Wildflowers, the main character  is fulfilling her dream of opening a business, and invited all of her friends to the property before renovations for a blessing party.

They prayed, sang worship songs and wrote scripture right on the walls, studs, and sub-flooring.

I absolutely loved the idea that the blessings they wrote and prayed for would forever be etched in their memories.

I knew that if I ever built or renovated a home – I wanted to do something similar.

I love the idea that as we walk through the finished rooms of our home in just a few months, we’ll remember the verses written on the foundation of each room we enter.

And, maybe someday many, many years from now, a different family might have occasion to see the blessings written by us under the carpet or on the wall studs.

Today I’m sharing inspirational bible verses for a new home blessing.Bible Verses About Home: Scriptures for a Strong Foundation and New Home Dedication | Five Marigolds

Continue reading

Family Growth Chart for less than $15

We recently made the decision to sell our “starter” home and build a new home that better accommodates our growing family. We bought this home just months before our wedding, had three babies here and many, many precious memories as a family. We’re ready for the next chapter, but this sentimental mom is feeling a bit emotional about it, as well.

The moment we signed the papers to build our new home I was immediately motivated to take on a project I’ve been meaning to for a long time – make a family growth chart that we can take with us – wherever we go. Our former growth chart was done the old fashioned way – with pencil on the wall of our kitchen (that I still can’t bring myself to paint over even since I’ve made this beautiful new chart).growth chart2

I’d once tried my hand at an embroidered chart that was supposed to be  cute and charming, but didn’t end up looking quite as polished as my inspiration. I also  found that I was too lazy to embroider once a year. My laziness factor is high.

So I moved on to those cute reclaimed signs I’ve seen all over Pinterest.

I started with a 3/4″x7″x8′ piece of cedar lumber that I purchased at Home Depot for less than $9. First, I enlisted Dub to weather it for me. I gave him chains and a hammer and let him have at it. I stained it with leftover stain that I used on our stairs for our garage makeover.

From there, I had to get measuring – my least favorite part. Our family is really tall, so I cut my board to 6′ tall and painted 1′ white stripes using leftover paint from the garage makeover. These are some terrible progress photos, but you get the idea.

Family Growth Chart for Less Than $15 | Five Marigolds

I actually liked the way this looked when I was done, but I went ahead and sanded it to give it a more distressed look.Family Growth Chart for Less Than $15 | Five Marigolds

Family Growth Chart for Less Than $15 | Five Marigolds

Then, I used my silhouette to create the measurement marks. I barely use my Silhouette but I used it for this, figuring it would make the measuring much easier for me. I measured it on the computer, cut it out on the Silhouette and then used transfer paper to stick it right on the board without having to re-measure.

Family Growth Chart for Less Than $15 | Five Marigolds

I’m super happy with the way that it turned out! I can’t wait to hang this measurement chart in our new home next year. I can see keeping this chart in our home forever, and measuring little grandbabies someday.growth chart2_1

Postscript: after completing my chart, I stumbled upon this cute version by Handmade Charlotte

growth-chart6-handmade-charlotte-powerofpaint-dot-net

If I had to do it over again, I think her way of painting the numbers would be a lot cheaper and easier. However, I’d still want to make the measurement marks so that I could tell visually exactly how tall the kids are. Everytime they get measured they want to know EXACTLY how many feet, inches and centimeters tall they are. Because that matters to 4 and 6 year olds.

What do you think? Do you have a family growth chart in your home?


Baby Girl Bow Birthday Party

My baby girl just turned one and because her birthday is exactly a week after Dub’s, I’ll admit I ran out of steam on the party planning. However, I wanted to do something special and celebrate as a family, and was able to put together a cute Bow Birthday theme really inexpensively.Baby Girl Bow Birthday Party | Five Marigolds

To keep birthday party planning expenses manageable, we buy a few essentials that we reuse year after year.

These include:

  • Bunting (similar here and here)
  • Centerpieces
  • My Special Day chair covers that we reuse for birthdays, first days of school, and any day we want to recognize and celebrate each child individually.

Baby Girl Bow Birthday Party Chair Cover | Five Marigolds

Additionally, we always save leftover party supplies such as napkins, plates and plastic cutlery and every few years we find we don’t have to buy these supplies at all because of that stash. That was the case for baby ‘Belle’s party.

For the cupcakes, I whipped up a batch of vanilla and chocolate cupcakes and frosted them in pink and white buttercream frosting. I wanted them to carry out the bow theme, but because I’m lacking in fondant skills I purchased these toppers. You can find similar fondant bows here and here.

Baby Girl Bow Birthday Party Pink Cupcakes | Five Marigolds

Baby Girl Bow Birthday Party Pink Bow Cupcakes | Five Marigolds

We served homemade vanilla ice cream and a simple punch using 7-Up and raspberry sherbet.

With just two inexpensive plastic tablecloths from the dollar store, I made this impressive table centerpiece by using one tablecloth as usual, and using the other as a decorative sash by draping it across the front and simply pinching it in the middle. I actually unfolded some of the party napkins and fashioned a bow out of them – one napkin for each side of the bow, and two for the tails. Surprisingly beautiful, easy and inexpensive!

Baby Girl Bow Birthday Party | Five Marigolds

Next, I made bow napkin rings – I love how these turned out! I bought rectangle shaped napkins, but you could also do this by folding traditional napkins in half. Simply pinch them in the middle, place them on top of your cutlery and wrap a small band of paper around the bow, secured with tape.

Baby Girl Bow Birthday Party Napkin Ring

Baby Girl Bow Birthday Party Napkin Rings

As I mentioned earlier, I used leftover napkins to make the bow you see on the front of the table to carry the theme through.

I took a little photo shoot of baby ‘Belle sporting her birthday bow. I’d say the cupcakes were a hit!5m bow birthday cake smash

Like the ideas you see here? Be sure to follow my birthday party inspiration board and subscribe below to keep partying with me!

Looking for more inspiration? You might like these parties:

DIY Peppa Pig Birthday Party | Five Marigolds

Peppa Pig Party

Malibu Barbie Pool Party Birthday Infographic.2 | Five Marigolds

Malibu Barbie Party

Princess Birthday for $20

Princess Birthday for $20

https://fivemarigolds.wpenginepowered.com/2014/08/04/eves-princess-party/

(Very) Small Spaces: Shared Girl Room

Baby #3 is on the way  soon(!) and the nursery is officially done. We live in a 3 bedroom home with cozy (aka ridiculously small) bedrooms which meant lots of creativity and organization.
I tried my best to create the illusion of space with monochromatic touches of taupe and pink with gold accents against white.  We used a pink and taupe toile in the bedding for both girls and carried the colors throughout the room. Here is a mock up:shared girl room3
I’m certainly no designer (clearly!) but because I had such a hard time finding decor ideas for tight quarters, I’m posting mine for all of you out there with small spaces.
Tiny Spaces Shared Girl Room
Do you like how I kept the overstuffed toy box in the shot? That’s just me keeping it real.