Well, hello there (as the sign says)! Today I’m sharing a tutorial for my latest home project: a DIY Letter Board. If you’re been wanting to create a marquee board for your entryway, kitchen, or even a kid’s room, you’re going to love this project!

Well, hello there (as the sign says)! Today I’m sharing a tutorial for my latest home project: a DIY Letter Board. If you’re been wanting to create a marquee board for your entryway, kitchen, or even a kid’s room, you’re going to love this project!
This shop has been compensated by Collective Bias, Inc. and its advertiser, MARS. All opinions are mine alone. #ScoreAtCVS #CollectiveBias
Football season is here, and with it, countless Sundays spent gathering with friends for viewing parties. I’ll admit, I’m in this sport for the socializing and snacks, but not the work of prepping treats.
Today, I’m going to show you ridiculously easy ideas for showing up with the most team spirit at your next viewing party. These game day decor ideas are so simple, even the least skilled crafter can pull them off like a pro!
![Quick & Easy Game Day Decor #ScoreAtCVS [AD]](https://spcdn.shortpixel.ai/spio/ret_img,q_cdnize,to_avif,s_avif/fivemarigolds.com/wp-content/uploads/2016/09/Quick-Easy-Game-Day-Entertaining-Five-Marigolds.jpg)
This week I was out thrifting at the local resale shop and stumbled on this antique toolbox. I had a Fixer Upper vision for making this an antique tool box turned craft station for the kids – all Joanna Gaines style.
It looked pretty rough, so I texted this haphazardly-taken photo to my husband, asking him if I was crazy for wanting to pick it up.

This week I made one of my favorite projects ever: simple cement succulent pots.
I absolutely love these, because it’s super easy, inexpensive and looks beautiful and modern.
It’ s been awhile since I’ve shared on the blog. I ran out of steam there for awhile, but I’m back with a project I’ve been planning for some time, and finally got around to: my self serve sign for the kitchen.
We’re slowly but surely making some changes to our builder grade home, like a new back splash that we love. Still, I thought the kitchen needed a little more character.
Plan the ultimate Peppa Pig picnic party with these Peppa Pig birthday party ideas.
When planning my youngest’s 3rd birthday, it was a no-brainer to choose a Peppa Pig theme. She loves the show and her favorite outfit has Peppa on it.
After researching lots of Peppa Pig birthday party ideas, I came up with a picnic theme. Since her birthday is in March, we brought the outdoors indoors for the celebration!
When guests entered our home for the party, they were invited to try on a pair of rain boots for size to jump in muddy puddles.
I used inexpensive craft paper for the puddles and wrote, “We LOVE jumping in muddy puddles! Try on a pair for size and play with me!”
I absolutely love the look of these tinsel tassel banners for party decor. Even better? They’re super easy and inexpensive to make – just in time to decorate in the spirit of St. Patrick’s Day!
I’m so excited to share the final reveal in my vintage dollhouse series today.This has been such a fun project, but I’m so ready to turn it over to my girls who have been impatiently waiting for me to complete it.
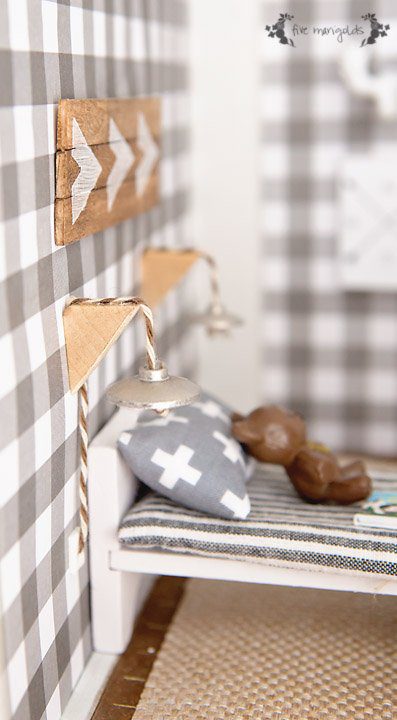
The last room in this project is the dollhouse play room. I left this room for last because it was the most awkward space – narrow with no windows. And since I knew I would finish it last, I knew there was a chance I’d run low on budget. I designated it the play room because I felt it was the least important room, and I wouldn’t need to make many purchases.
As it turned out, I was out of budget, so my original ideas for this room fell by the wayside as I found ways to make it work.
My daughter sacrificed her Shopkins ice cream truck sign to make an art easel, and of course you can tell I used Scrabble tiles to decorate the wall.
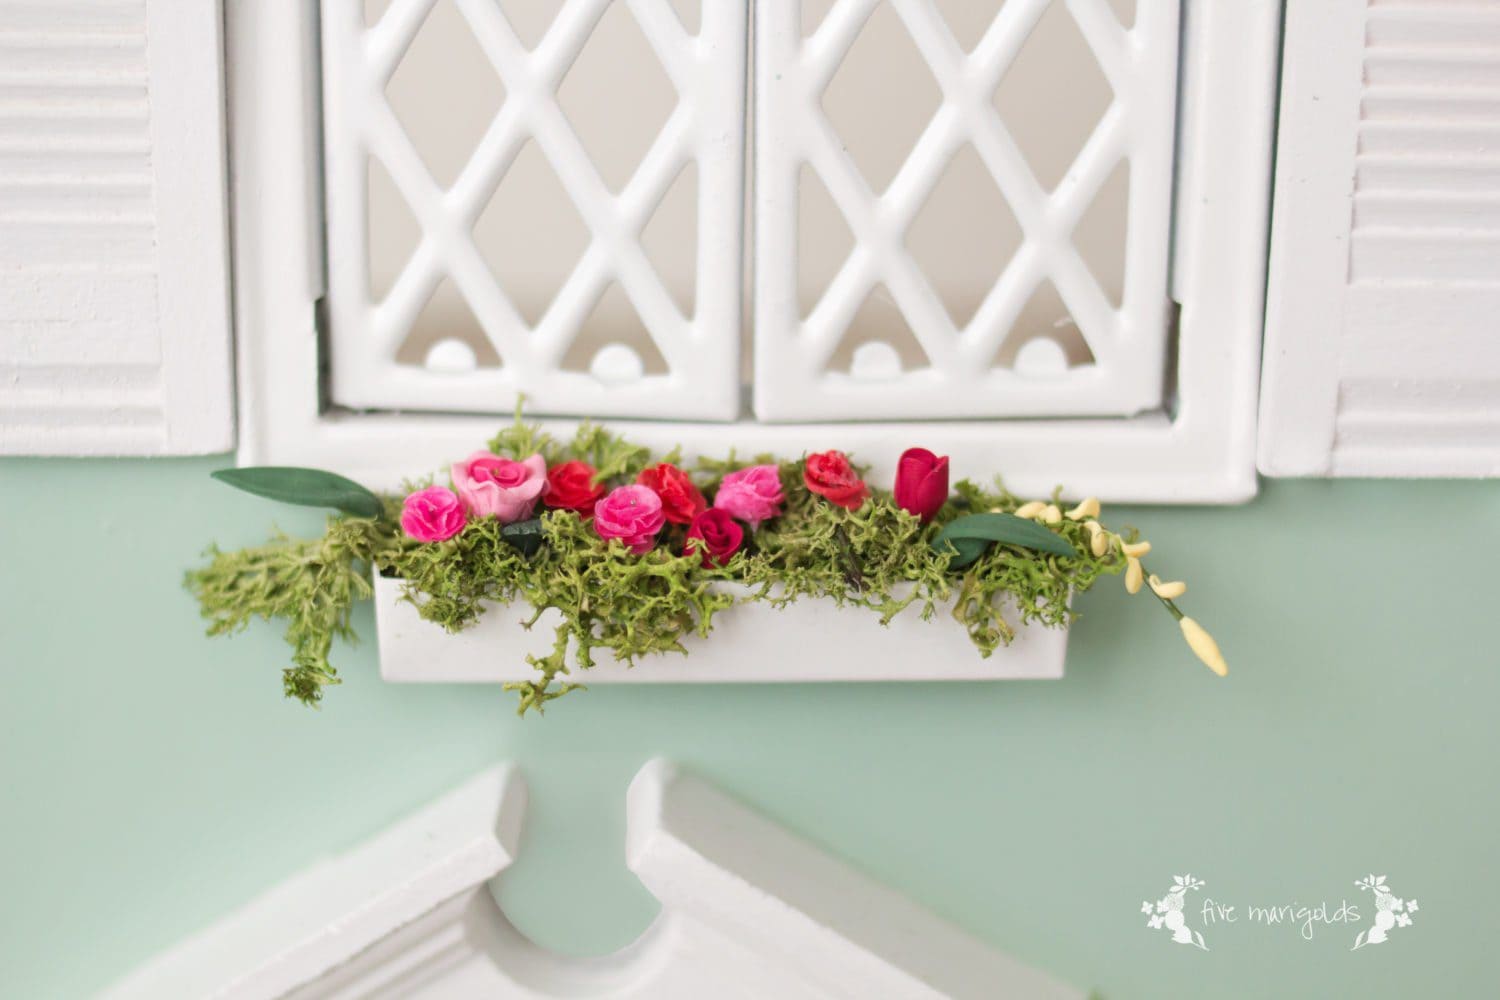
Today I’m sharing the vintage dollhouse kitchen remodel for my vintage dollhouse makeover project.
This week we’re moving the vintage dollhouse remodel to the main floor living room.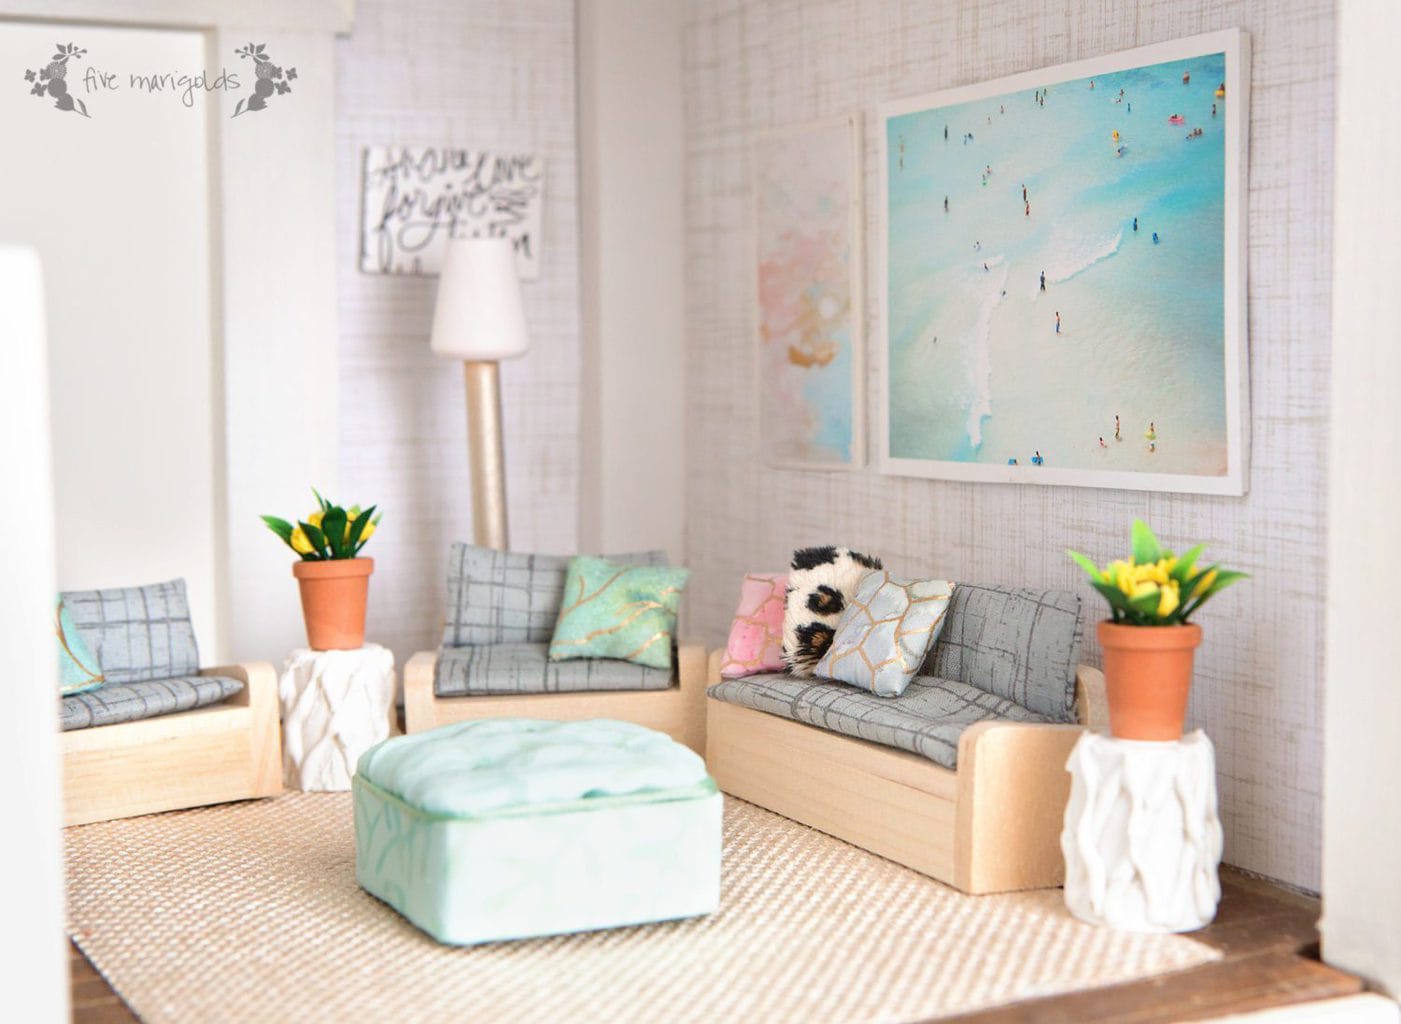
Do you love the look of those great pallet signs on Pinterest (my own version here!), but not the time and labor that goes into them? You’re in luck! Today I’m going to share with you how to make a faux pallet sign in just 10 minutes using inexpensive wood print paper.

See the Complete Vintage Dollhouse Makeover Series: Part I Vintage Dollhouse, Part II Exterior, Part III Boy’s Room, Part IV Girl’s Room, Part V Laundry / Bathroom, Part VI Living Room, Part VII Kitchen, Part VIII Play Room + Final Reveal
This week in my vintage dollhouse makeover series I bring you the remodeled bath and laundry room: two rooms that normally don’t get a lot of love in a dollhouse! I was determined to take on the challenge though – my girls’ dolls use this room quite a bit…

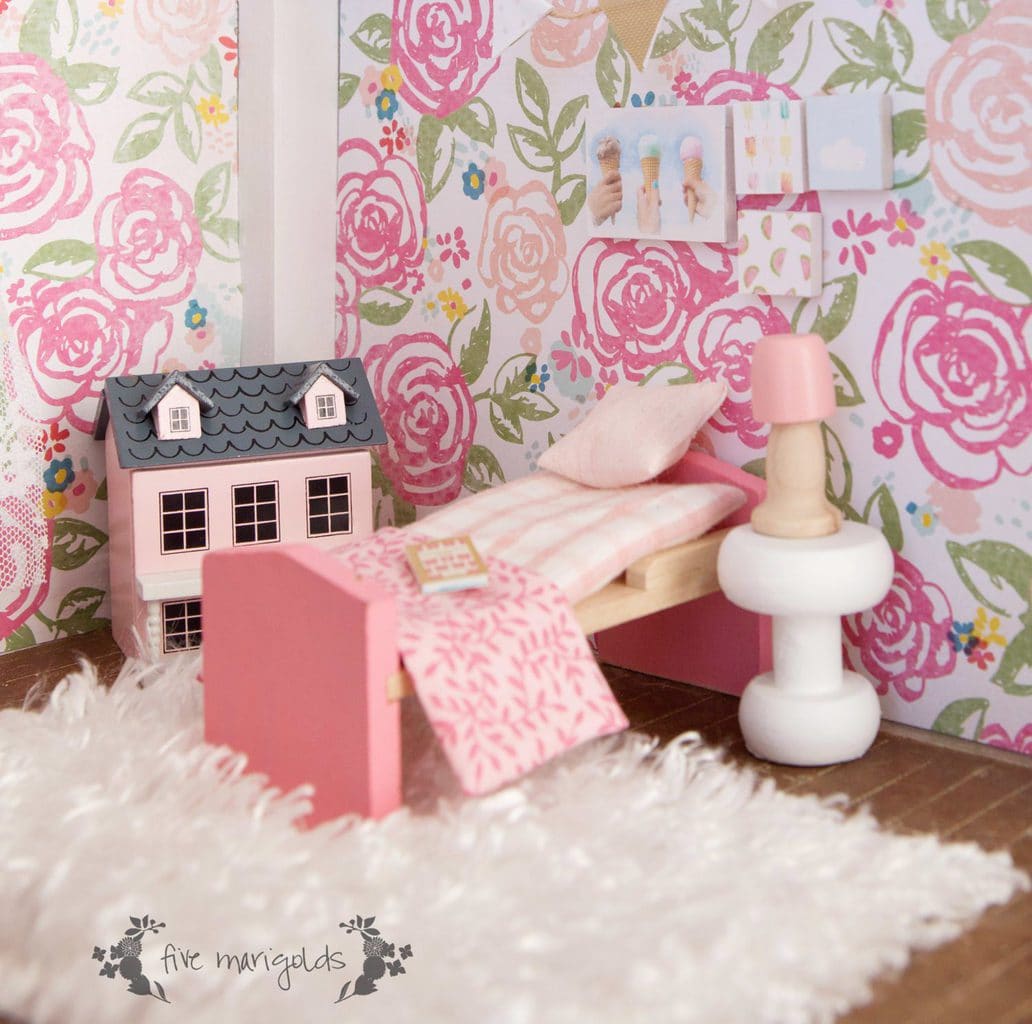
I’m so excited to share my vintage dollhouse girl room remodel with you! It has been such a vicariously fun exercise to decorate an entire girl’s room for less than $10.
When I scoured the internet for inspiration, I was drawn to the darling sets by Daisylane, Lundby and Hape. However, I was working with a minimal budget, so I set to work creating the look for less.
I’m excited to share the first finished room in my vintage dollhouse makeover series today!
I started with the boy room, because just like in my own home, it’s where inspiration struck me first.
Today I’m bringing you Part II of my vintage dollhouse makeover.
You can find the rest of the Vintage Dollhouse Makeover series here: Part I Vintage Dollhouse, Part II Exterior, Part III Boy’s Room, Part IV Girl’s Room, Part V Laundry / Bathroom, Part VI Living Room, Part VII Kitchen, Part VIII Play Room + Final Reveal
I think that you’re supposed to leave the exterior for the final “big reveal”, but I’m a rule breaker that way. That, and it happened to be the one part I could tackle while I waited for the interior furnishings to appear in the mail.
As I mentioned in my introductory post, I put myself on a budget for this project, so I needed to DIY it as much as possible, using supplies I already had on hand. Still, this portion of the makeover was the most costly, since all the paint used in the house is accounted for in this portion.
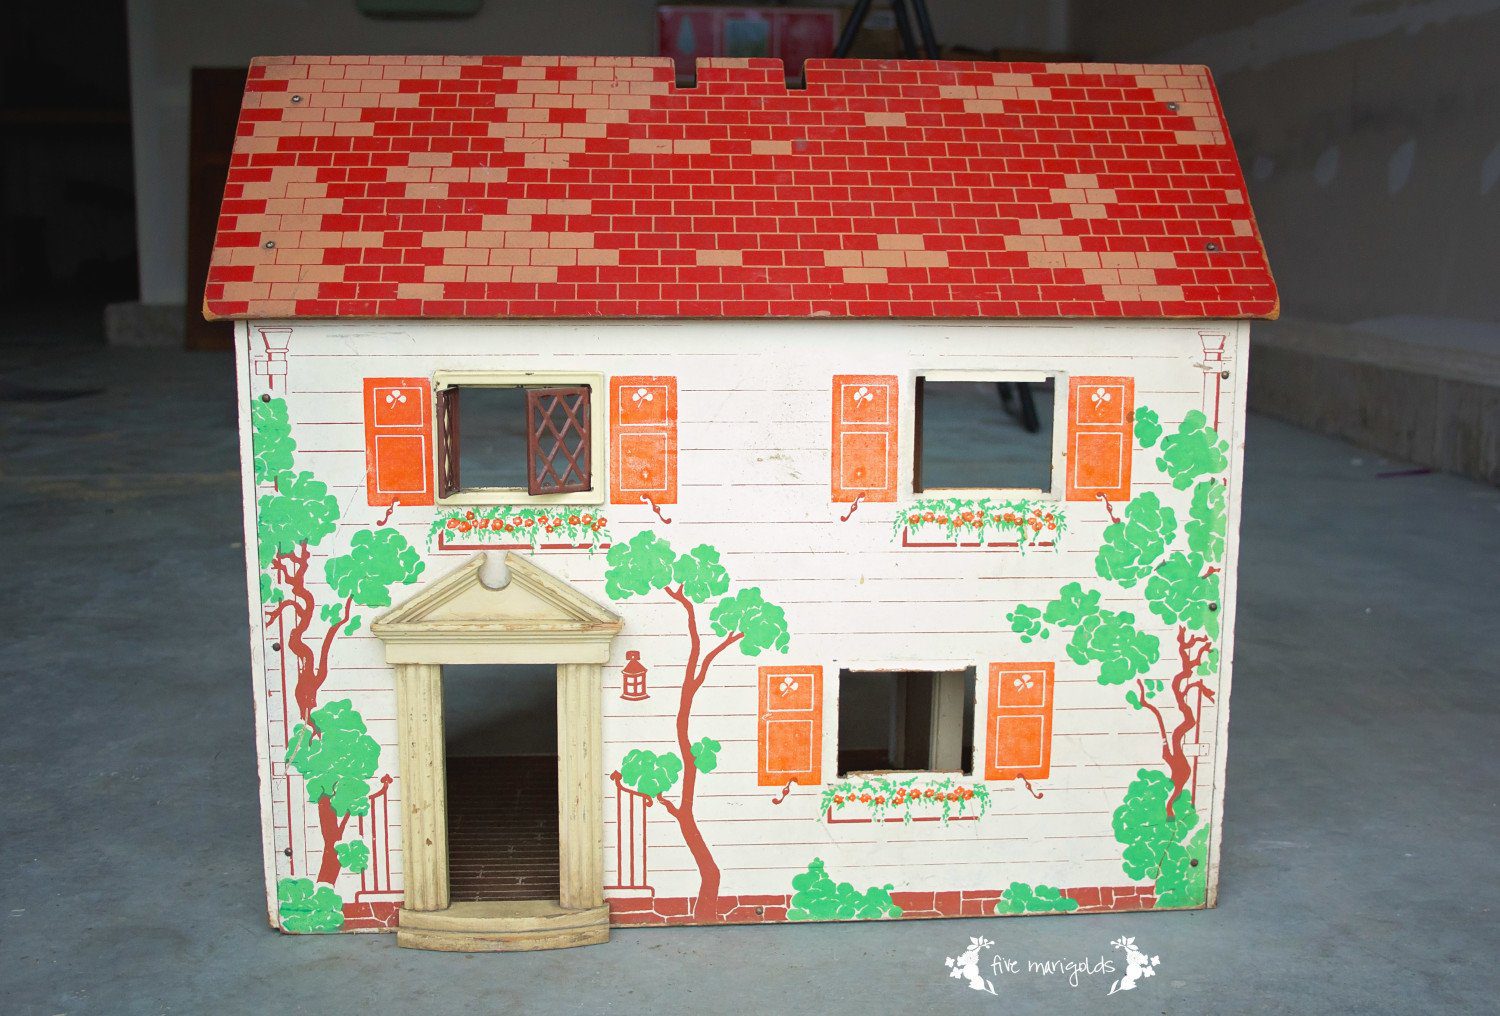
This summer I picked up this vintage doll house from the thrift store for a few dollars. I can’t explain why I picked it up, but I was thrilled with the find. So, what to do with a 1940’s era doll house in disrepair? I originally had delusions of restoring it, because it certainly had charm. However, once I started trying to do some touch ups I was faced with the reality that this baby needed a complete overhaul.
Here’s how it looked when I brought it home.
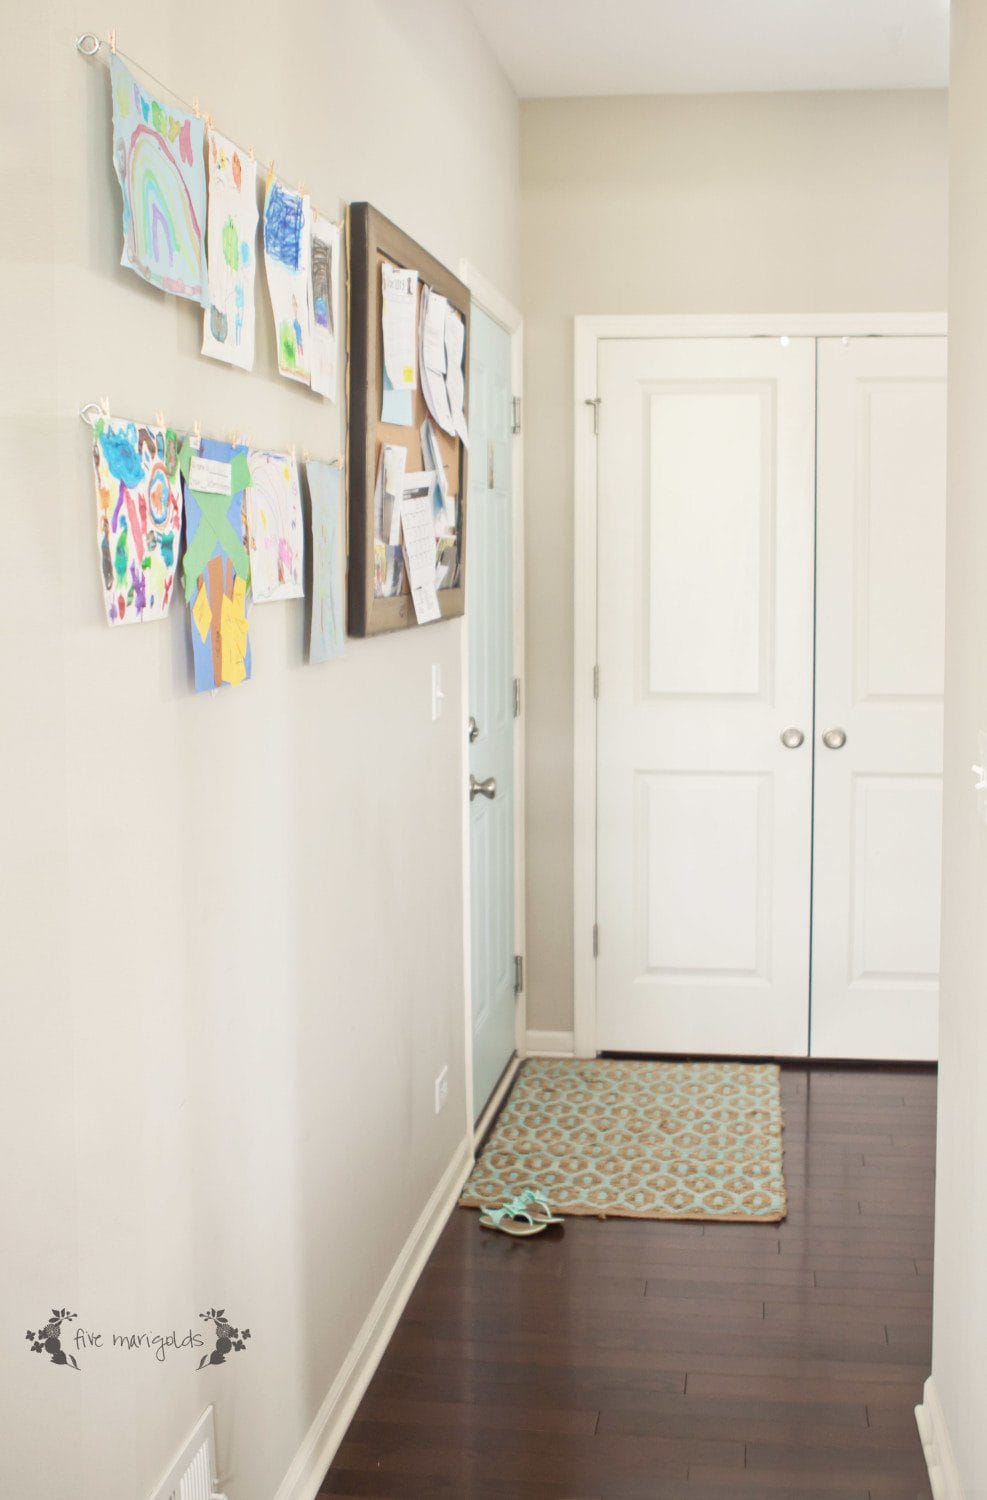
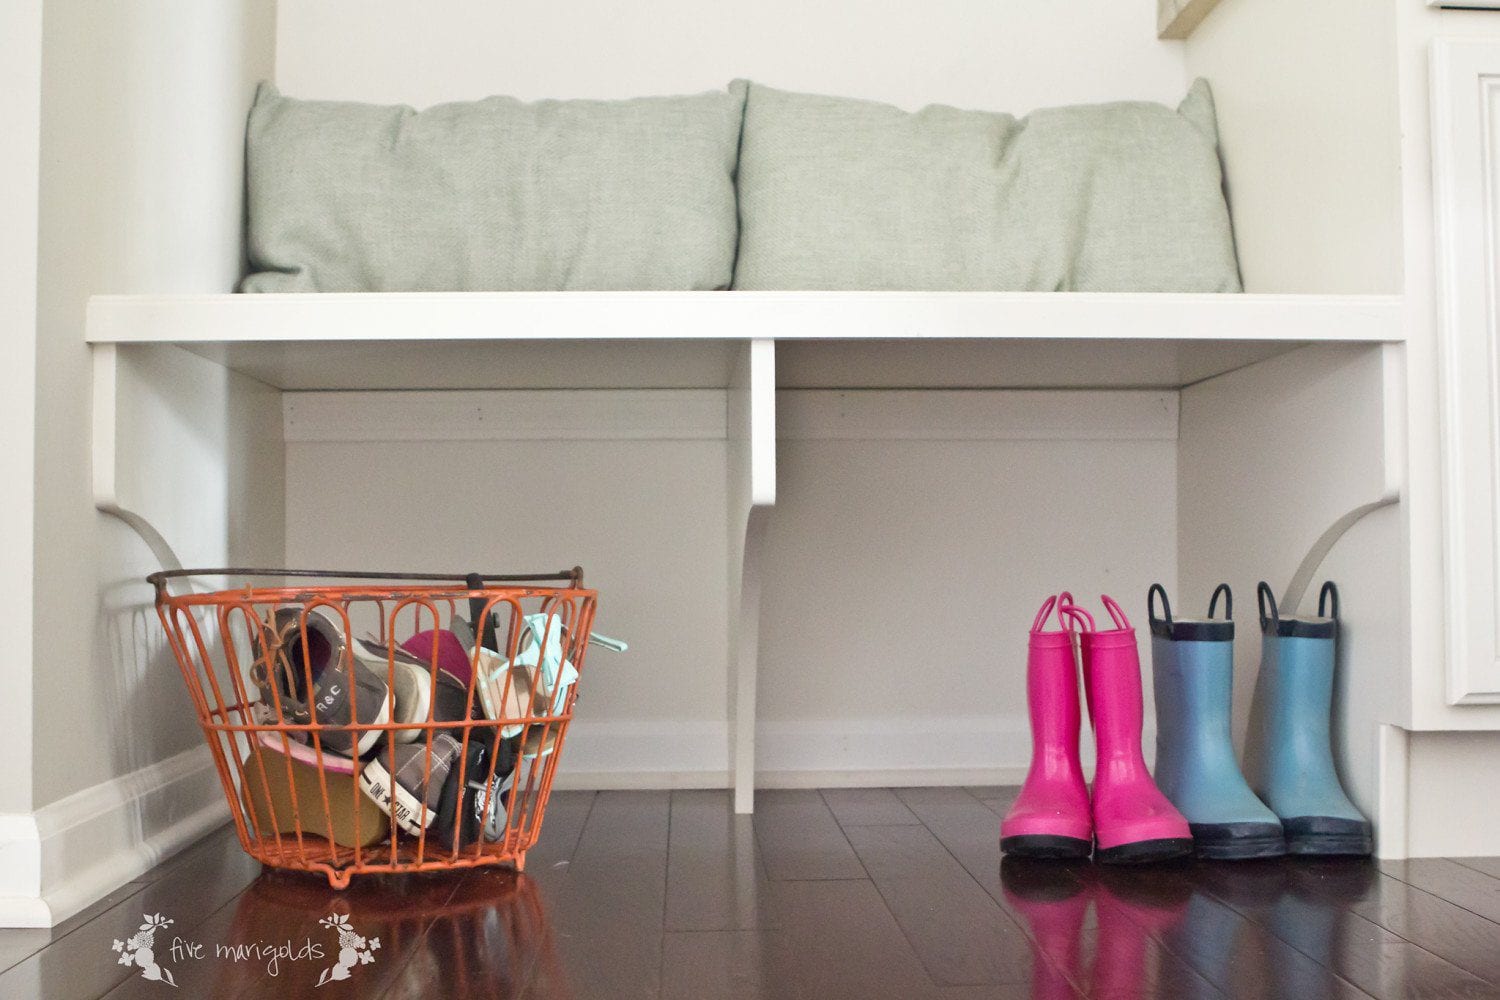
This is one of my favorite projects to date – also the easiest and least expensive: the children’s artwork display located in our Family Command Center – otherwise known as the mud room.
I wanted plenty of space where the children could hang their artwork and good grades with pride, without that messy cluttered look on the fridge. It also needed to be really flat to the wall, since the area I’d designated is in a space the width of a hallway.
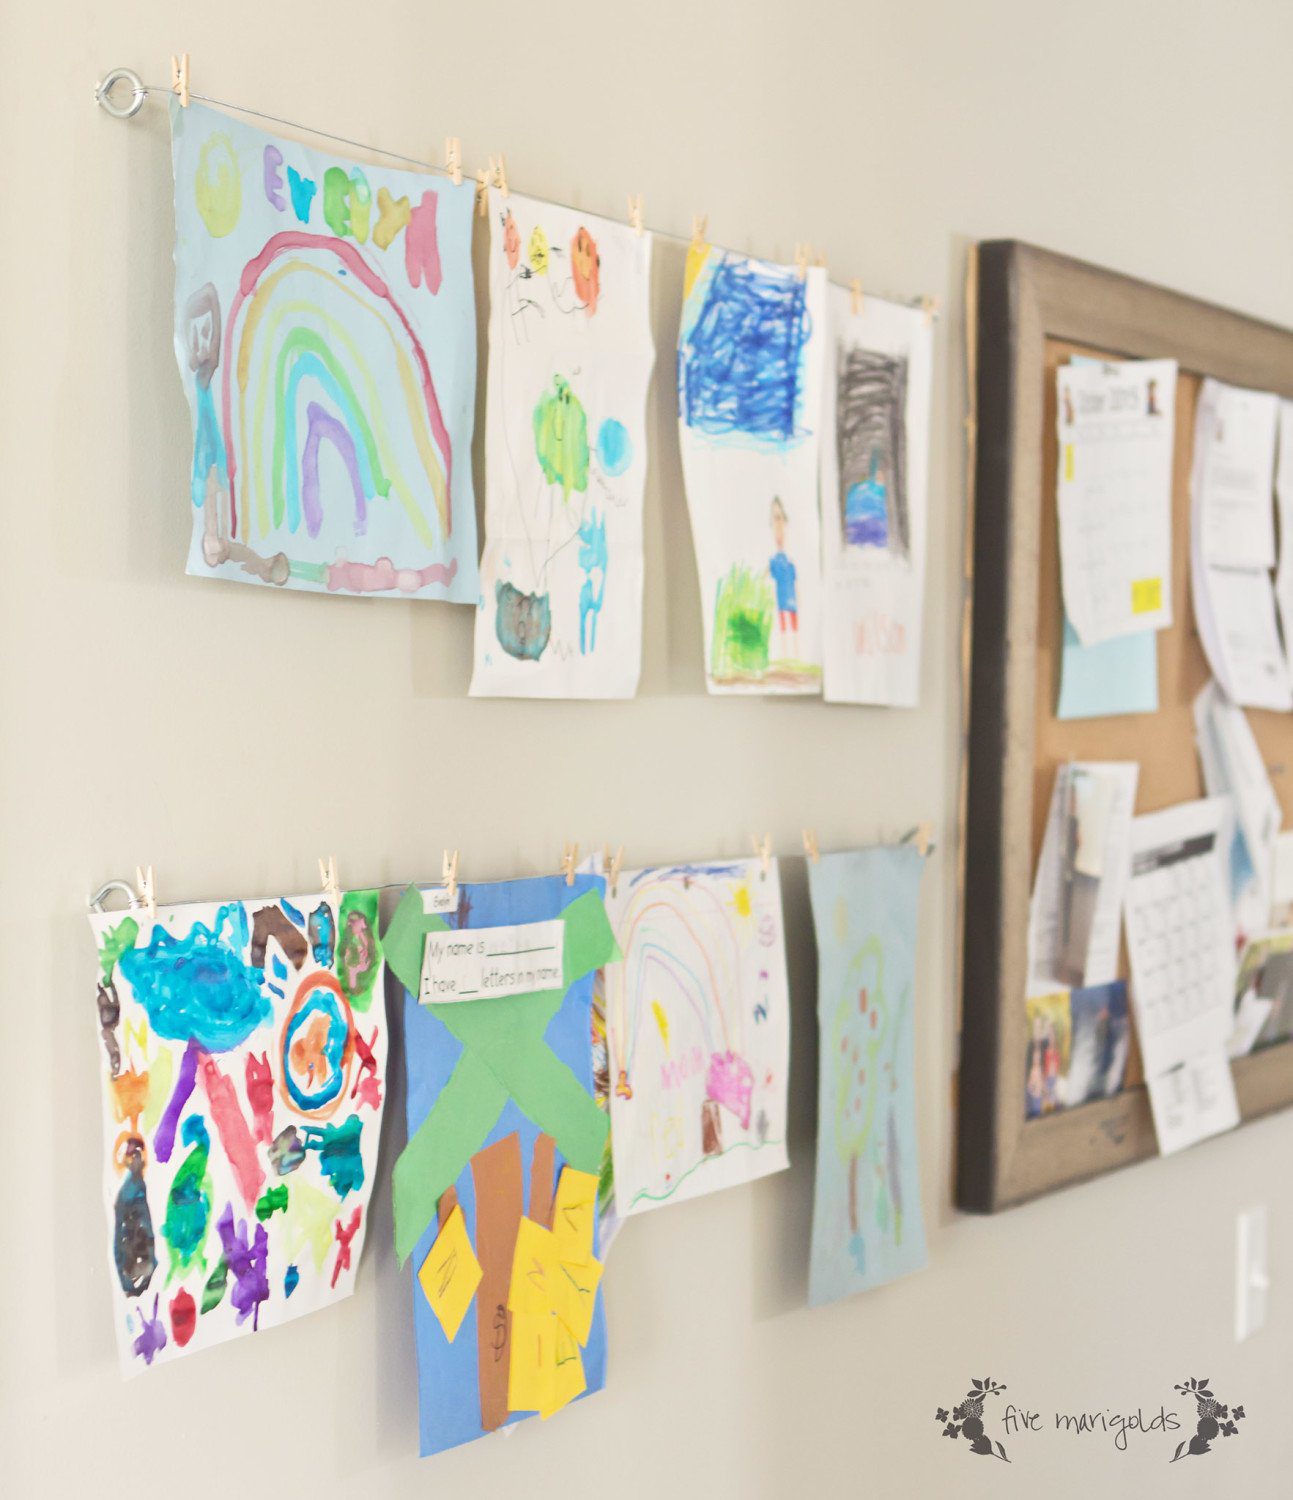
Here’s how I did it:

As for the rest of our family mud room command center, it’s still a work in progress. I have dreams for this space!

I found that sign at the thrift store. I think it was from a hotel long ago. I just love it!
What do you think of my low-tech art center for the kids?
Sources:
Earlier this year, I gave a small tour of ‘Belle’s nursery that is slowly transitioning to a big girl room. SLOWLY. Recently, I tried my hand at creating a DIY Canvas for Baby Nursery.
After making Eve’s wall art project I was inspired to make another one for ‘Belle’s room to fill a blank wall. 
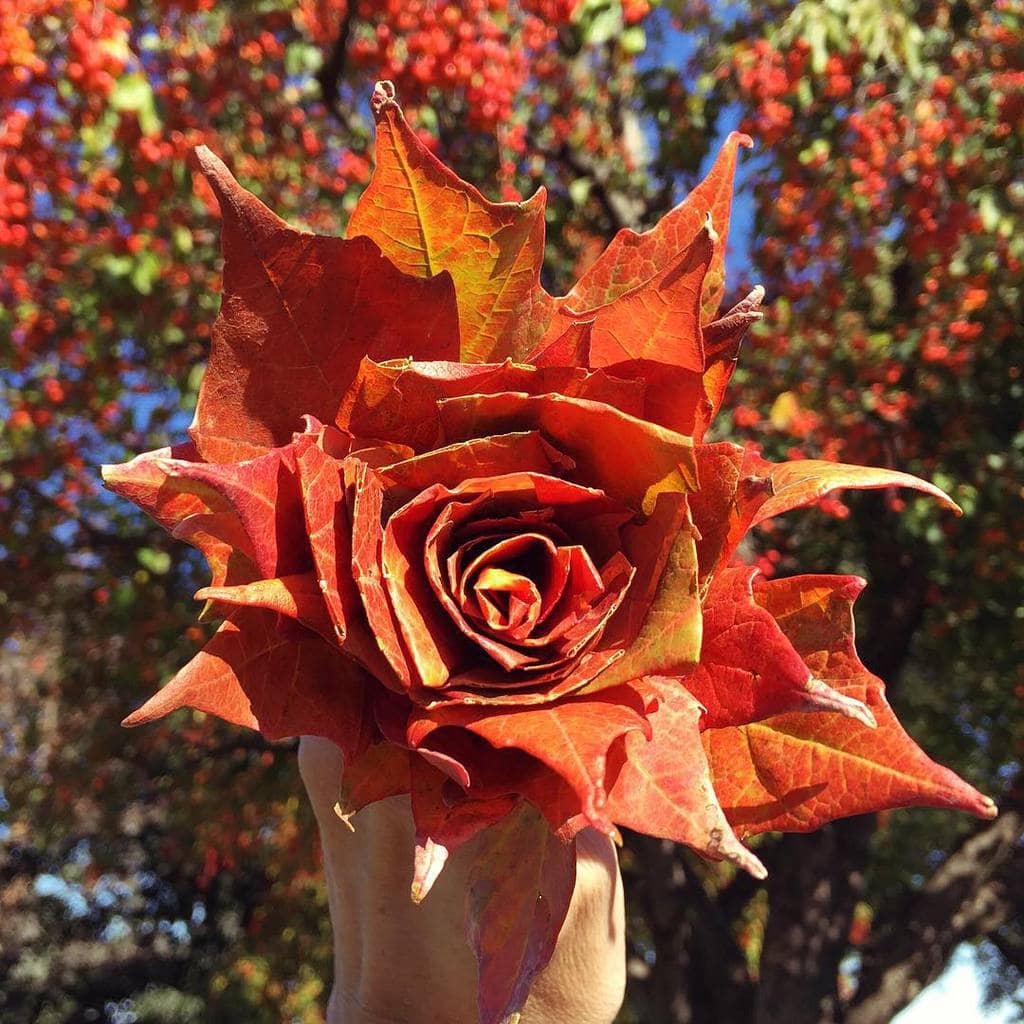
I recently posted an Instagram photo of a “rose” I’d created out of fall leaves. I had several of you message me to ask how I’d done it. It’s easy! However, I can’t take credit for this idea – I saw this in my Facebook feed one day and decided to follow it:
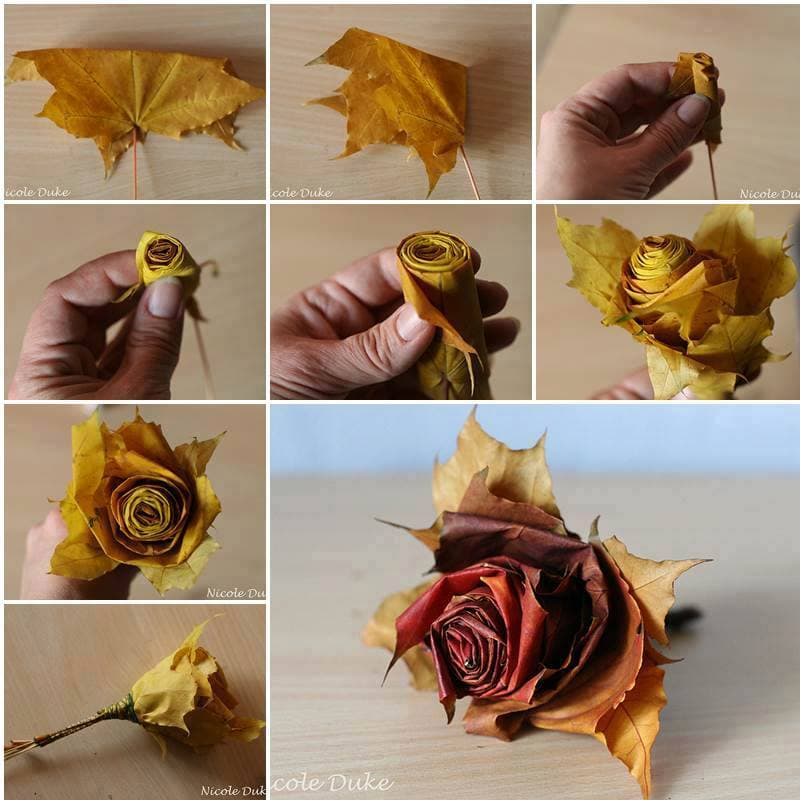
Photo tutorial c/o Nicole Duke – unfortunately I can’t find her to link you to her online.
Collect around 10-15 of the prettiest fall leaves you can find, ranging from small to large. I put the kids in charge of this. Starting with one of the smallest leaves, fold the “points” or tips of the leaves down, making sure the colorful side is on the outside.
Then, roll it from left to right into a tight tube, with the stem pointing down. Take your next leaf and do the same, but this time wrapping it around the first leaf. Repeat this over and over, wrapping looser with each leaf.
With your final 3-6 leaves, leave the points up and wrap them around the outside. Doesn’t it resemble a beautiful rose?
In addition to the fab blogs in the right sidebar, this was also linked up at Tatertots and Jello,Savvy Southern Style, Live, Laugh Rowe, Nap Time Creations The Turquoise Home.and The Scoop.
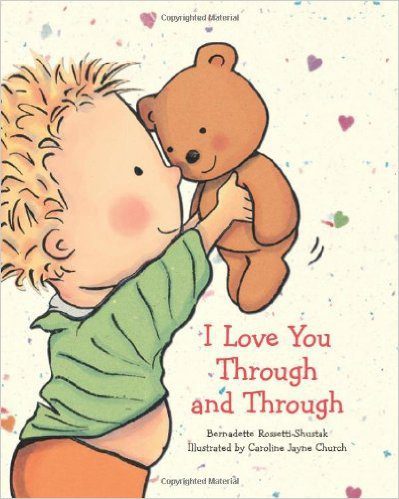
I’ve always loved this book by Bernadette Rossetti-Shustak, and all of my kids have, too.
It’s hard to believe this little ‘ol blog is more than two years old now. I created it shortly after my third baby was born as a creative outlet for my craftiness. Today, my baby is a toddler and will be transitioning into her “big girl” room soon!
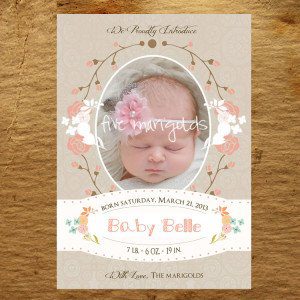
Recently, I converted the design I created for Baby ‘Belle’s baby announcement to create this printable artwork for her current nursery / soon-to-be big girl room.
When I see this hanging in her room, it reminds me of the baby she was, and of course these sweet words I want her to remember always.
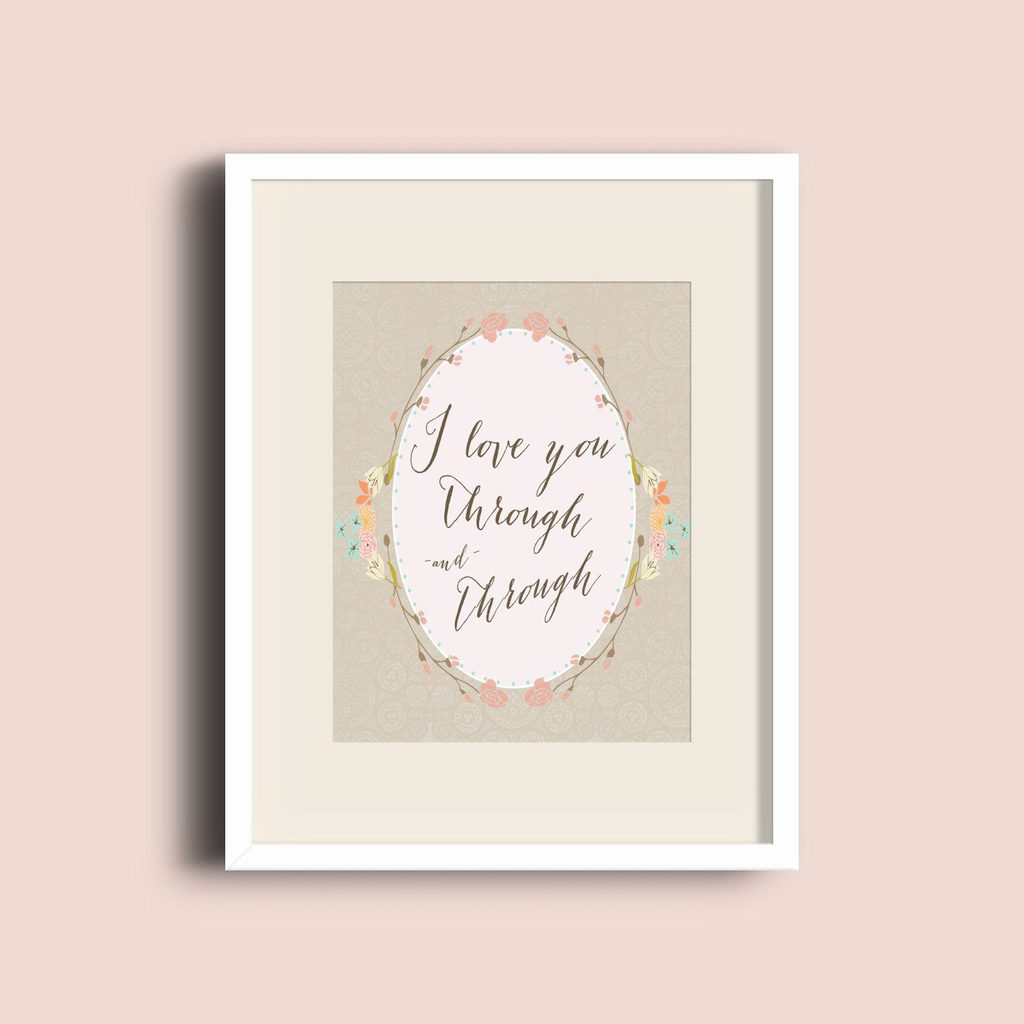
In celebration of the two year anniversary of my blog, I’m making this art available by free download to my readers! If you take the time to print this for your sweet little girl’s room, please take a moment to tell me about it below. Even better – share your snap with me! I love to see my artwork in your homes!
Download the Free Printable here.
In addition to the fab blogs in the right sidebar, this was also linked up at Tatertots and Jello,Savvy Southern Style, Live, Laugh Rowe, Nap Time Creations The Turquoise Home,Tidy Mom, Elizabeth and Co. Vintage, Chica on a Shoestring and The Scoop.