
Dollhouse Makeover series:
Part I Vintage Dollhouse, Part II Exterior, Part III Boy’s Room, Part IV Girl’s Room, Part V Laundry / Bathroom, Part VI Living Room, Part VII Kitchen, Part VIII Play Room + Final Reveal
I’m excited to share the first finished room in my vintage dollhouse makeover series today!
I started with the boy room, because just like in my own home, it’s where inspiration struck me first.
This post may contain affiliate links. Please read my privacy policy and disclosures.
When I first began researching ideas for this room, I was smitten with the charming wood sets by Hape, Daisylane (Le Toy Van) and Plan Toy. While the pricing for these sets is reasonable, it didn’t fit my minimalist budget. Therefore, I cataloged these as inspiration to create my own set for less.


The foundation of this dollhouse boy room is the original faux hardwood. While they’re not in perfect condition, I still like the look – and the idea of keeping these intact. To keep the room light, I laid a faux jute rug using textured scrapbook paper. I covered it with a bear skin shaped rug using some minky fabric I had on hand.
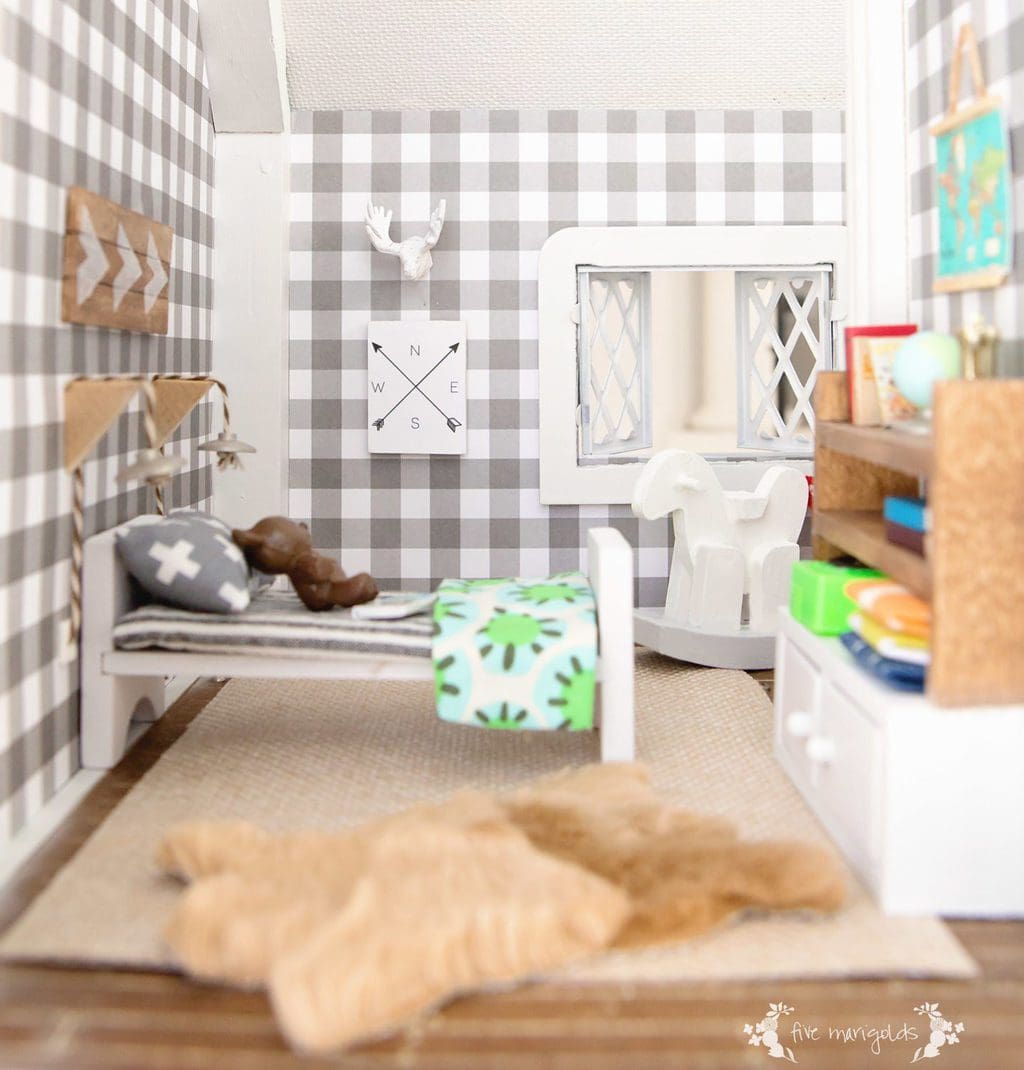
I started with gray and white plaid scrapbook “wallpaper.”
I used furniture from other rooms of doll house to bring this room together. I split the bunk bed from this set (more on that later) and painted it white. I sewed a simple duvet cover, pillow and throw blanket, using fabric scraps I had on hand.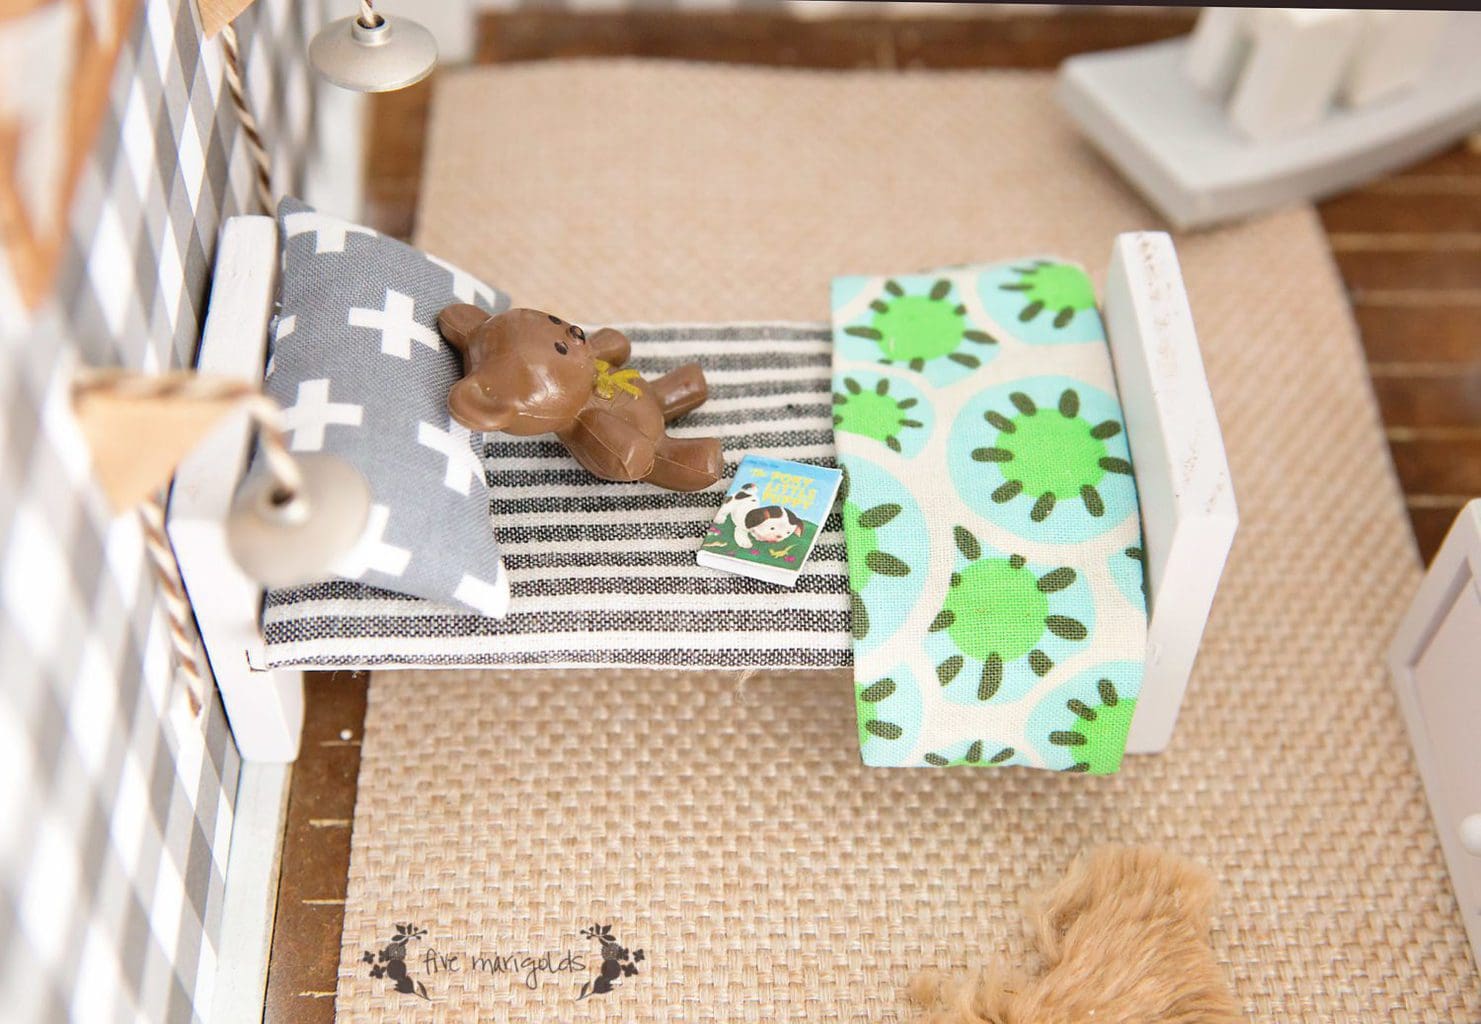
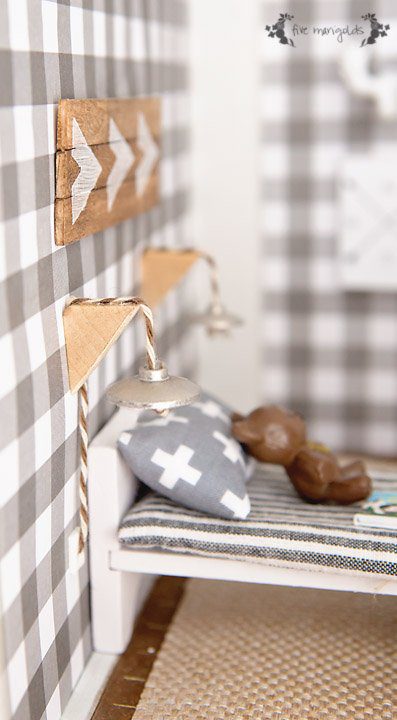
Above the bed, I created a pallet wood sign by staining and painting some popsicle sticks.
I copied the rustic / industrial pendant lights I DIY’ed for my son’s room, using teeny triangles of wood, baker’s twine for electrical cords and spray painted Legos for the light fixtures. 
I created this simple compass wall art and, yes, sacrificed a toy plastic moose! It was as close as we had to a deer head.
I added shelves from yet another furniture set that you’ll see more of later in this dollhouse series. It was originally pink and light wood, so I spray painted the bottom half and stained the upper half – I love how it turned out! I created the globe out of a marble and painted it with colors I already had on hand. I used another Lego piece from my son’s stash for the base. I added books and record player from my childhood dollhouse, and folded some scrap fabric into linens.
I created the map from one I found online and shrunk to scale, using matchsticks and hemp twine to finish it off.
I finished the room with a rocking horse from the bedroom set that I painted to fit the scheme of the room.
I’m kind of loving the first finished room! I think I accomplished my goals to keep it simple, stylish and cheap.
Price Breakdown: Dollhouse Boy Room
The budget breakdown for this room is a little misleading because this particular room was pieced together from sets intended for other rooms. I’ll be reflecting those costs separately in future posts.
- Wallpaper $0.90
- Jute Rug: $1
- Furniture: $0**
- Bedding: $0*
- Art, lights and accessories: $0*
- TOTAL = $1.90
*Used materials I already had on hand.
**Furniture for this room was pieced together from sets from other rooms, and will be reflected in those posts.
Did you like my dollhouse makeover so far? Be sure to subscribe to get more updates on the dollhouse renovations and follow my Pinterest dollhouse inspiration board. In the meantime, follow my other vintage dollhouse makeover posts here:
Vintage Dollhouse Makeover Part I Vintage Dollhouse, Part II Exterior, Part III Boy’s Room, Part IV Girl’s Room, Part V Laundry / Bathroom, Part VI Living Room, Part VII Kitchen, Part VIII Play Room + Final Reveal

Oh my word that it so cute!! The lego lights are my favorite!! Super good job! Can’t wait to see more!
So cute – love all the detail and that map is simply cool. I had a dollhouse when I was a little girl and it was the best. Favorite part was redecorating.
I agree, there is something special about dollhouses for little girls…and big girls, too 🙂
Oh I love this! Makes me want a dollhouse so I can do a little interior decorating. 🙂
This is amazing! I’m so impressed! Can I have the life size version of this room for my sons please?
I am so blown away by how beautiful this dollhouse turned out! The furnishings are so incredible! You’ve just done such an amazing job!
Featuring you on FB on Saturday afternoon. 🙂 Thanks for linking up to Party Junk!
Wow, thank you so much for the kind words and feature!! I’m thrilled! I’m having a lot of fun with this project. Up next: the girl’s room 🙂
You did a fantastic job! I am loving seeing everything coming together on this project 🙂
Thank you so much, Jenn! <3
This is so awesome!! I’m trying to re-vamp my childhood dollhouse for my little girl. Can you tell me what you used to affix the scrapbook paper to the walls? Is it holding up?
How fun! I tried several things, but what ended up doing the trick is the same thing that worked for my first dollhouse 30 (cough) years ago, similar to this: http://amzn.to/2bUoZBK. Actually, I used my original tub! Still works great after all these years.