
Today I’m bringing you Part II of my vintage dollhouse makeover.
You can find the rest of the Vintage Dollhouse Makeover series here: Part I Vintage Dollhouse, Part II Exterior, Part III Boy’s Room, Part IV Girl’s Room, Part V Laundry / Bathroom, Part VI Living Room, Part VII Kitchen, Part VIII Play Room + Final Reveal
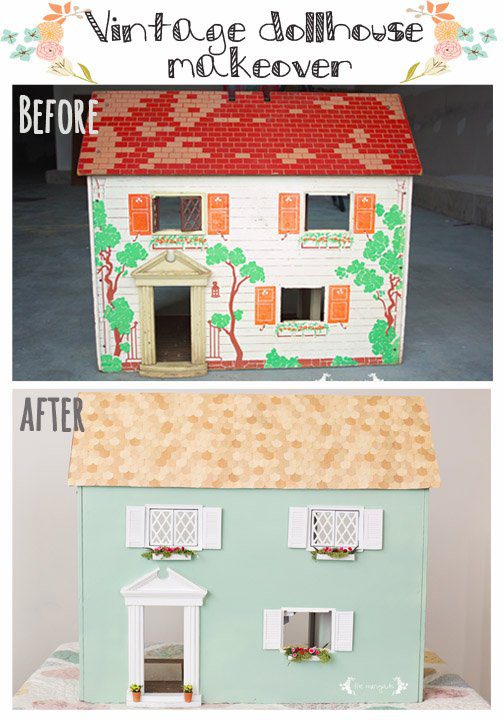
I think that you’re supposed to leave the exterior for the final “big reveal”, but I’m a rule breaker that way. That, and it happened to be the one part I could tackle while I waited for the interior furnishings to appear in the mail.
As I mentioned in my introductory post, I put myself on a budget for this project, so I needed to DIY it as much as possible, using supplies I already had on hand. Still, this portion of the makeover was the most costly, since all the paint used in the house is accounted for in this portion.
This post may contain affiliate links. Please read my privacy policy and disclosures.
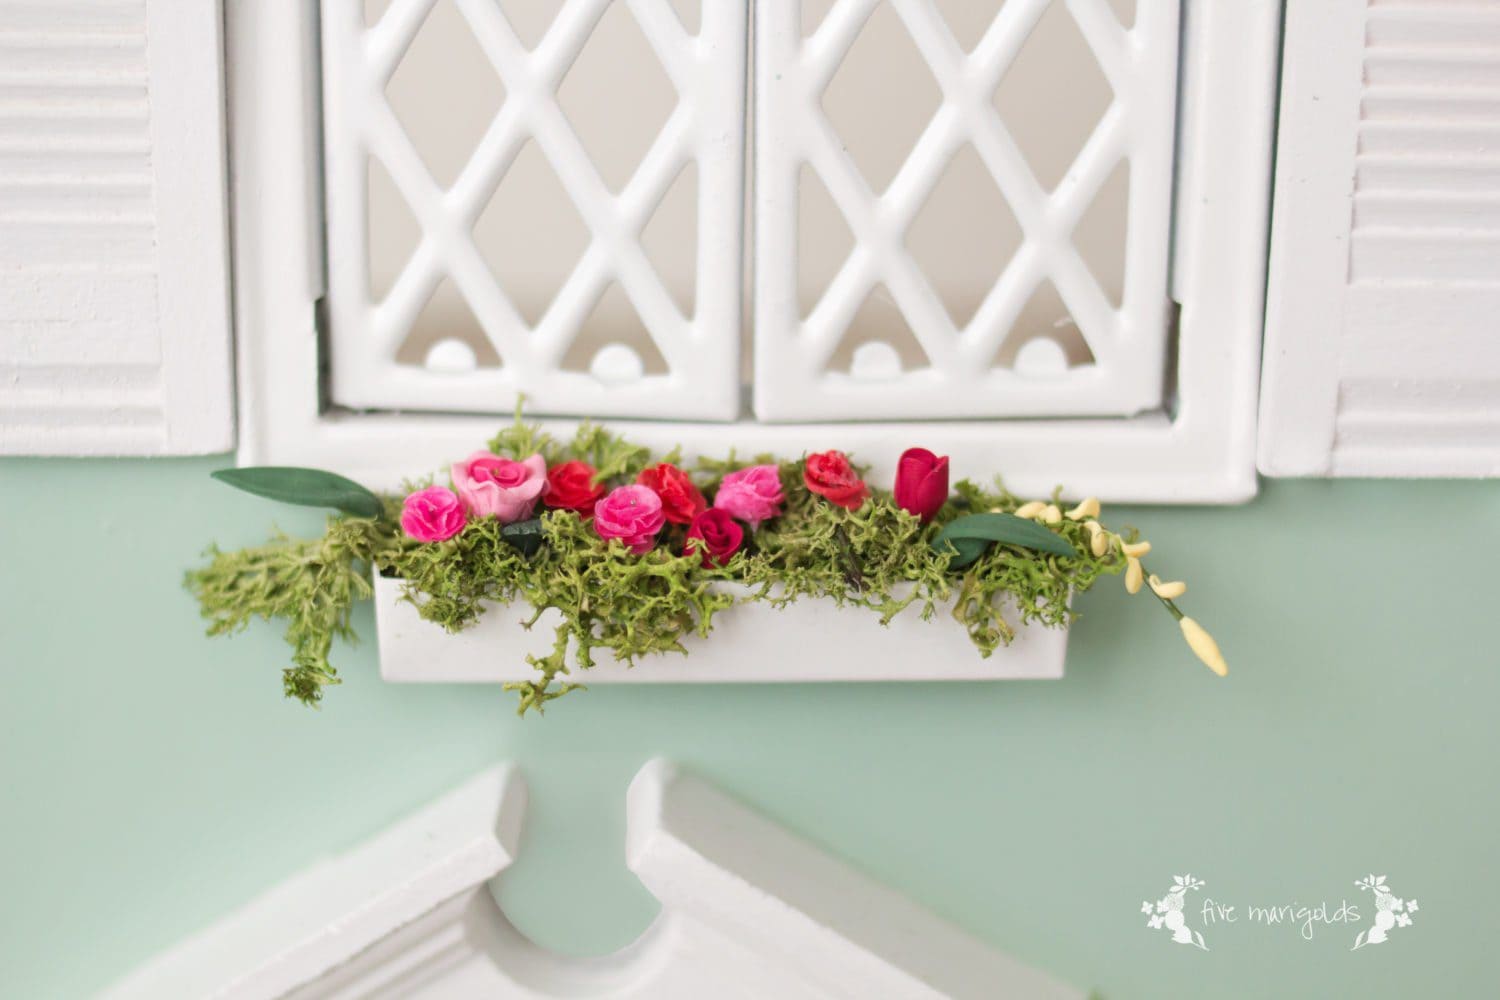
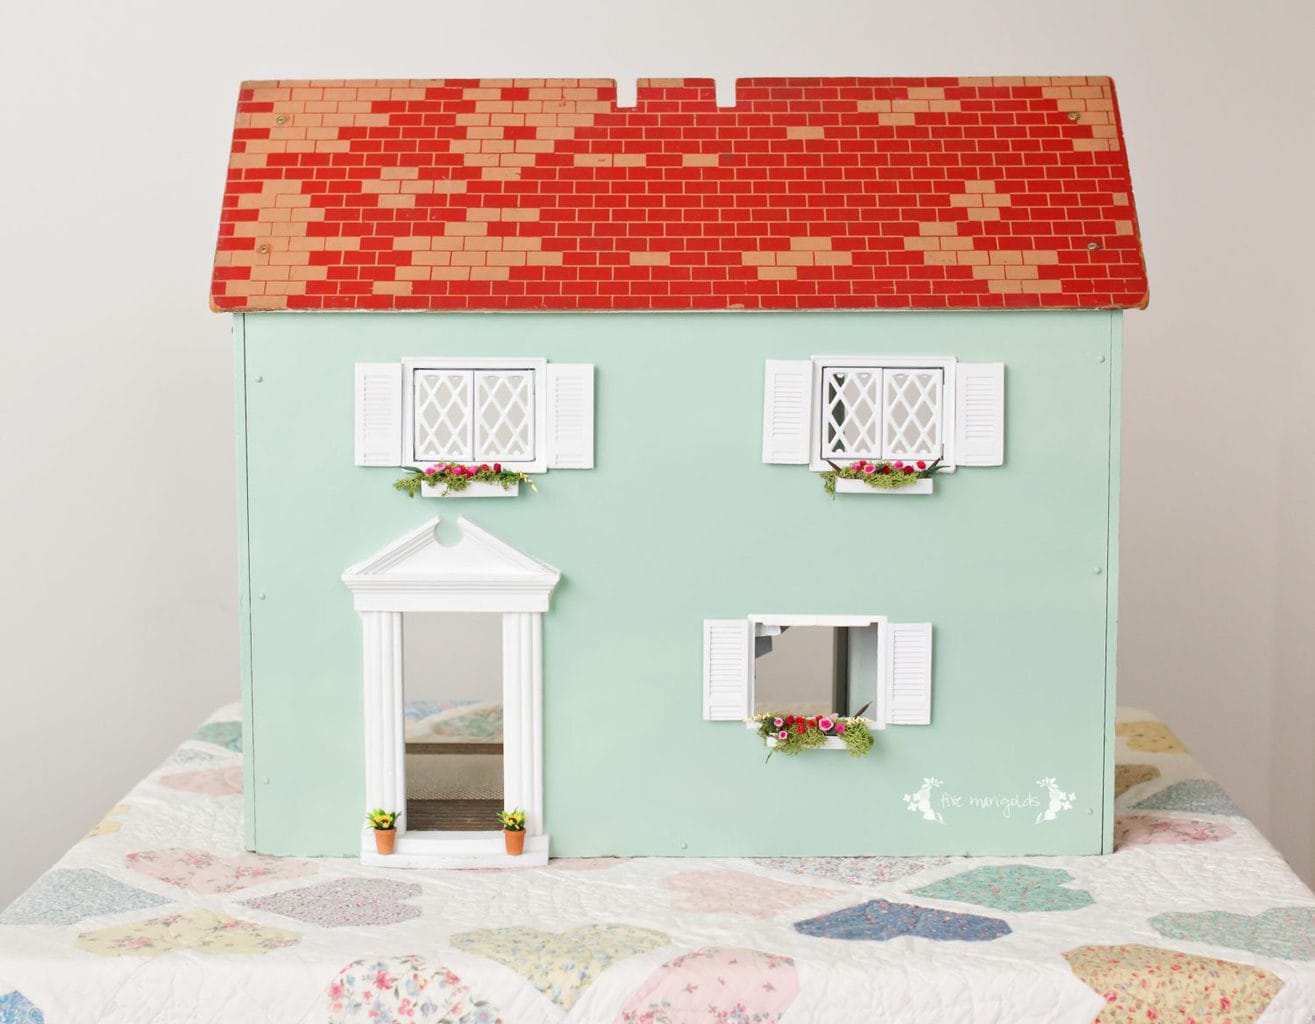
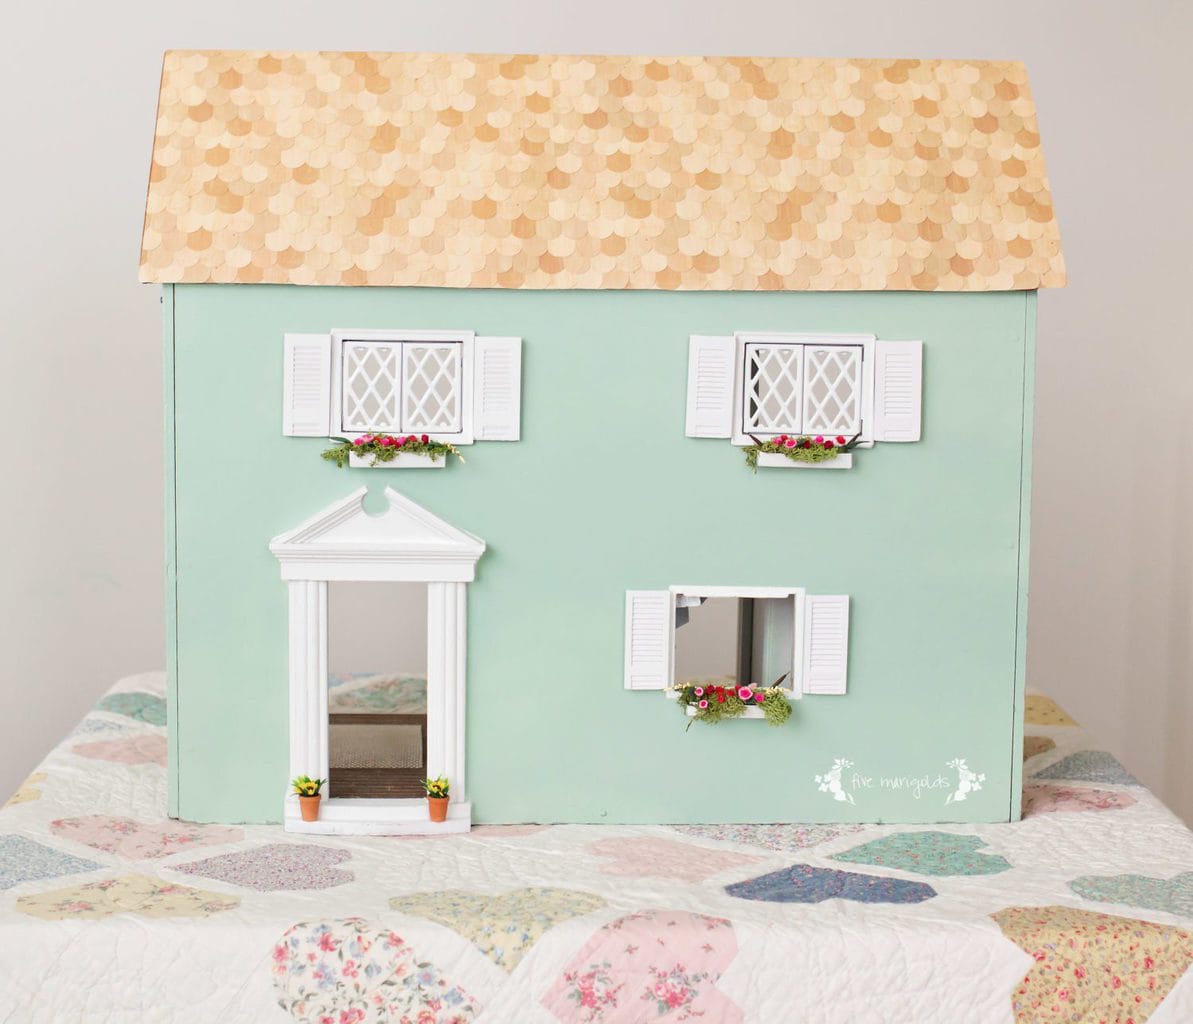
I started by removing the roof (psst…please read to the end to help me with the roof!) and having my husband spray paint the exterior with a mint green color I love. We painted the door frame and shutters white, using my favorite double coat spray paint. Since the house came with the bottom shutters missing, I added wood shutters to all the windows and painted a little border around the bottom window to make it look more balanced.
I wanted to add more color and dimension in the form of flowers, and for the sake of budget, I got creative with some window boxes. I cut the bottoms off of candy boxes and spray painted them white…after I ate all the candy myself. #sacrifice
I filled the boxes with some of the kids’ Play-Doh, and covered that with a layer of sponge moss that I had in my craft drawer. 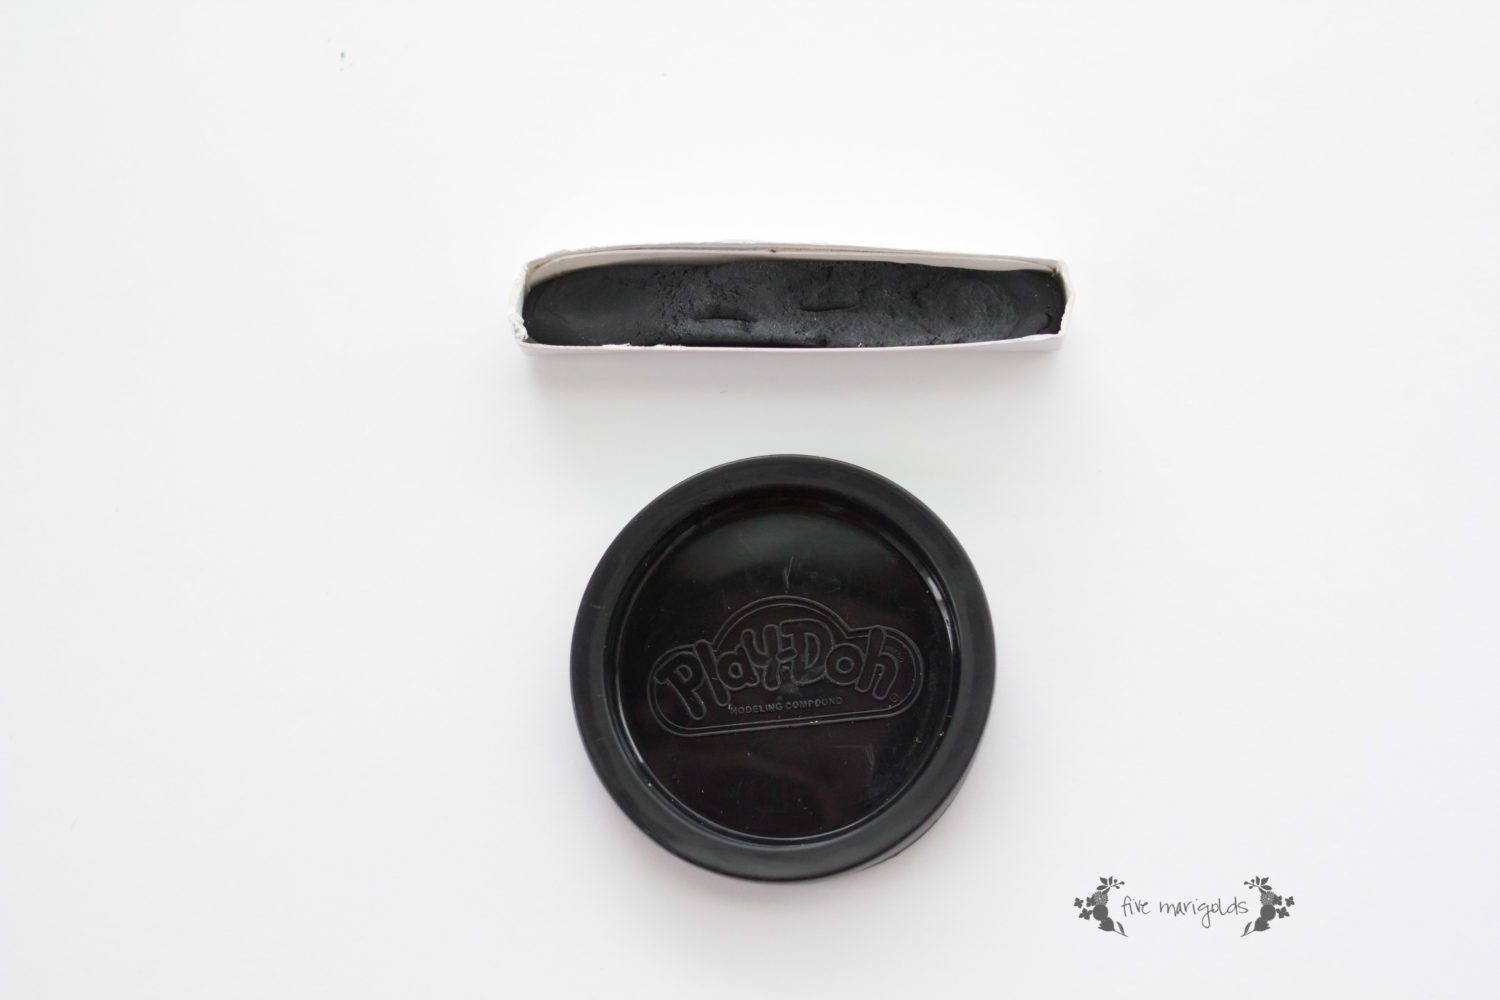
For the flowers, I did something a little crazy. I made about 20 carnations using some wire and tissue paper. Really.
I used a standard hole punch to punch circles out of various colors of tissue paper – about 10 layers at a time. Then, I used a push pin needle to punch a center hole into the stacks of circles I created from the hole punch.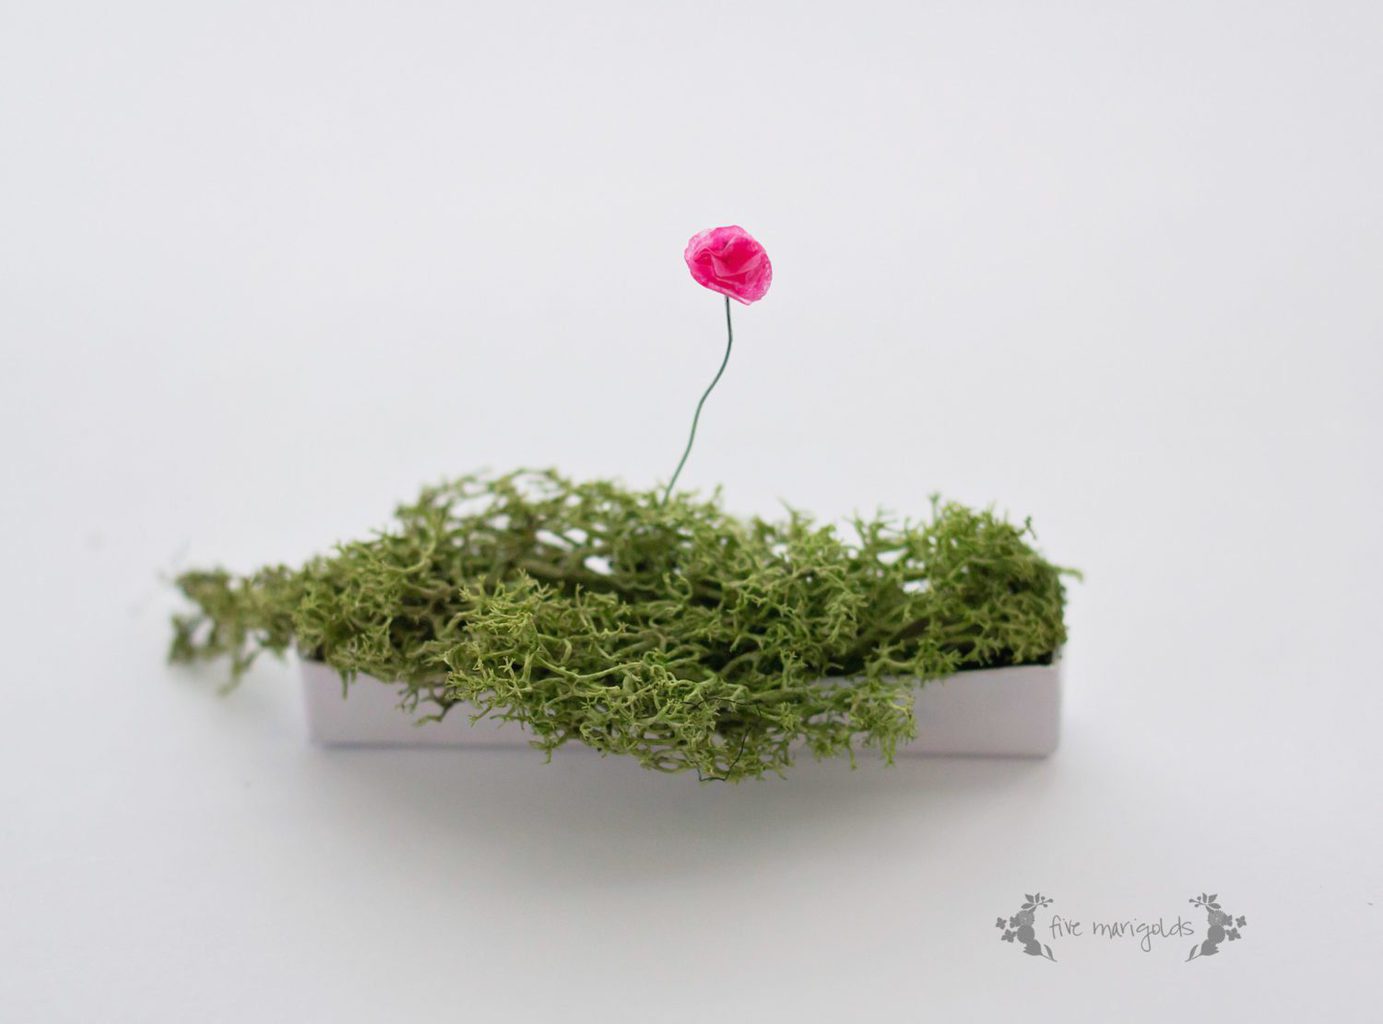
I cut the wire to 1″ pieces (to be trimmed down later, as needed). I first dropped some gorilla glue on the tip of the wire and covered that end with my first piece of paper. I then proceeded to thread the wire from the bottom, using about 10 circles, gluing between layers and crinkling each piece of tissue before adding the next. The result was surprisingly impressive, if I do say so myself.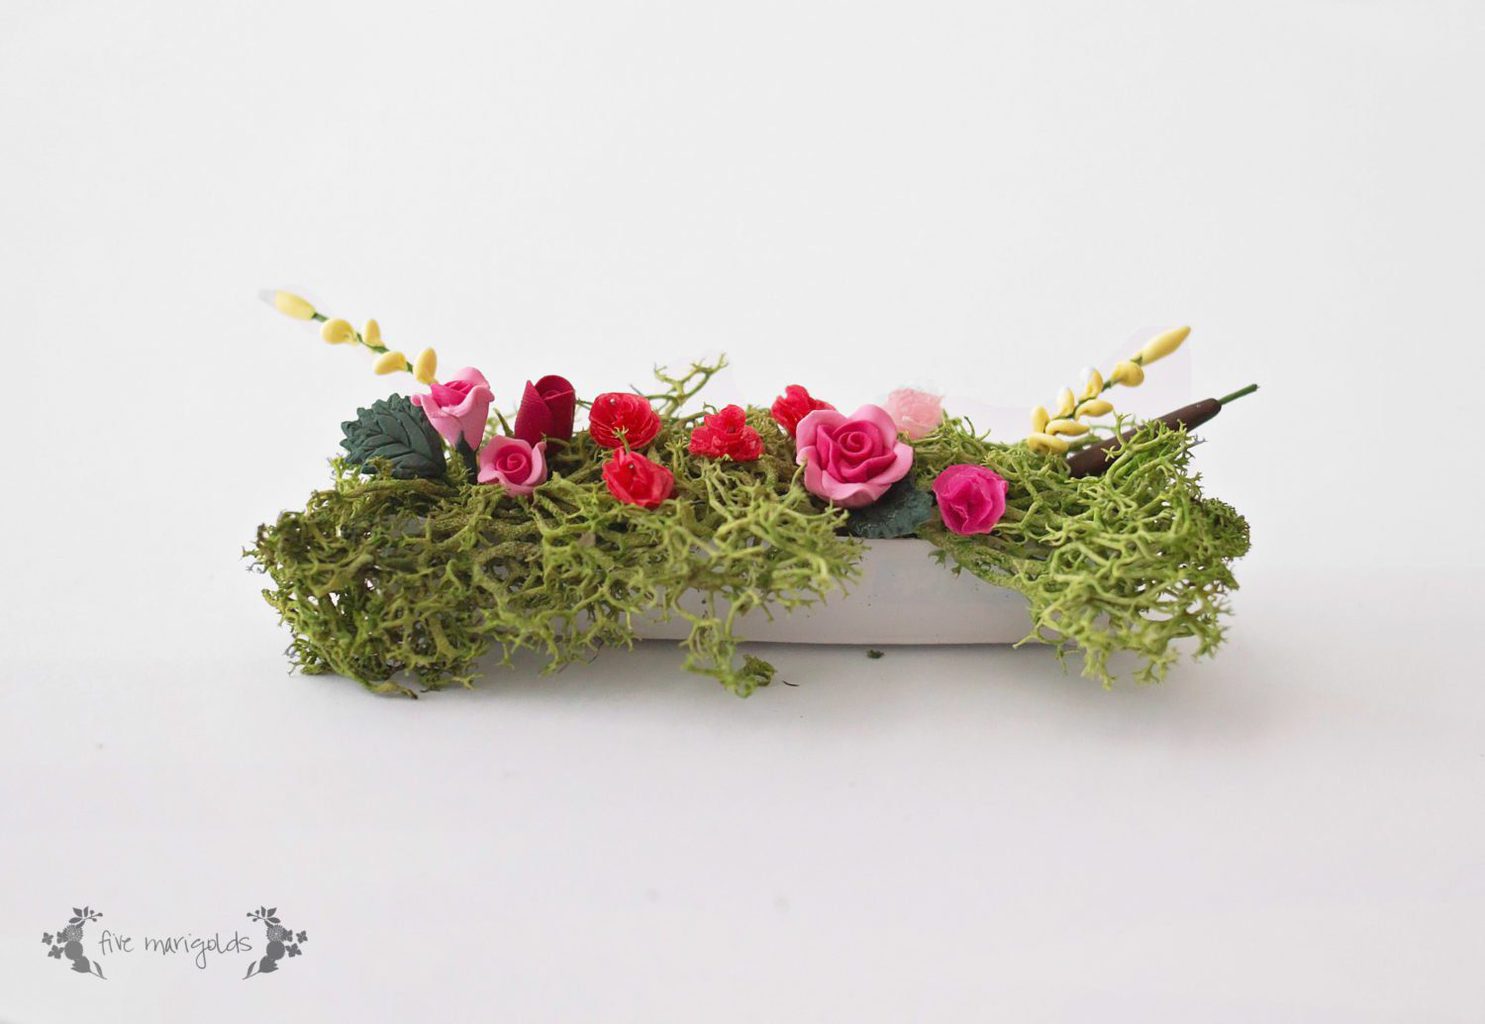
About 20 DIY flowers into the project, I found a miniature pitcher of flowers on sale and decided to finish the project by purchasing it and dividing it into all three window boxes. I love the resulting combination!
I finished the exterior with a couple pots of sunflowers that I got in the miniature section at Michael’s.
So here is where you come in: I need your help with the roof! I preserved this vintage roof because I see charm in it, and I totally think it works with the newly refreshed exterior. However, I do really like the look of this faux wood shingle roof. Please help me decide before I make a permanent decision: original, or wood shingle? Please vote and tell me in the comments below!
Price Breakdown – Exterior:
- Paint: $7
- Shutters: $4.50
- Flower pots: $3
- Roof (TBD): $0.87
- Window boxes/flowers: $3.50
- TOTAL = $18.87 (nearly half of my budget – the pressure is on, now!)
Did you like my remodel so far? Be sure to subscribe to get more updates on the dollhouse renovations and follow my Pinterest dollhouse inspiration board. In the meantime, follow my other vintage dollhouse makeover posts here:
Vintage Dollhouse Makeover Part I Vintage Dollhouse, Part II Exterior, Part III Boy’s Room, Part IV Girl’s Room, Part V Laundry / Bathroom, Part VI Living Room, Part VII Kitchen, Part VIII Play Room + Final Reveal

Wow! Your flowers are really impressive. Actually, the whole thing is! I’m kind of torn on the roof. The wood is really cute, but I’m a sucker for vintage nostalgia…
Thanks so much, Keri! I’m having fun with this project.
Original roof!! So cute!
Thanks, Jen!
Love this!!
I like the vintage roof, myself. This is the kind of project I loved doing as a kid. Making the flowers was the kind of challenge that was so much fun, since I didn’t even think of buying things for my profects.
Oh, if there had been Pinterest and the internet, who knows where I would be creatively. Keep thinking creatively, you’re doing a nice job.
Such a cool project! And your work is meticulous. I also like the vintage roof. How fun!
Thank you, Jan!
You did such a fantastic job on this! Really! When I saw the before photo I thought it was the after at first… and I thought “no way..” Then I realized my error ha ha ha. I love it. It looks like something from a magazine. Just lovely <3 Thank you so much for sharing it on the #SundayBlogHop I've scheduled a few extra shares of this with my followers. I know they'll love it too!
Thank you so much for the lovely comment and for sharing, Jenn! If only I could paint that intricately! Ha!
Stopping my Pinterest browsing to immediately follow a link and comment on it is just not something I do, but this stopped me in my tracks! Unbelievably cute! I want to live there! I usually like old too but I vote for or the new roof 😉
Wow, Marianne, that is the highest compliment you could give! I’m so grateful you stopped by to tell me so.
I acquired a dolls house from my friend who had it made for her daughter 30 years ago. I have thatched the roof and I’d like to show it to you to see what you think (I’m new to dolls houses ). I cant upload a picture here though. Maybe I can email it to you.
That sounds amazing! I would love to see it!