
I absolutely love the look of these tinsel tassel banners for party decor. Even better? They’re super easy and inexpensive to make – just in time to decorate in the spirit of St. Patrick’s Day!
Tag: Tissue Paper
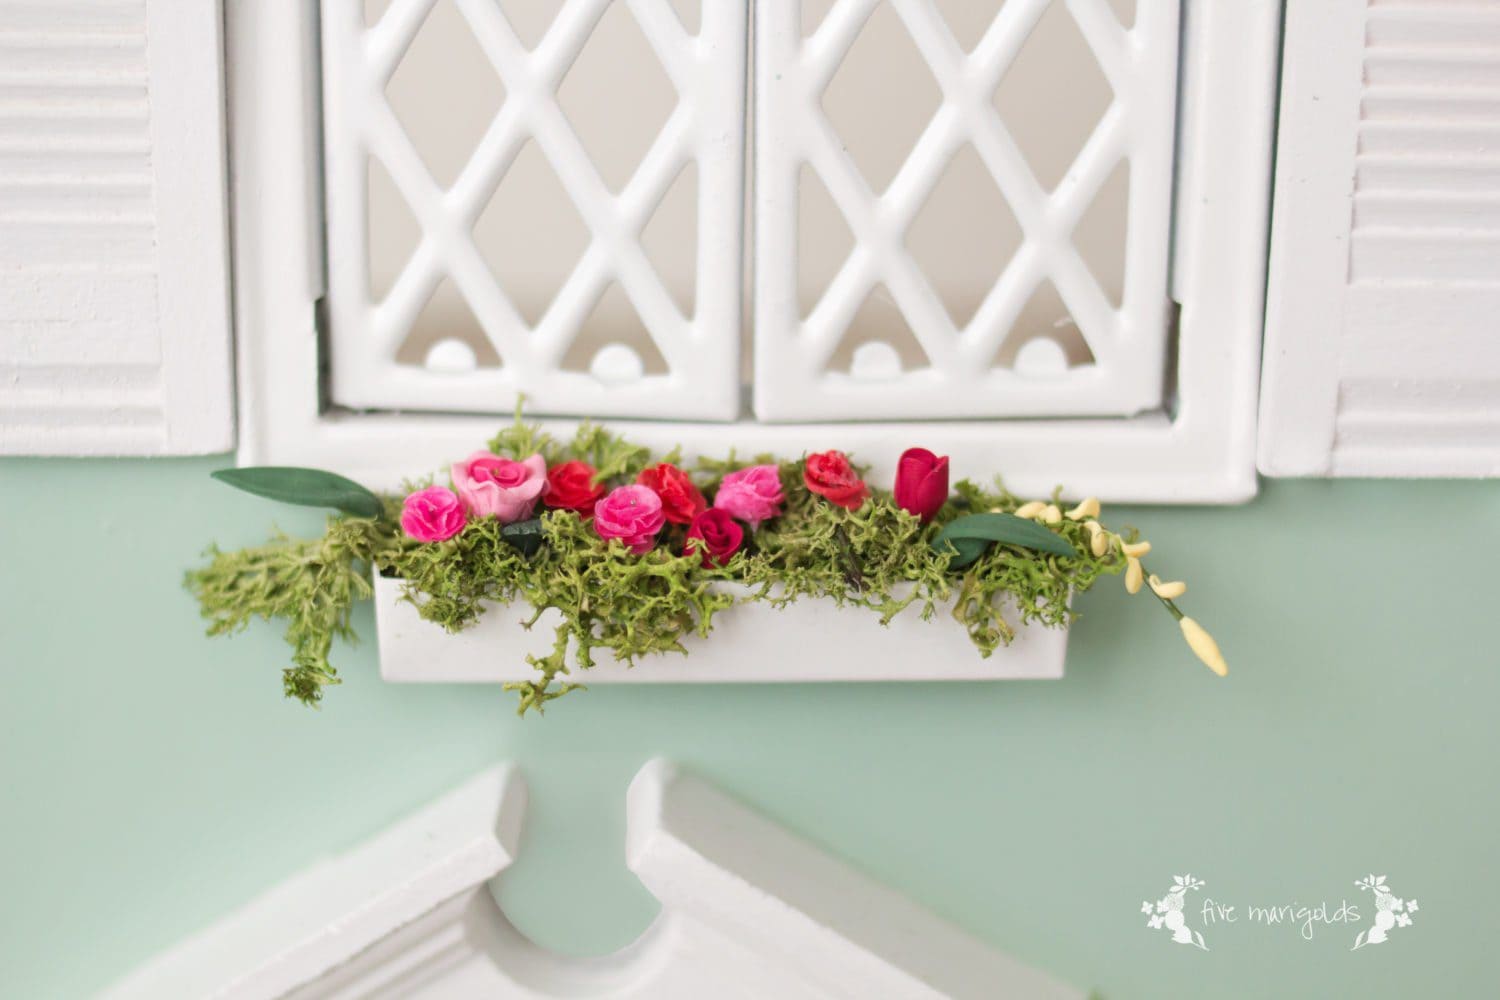
Vintage Dollhouse Makeover Part II: Exterior Facelift
Today I’m bringing you Part II of my vintage dollhouse makeover.
You can find the rest of the Vintage Dollhouse Makeover series here: Part I Vintage Dollhouse, Part II Exterior, Part III Boy’s Room, Part IV Girl’s Room, Part V Laundry / Bathroom, Part VI Living Room, Part VII Kitchen, Part VIII Play Room + Final Reveal
I think that you’re supposed to leave the exterior for the final “big reveal”, but I’m a rule breaker that way. That, and it happened to be the one part I could tackle while I waited for the interior furnishings to appear in the mail.
As I mentioned in my introductory post, I put myself on a budget for this project, so I needed to DIY it as much as possible, using supplies I already had on hand. Still, this portion of the makeover was the most costly, since all the paint used in the house is accounted for in this portion.
Minecraft Birthday Party
This year, Dub wanted his party to be all about Minecraft. I didn’t want our home to look like it threw up Minecraft-licensed decor, so I went with something that we all could get excited about. We weren’t having a big celebration at home either, so I wanted to keep this simple and fairly inexpensive. 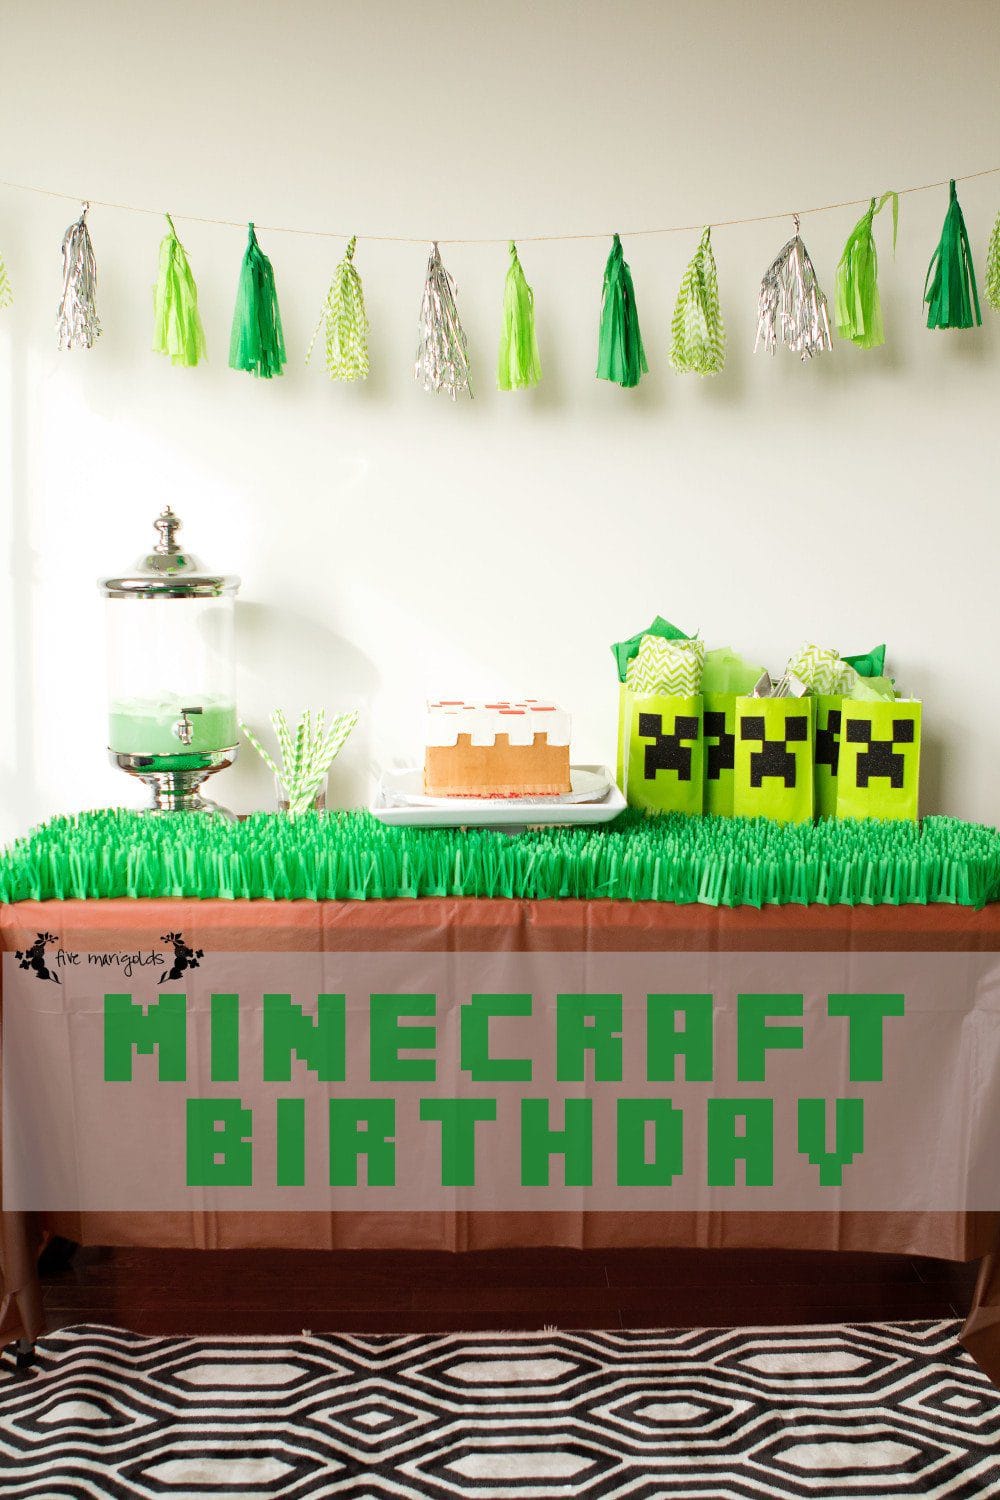
First: the centerpiece du jour: his Minecraft cake. Kind of a boring concept, but this is a representation of THE pixelated cake featured on the video game. I was more than happy to outsource this portion of the party and Dub was in love with how it turned out. It was exactly what he wanted!

Next, I created the theme using a brown dollar store tablecloth and some tissue paper “grass.” Super inexpensive for one package to cover this table, and the kids were fascinated by this!
I created a simple and inexpensive tissue paper bunting that added some visual interest in the party theme color (tutorial here).
Finally, I like to decorate with party favors, because it’s the decoration that cleans itself up as the guests leave.
I bought some green lunch bag sized paper bags and cut felt into the shape of a Creeper face. Really, this would have been so much easier with black construction paper and my Silhouette SD, but black felt was what I had on hand so that’s what I used.

I filled the bag with goodies like gold and silver ore, Mike & Ikes, a growing green bug, and I repurposed my Minecraft Valentine printable to wrap boxes of Nerds candy.
The highlight of the goodie bags was a Lego Steve creation I made with the help of Pinterest and the Lego Pick-A-Brick tool.

*This post contains affiliate links. Please read the full disclaimer on the right sidebar. Thank you for your support!
Find my other Minecraft Birthday Party posts here:

Minecraft Tinsel Tassel Bunting Tutorial

DIY Minecraft Lego Steve Favors
Tutorial: Tinsel Tassel Party Banner
I absolutely love the look of these tinsel tassel banners for party decor. Even better? They’re super easy and inexpensive to make.
Dub really wanted a Minecraft-themed birthday party, but I didn’t want a licensed decor explosion, so I began thinking of ways to decorate with color. With lots of Pinterest inspiration, I decided I wanted to give this a try. However, I was surprised to find there aren’t a lot of tutorials out there so I am sharing a quick and dirty tutorial of my own.
I set to work on this particular banner with four colors of tissue paper, green, lime green, chevron and silver metallic (I linked to some examples because I initially had a hard time finding these).
1) First, I took a stack of 8 sheets of tissue in each color and cut them the short length of the pre-cut sheets (approximately 20″) and cut them about 8″ wide.
2) I then folded the stack of sheets in half and began cutting them in 1/4″ strips, stopping about 1″ from the fold. I used a rotary cutter and mat to make quick and more precise work of this, but regular scissors will do.


3) I then unfolded the papers and, taking 2 sheets at a time, began rolling them tightly at the center. Once each set of 2 was rolled at the center I began gently twisting the rolled portion. Once it was lightly twisted I folded it in half and began twisting the rolled portions together. When you’re done it will look something like this. Perfectly imperfect.
4) Thread the tassels through a string or ribbon. I made a single simple knot at each tassel to keep them in place.

All in all, this was a pretty quick and easy project that took me maybe 20 minutes total to complete. I also love that if you source your papers from the dollar store, you could complete three of these banners for just $4! (meaning, each banner is just over $1, with plenty of paper to spare for favors or gifts). I have a feeling various themed tinsel banners will be showing up at more parties around here!
Dub’s party is not for a few more weeks, so I’m letting it hang on our mantle for St. Patrick’s Day. How’s that for multi-purpose party decor?
Find my other Minecraft Birthday Party posts here:

DIY Minecraft Birthday Party
DIY Minecraft Lego Steve Favors