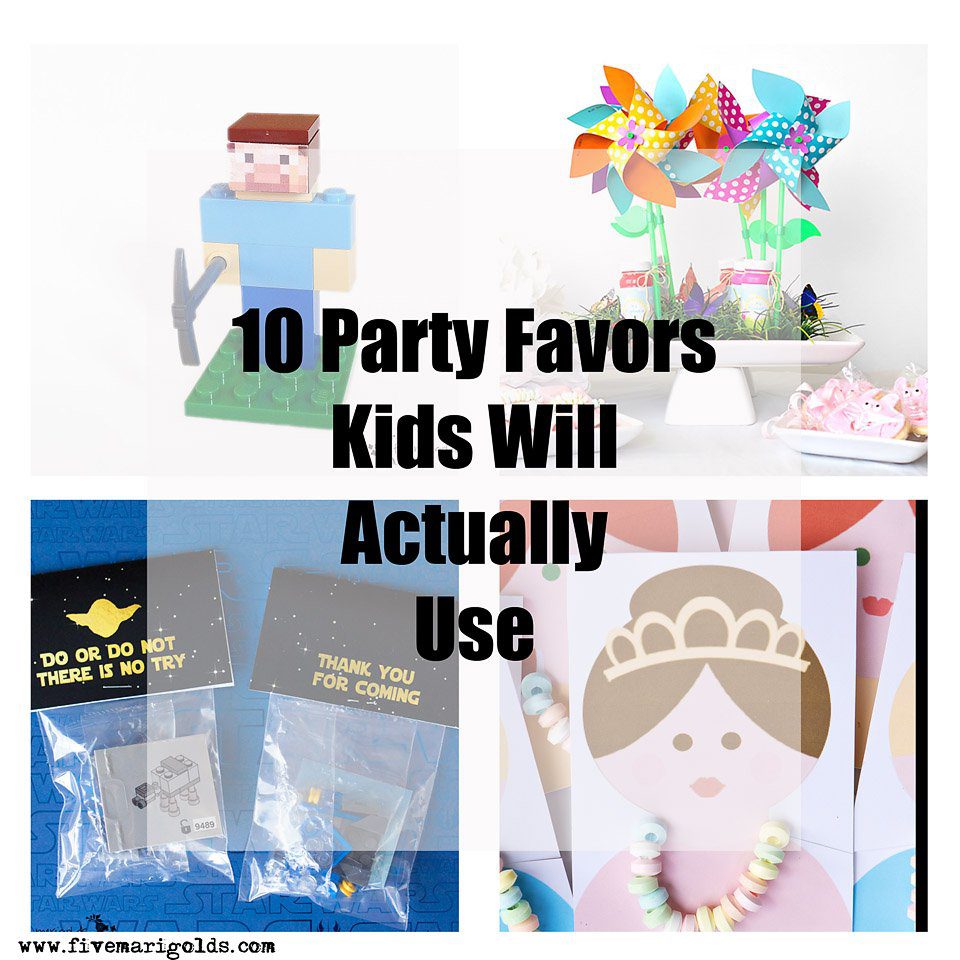
Birthday Party Favor Ideas You Should Steal
Looking for creative birthday party favors that totally rock? These goodie bag ideas will make you look like a creative super-mom, and won’t break the bank.
Looking for creative birthday party favors that totally rock? These goodie bag ideas will make you look like a creative super-mom, and won’t break the bank.
Plan the ultimate Peppa Pig picnic party with these Peppa Pig birthday party ideas.
When planning my youngest’s 3rd birthday, it was a no-brainer to choose a Peppa Pig theme. She loves the show and her favorite outfit has Peppa on it.
After researching lots of Peppa Pig birthday party ideas, I came up with a picnic theme. Since her birthday is in March, we brought the outdoors indoors for the celebration!
When guests entered our home for the party, they were invited to try on a pair of rain boots for size to jump in muddy puddles.
I used inexpensive craft paper for the puddles and wrote, “We LOVE jumping in muddy puddles! Try on a pair for size and play with me!”
I absolutely love the look of these tinsel tassel banners for party decor. Even better? They’re super easy and inexpensive to make – just in time to decorate in the spirit of St. Patrick’s Day!

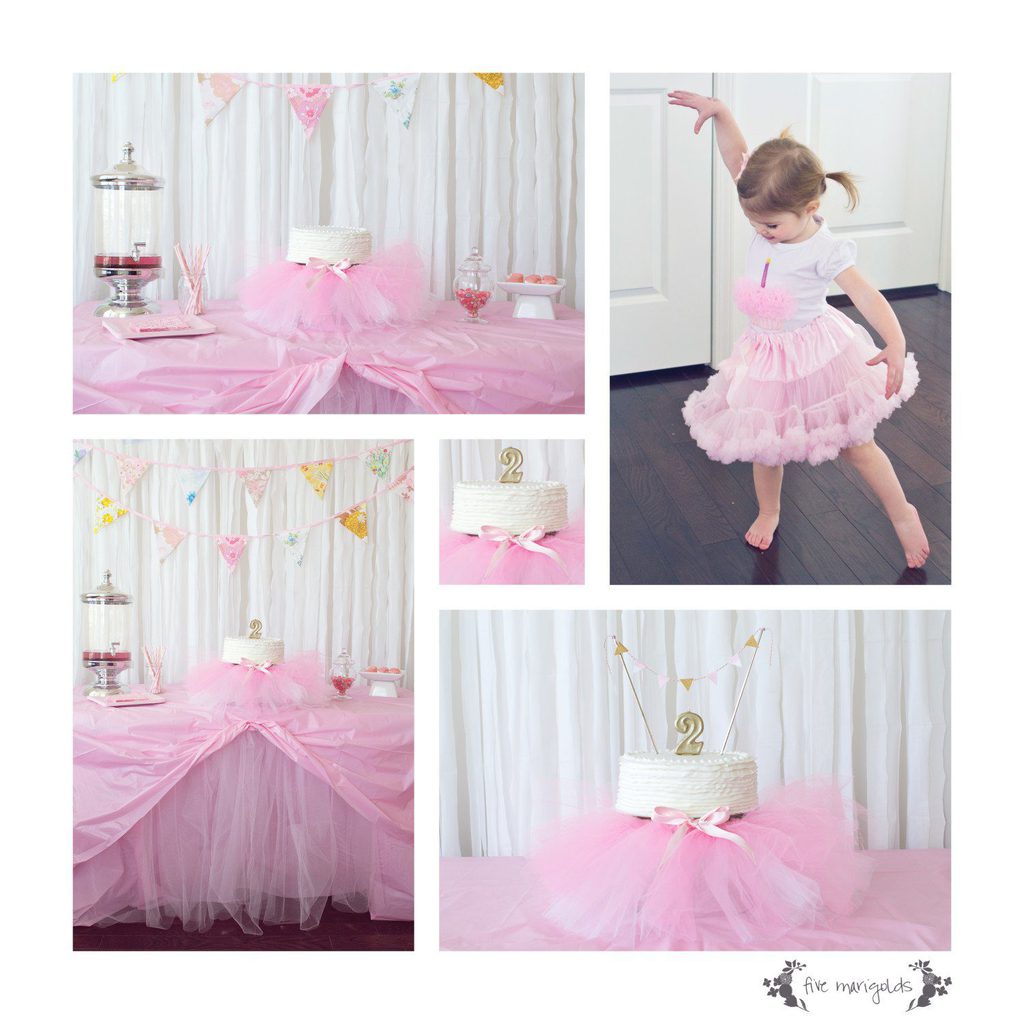
What could be better than a tutu birthday party for your little ballerina’s two year-old birthday?
For baby ‘Belle’s party, I wanted to do something that conveyed her love of dancing and tutus and looked special, but that was simple and inexpensive to put together.
First, for my $3 backdrop, I took 3 white plastic tablecloths from the dollar store for my backdrop. I simple folded them in half length wise, then began rolling them up toward the fold. Once the cloth was rolled approximately 10″ from the fold, I began cutting the rolled tablecloth in strips approximately 3″ apart. Easy!
I finished it off with the vintage bunting we re-use for the girls’ parties each year. I love how this small investment adds something special to every party we have for them.
Next, I layered the table with two tablecloths, sandwiched with some tulle. I had planned to make this an inexpensive “tutu tablecloth” but it didn’t quite turn out that way! No problem though – I still love the effect of the pink tulle as the focal point of the table. To finish it off, I placed the tablecloth over the top and bustled it at the center to better highlight the tulle.

Finally, I placed a trifle bowl upside down and I placed her own baby tutu around the bowl. Then, I just placed the cake on top. 
I’d ordered a the cake to looks similar this:
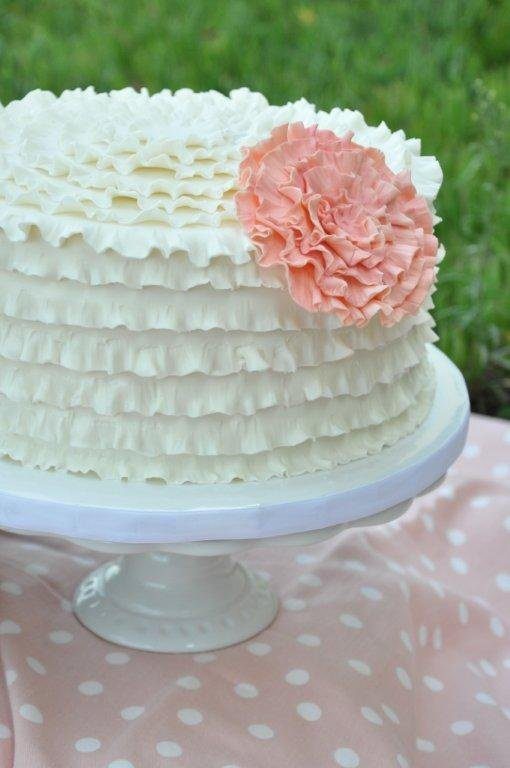
So, I was a little disappointed in the finished result from my local Target bakery.However, I really can’t complain for such an inexpensive cake…and really it looks so cute when it’s all propped out with this gold “2” candle and bunting.

We served ballerina punch, pink Jelly Bellys and dipped marshmallows for a birthday-worthy sugar buzz.
I hope you like ‘Belle’s tutu party fit for a two year-old ballerina. Thanks for stopping by!
For Dub’s birthday this year, he wanted everything Minecraft. He also loves Legos so, naturally, Lego Steve from Minecraft seemed like the perfect party favors.
I did a lot of research trying to find an easy way to do this. To be honest, I was hoping there would be a sale of Minecraft Lego lots on ebay that would allow me to phone this one in, but it was not to be.
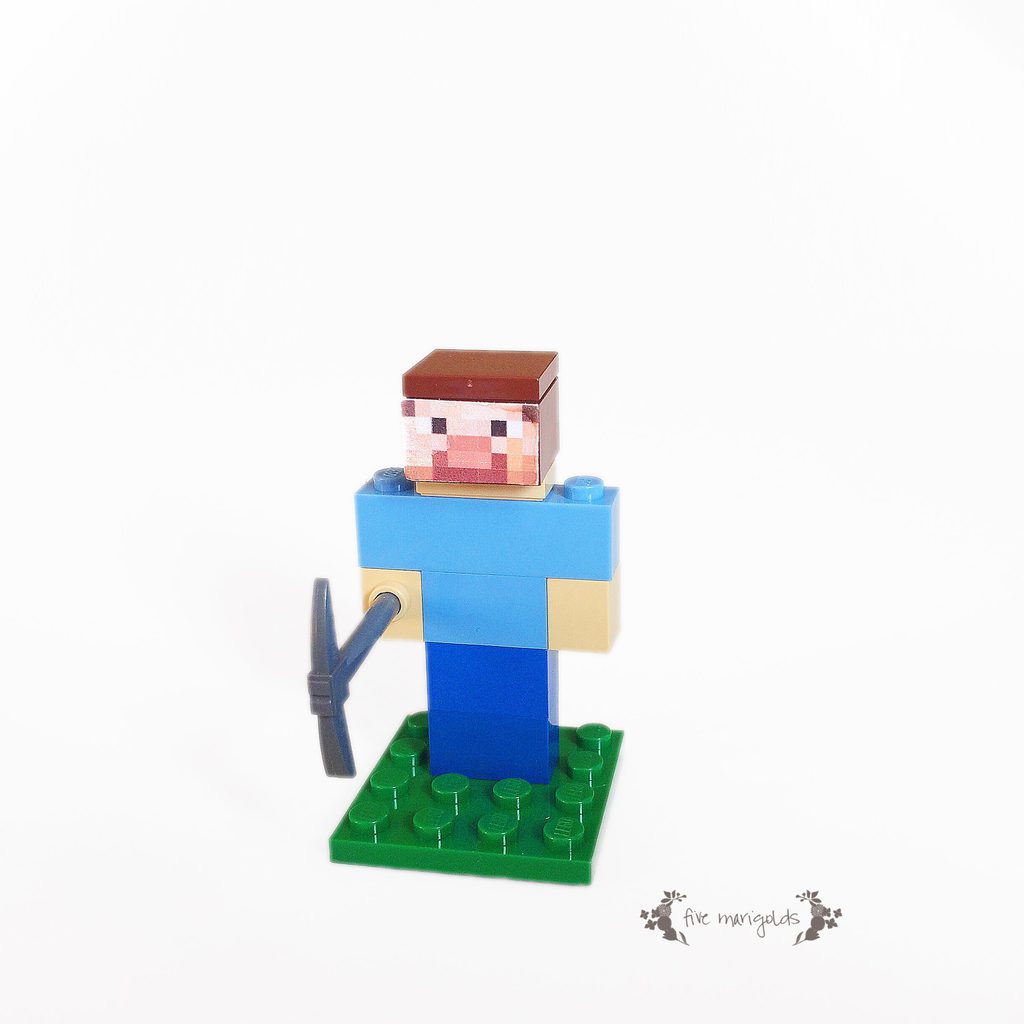
So, I ended up making a Minecraft Lego Steve myself using the Lego Pick-A-Brick feature.
While you can do this in-store if you have a Lego retail location near you, they have a varying selection, so I saved myself the trip and did my shopping online. I wanted to be able to have all the pieces I needed for Minecraft Steve! This is where I insert my Lego PSA – I found out after I placed my order that Pick-A-Brick orders can take up to 18 business days! That’s almost a month! So, this Lego Minecraft Steve favor only really works if you are planning out by at least a month to ensure your Bricks get to you in time.
Here’s what I ordered to make 15 favors:
Item#, color – quantity
For the pick axe, I had to go to Ebay where I got a great deal paying $1.47 total for 15 axes. That brought the total to $26.21 for 15 favors, or $1.74, each. (I didn’t see any swords or pick axes in the Pick-A-Brick section when I was ordering. They do have a “mini Fireman’s axe” or a “warrior weapon,” though.)
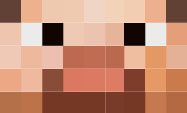
Then, I went to work making a face for Minecraft Steve in PhotoShop. I measured it to the size of the 2×2 Lego and then I printed it on Avery label paper. Removing the paper backing first, I cut down each face sticker to the exact size and then replaced it on a small square of the paper backing to place in the favor bag.
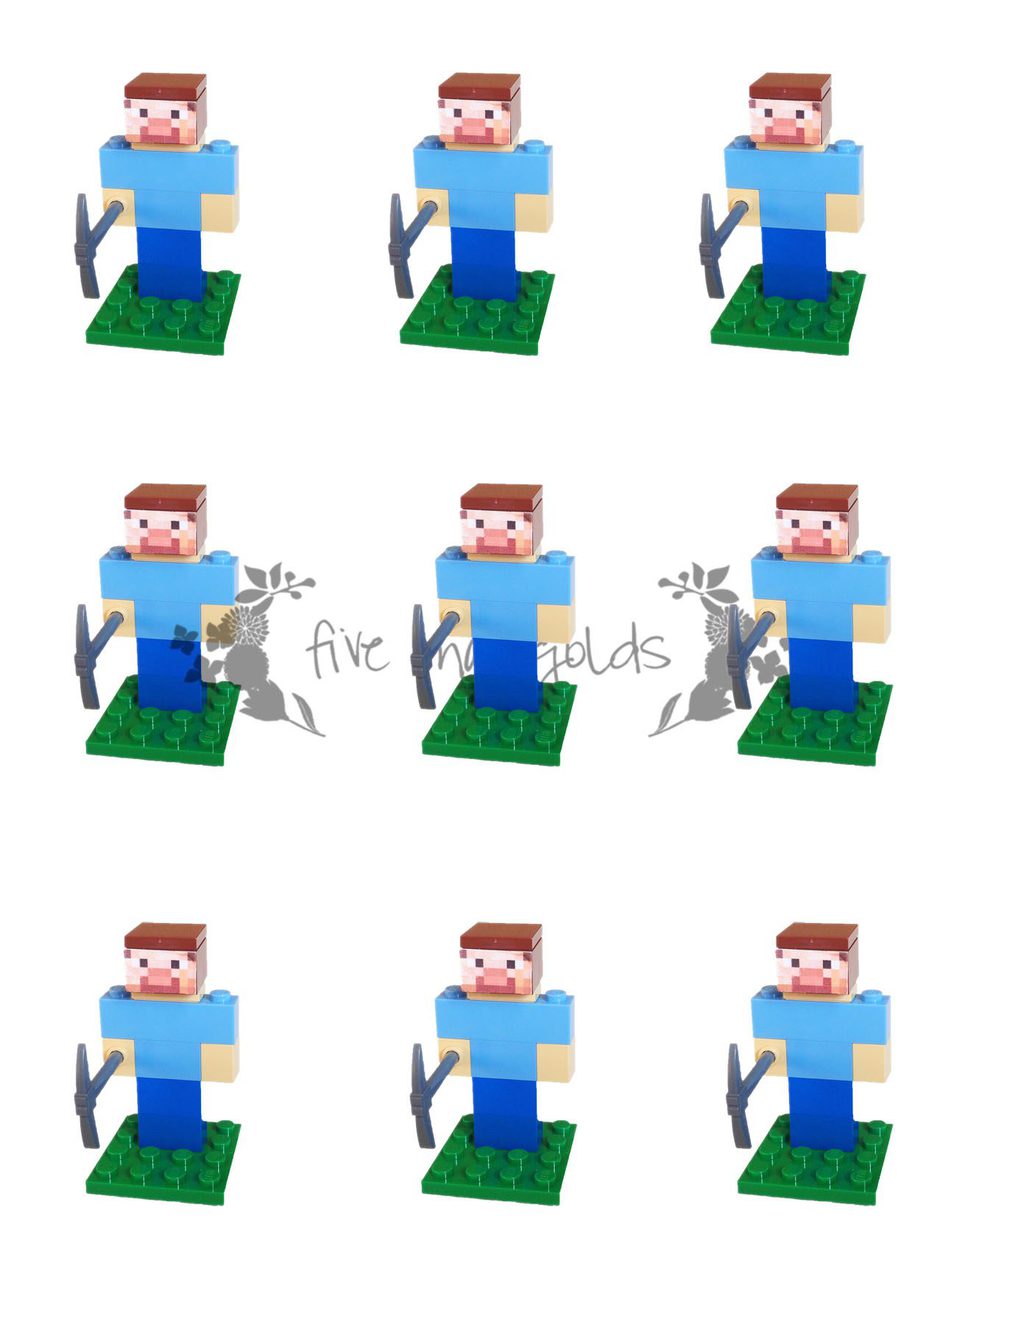
I took a photo of the complete Lego Minecraft Steve to include with all the kits. The kids had a lot of fun putting Lego Steve together while they were still at the party, and had a great time showing off their new toy when they were done.
I placed the Legos in a small jewelry ziplock bag. Then, I made a simple tag that I stapled to the top of the sealed bag as a finishing touch.

This was a huge hit among the 6 and 7 year old crowd!
While this Lego Minecraft Steve party favor does take a bit of advanced planning, you and your child will will have so much fun sharing these unique and fun activities for the kids to do!
Thinking of making a Lego Steve for your Minecrafter’s party? You can get a head start by downloading Steve’s face here (compatible with Avery 5260* labels), the finished Steve image inserts here, and the favor tags here. Enjoy!
MORE FREE MINECRAFT PRINTABLES: Like these printables? Be sure to check out my other free Minecraft Printables here and here.
Find my other Minecraft Birthday Party posts here:

DIY Minecraft Birthday Party

Minecraft Tinsel Tassel Bunting Tutorial
This year, Dub wanted his party to be all about Minecraft. I didn’t want our home to look like it threw up Minecraft-licensed decor, so I went with something that we all could get excited about. We weren’t having a big celebration at home either, so I wanted to keep this simple and fairly inexpensive. 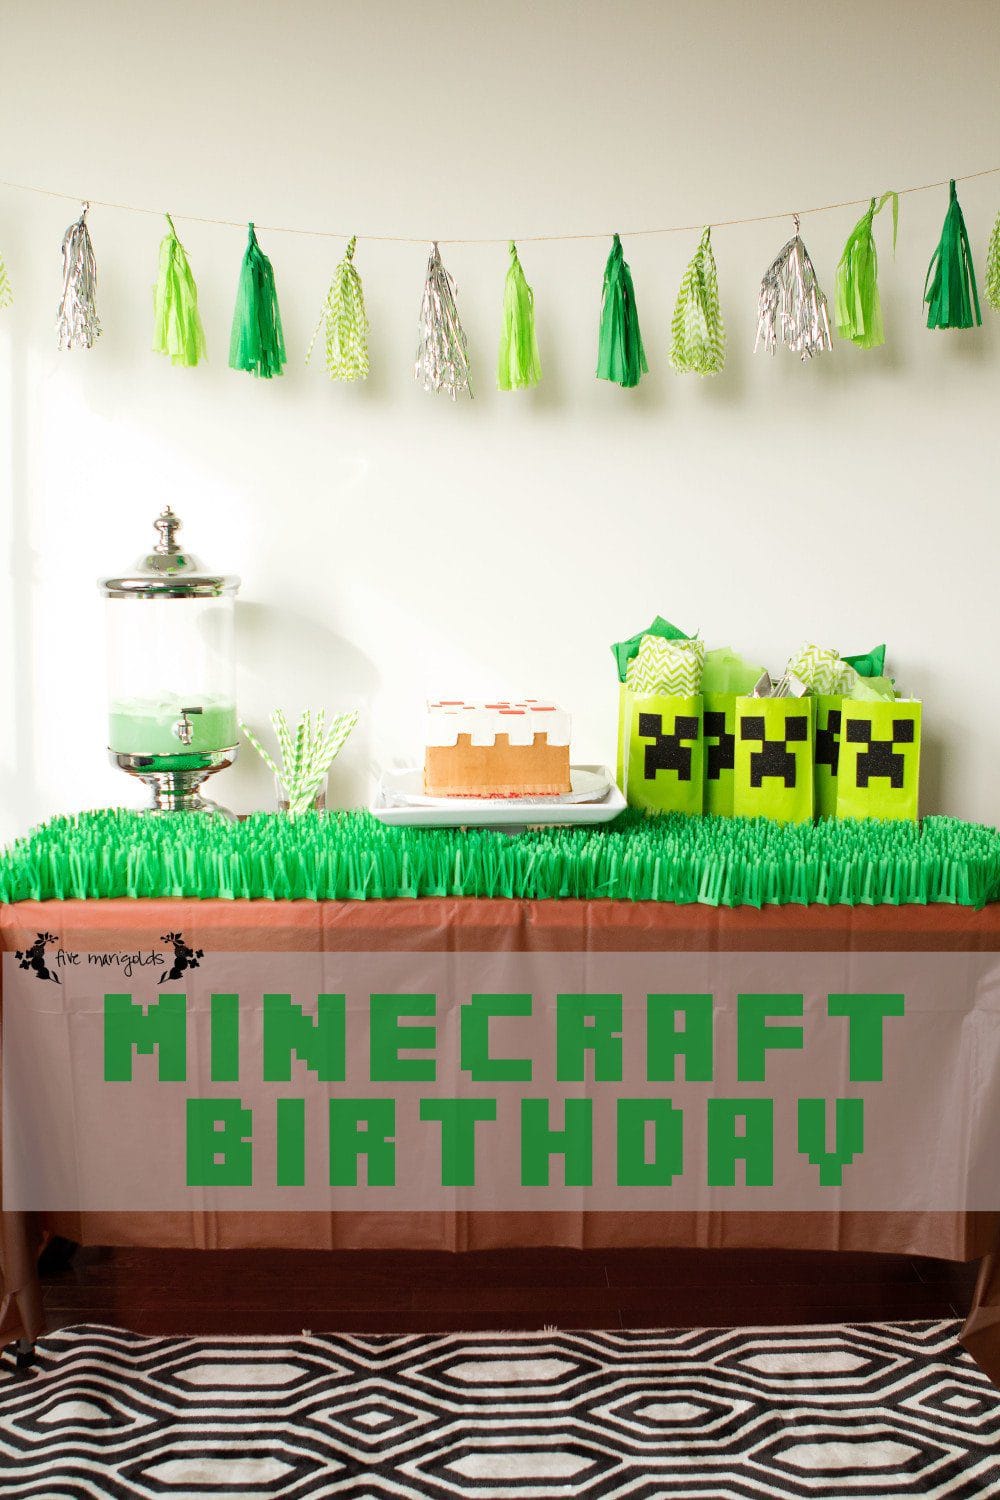
First: the centerpiece du jour: his Minecraft cake. Kind of a boring concept, but this is a representation of THE pixelated cake featured on the video game. I was more than happy to outsource this portion of the party and Dub was in love with how it turned out. It was exactly what he wanted!

Next, I created the theme using a brown dollar store tablecloth and some tissue paper “grass.” Super inexpensive for one package to cover this table, and the kids were fascinated by this!
I created a simple and inexpensive tissue paper bunting that added some visual interest in the party theme color (tutorial here).
Finally, I like to decorate with party favors, because it’s the decoration that cleans itself up as the guests leave.
I bought some green lunch bag sized paper bags and cut felt into the shape of a Creeper face. Really, this would have been so much easier with black construction paper and my Silhouette SD, but black felt was what I had on hand so that’s what I used.

I filled the bag with goodies like gold and silver ore, Mike & Ikes, a growing green bug, and I repurposed my Minecraft Valentine printable to wrap boxes of Nerds candy.
The highlight of the goodie bags was a Lego Steve creation I made with the help of Pinterest and the Lego Pick-A-Brick tool.

*This post contains affiliate links. Please read the full disclaimer on the right sidebar. Thank you for your support!
Find my other Minecraft Birthday Party posts here:
Minecraft Tinsel Tassel Bunting Tutorial

DIY Minecraft Lego Steve Favors
I absolutely love the look of these tinsel tassel banners for party decor. Even better? They’re super easy and inexpensive to make.
Dub really wanted a Minecraft-themed birthday party, but I didn’t want a licensed decor explosion, so I began thinking of ways to decorate with color. With lots of Pinterest inspiration, I decided I wanted to give this a try. However, I was surprised to find there aren’t a lot of tutorials out there so I am sharing a quick and dirty tutorial of my own.
I set to work on this particular banner with four colors of tissue paper, green, lime green, chevron and silver metallic (I linked to some examples because I initially had a hard time finding these).
1) First, I took a stack of 8 sheets of tissue in each color and cut them the short length of the pre-cut sheets (approximately 20″) and cut them about 8″ wide.
2) I then folded the stack of sheets in half and began cutting them in 1/4″ strips, stopping about 1″ from the fold. I used a rotary cutter and mat to make quick and more precise work of this, but regular scissors will do.


3) I then unfolded the papers and, taking 2 sheets at a time, began rolling them tightly at the center. Once each set of 2 was rolled at the center I began gently twisting the rolled portion. Once it was lightly twisted I folded it in half and began twisting the rolled portions together. When you’re done it will look something like this. Perfectly imperfect.
4) Thread the tassels through a string or ribbon. I made a single simple knot at each tassel to keep them in place.

All in all, this was a pretty quick and easy project that took me maybe 20 minutes total to complete. I also love that if you source your papers from the dollar store, you could complete three of these banners for just $4! (meaning, each banner is just over $1, with plenty of paper to spare for favors or gifts). I have a feeling various themed tinsel banners will be showing up at more parties around here!
Dub’s party is not for a few more weeks, so I’m letting it hang on our mantle for St. Patrick’s Day. How’s that for multi-purpose party decor?
Find my other Minecraft Birthday Party posts here:
DIY Minecraft Birthday Party
DIY Minecraft Lego Steve Favors
Planning Eve’s birthday party each year is always so much fun coming up with new themes. And this year we’re doing a Princess Birthday Party. Making adorable decorations and favor bags has been a blast. Get all the details on how to make these Princess party favor candy necklace cards for your next party!
There are so many princess birthday party ideas flooding the internet. After wading through endless princess stuff, I decided to use more of a traditional princess theme rather than a Disney princess party. I knew I wanted some custom party favors, but I didn’t really find anything out there I loved for purchase, so I decided I needed to create my own.
First up was the princess crown Candy Button favors. I love the nostalgic feel of the old-fashion candy combined with ultimate princess accessory.
Next up, candy necklace cards. These cute candy cards were the hit of the party. The girls just couldn’t love them more. Who wouldn’t love candy jewelry, right?


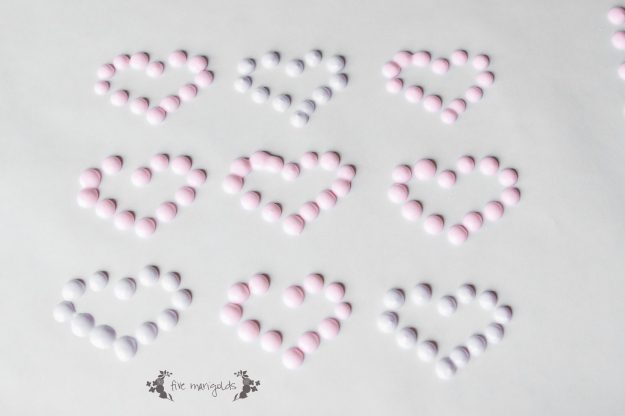
There’s just something about Candy Buttons. These nostalgic candies are surprisingly easy to make, and are perfect for birthdays, party favors, or just a fun sweet treat.
To make Candy Buttons, all you need to do is prepare a simple royal icing recipe. You can use the recipe listed on the can of Meringue Powder, but I used the following recipe, inspired by Sweet Sugarbelle:
What you’ll need:

To prepare:
Next, tear off a sheet of freezer paper – large enough that you can fit a large batch of buttons on (you won’t cut the paper until these are dry).
Fill your pastry bag (I used my Pampered Chef Decorator Bottle Set*) with frosting and twist the top, removing excess air. Now, simply pipe evenly sized dots across the paper. If possible, print a template in advance and place it below the freezer paper. Be sure that the design will fit into your final packaging. If you’re using pretzel bags for your packaging, your design will need to be approximately 2.15 x 5″ to fit the pretzel bags I would be placing them in.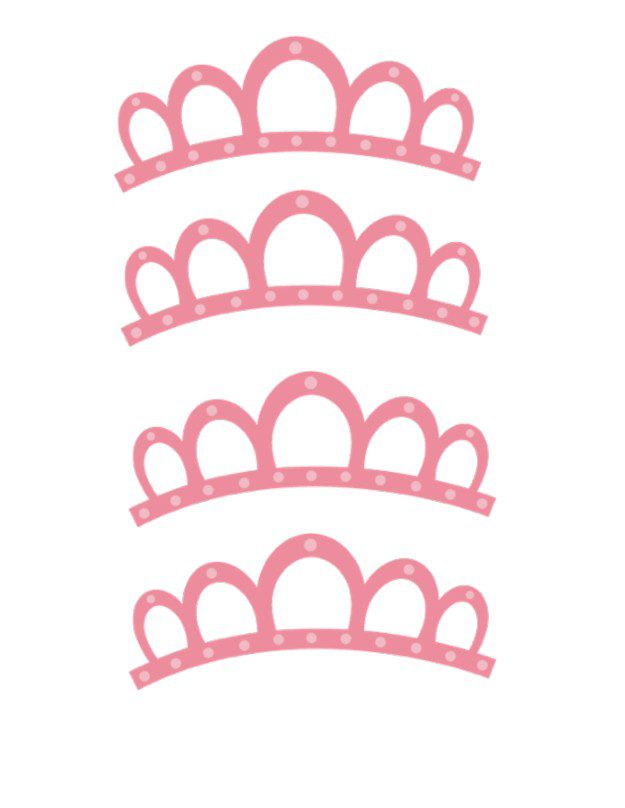
 Let the Buttons sit overnight to dry. Any excess frosting will keep in a resealable bag refrigerated for two weeks.
Now for the fun! Once the Buttons have set up overnight, you can begin cutting the freezer paper to your desired shapes.
Package your Candy Buttons for the occasion. I placed them in Wilton pretzel bags that I got at JoAnn’s for $1.37 using my 40% off coupon. Think of the possibilities! Birthday party favors, Valentines, and more!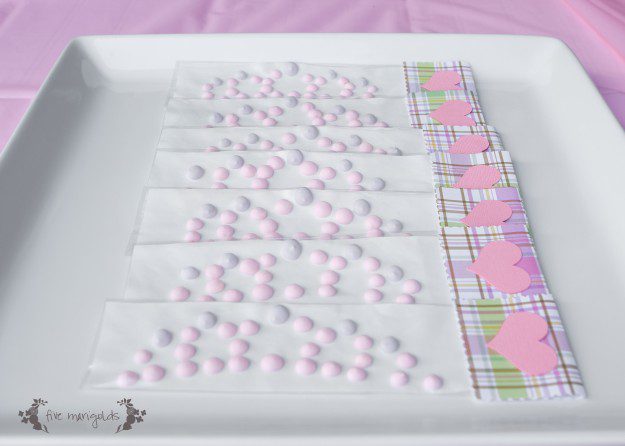

In addition to being featured on the fab blogs listed on the right of this blog, this post was also featured on Huckleberry Love.
Wow, I can’t believe how time flies. As little Dub’s birthday approached, I knew his would have to be a superhero theme, but I wanted it to be less focused on commercial super heroes and a little more of a generic comic book vibe.
To set the tone, I set off to create a comic book – inspired invite. I coerced him into taking a Clark Kent/super man photo. I just had him wear his Superman pajama shirt under a button down and snap on tie and then put on a pair of glasses frames I got at the dollar store. I went to work in PhotoShop and created this invite. I used PhotoShop action that made him look like a true comic book character.

Next, I wanted to make a comic book pendant. I was very pregnant and on bed rest while planning the party, so I enlisted my mom for help. I bought a comic book off ebay, cut the comic pages into triangles and placed them inside the fold of some red binding I had on hand. Then she simply sewed along the binding and voila! Dub liked this so much he asked to hang it in his room after the party.

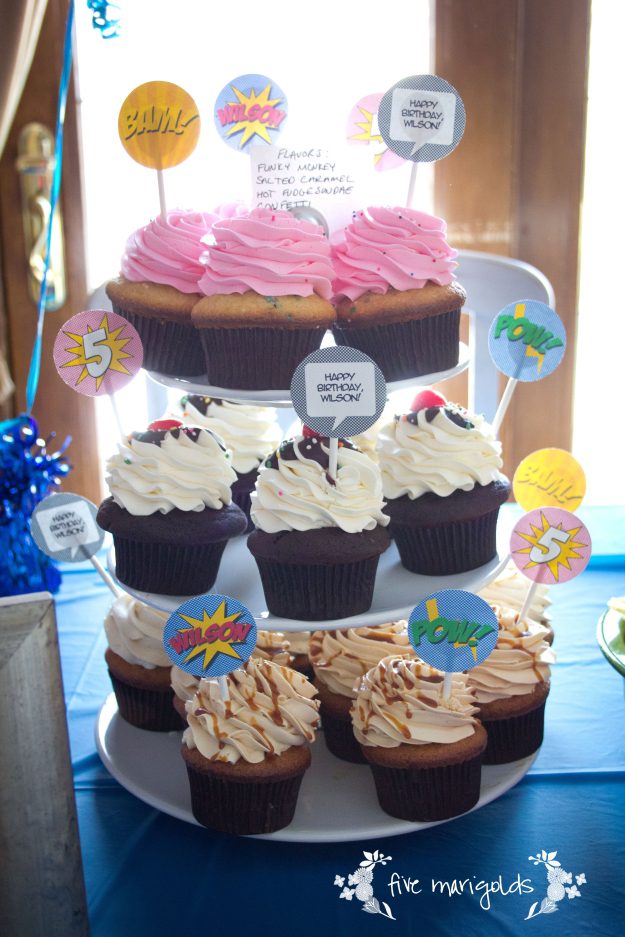
Again, since I was very pregnant I decided to hire out the cake in the form of some amazing cupcakes from our local bakery. I made cupcake toppers in PhotoShop and attached them to lollipop sticks I found at Michael’s in the baking section.
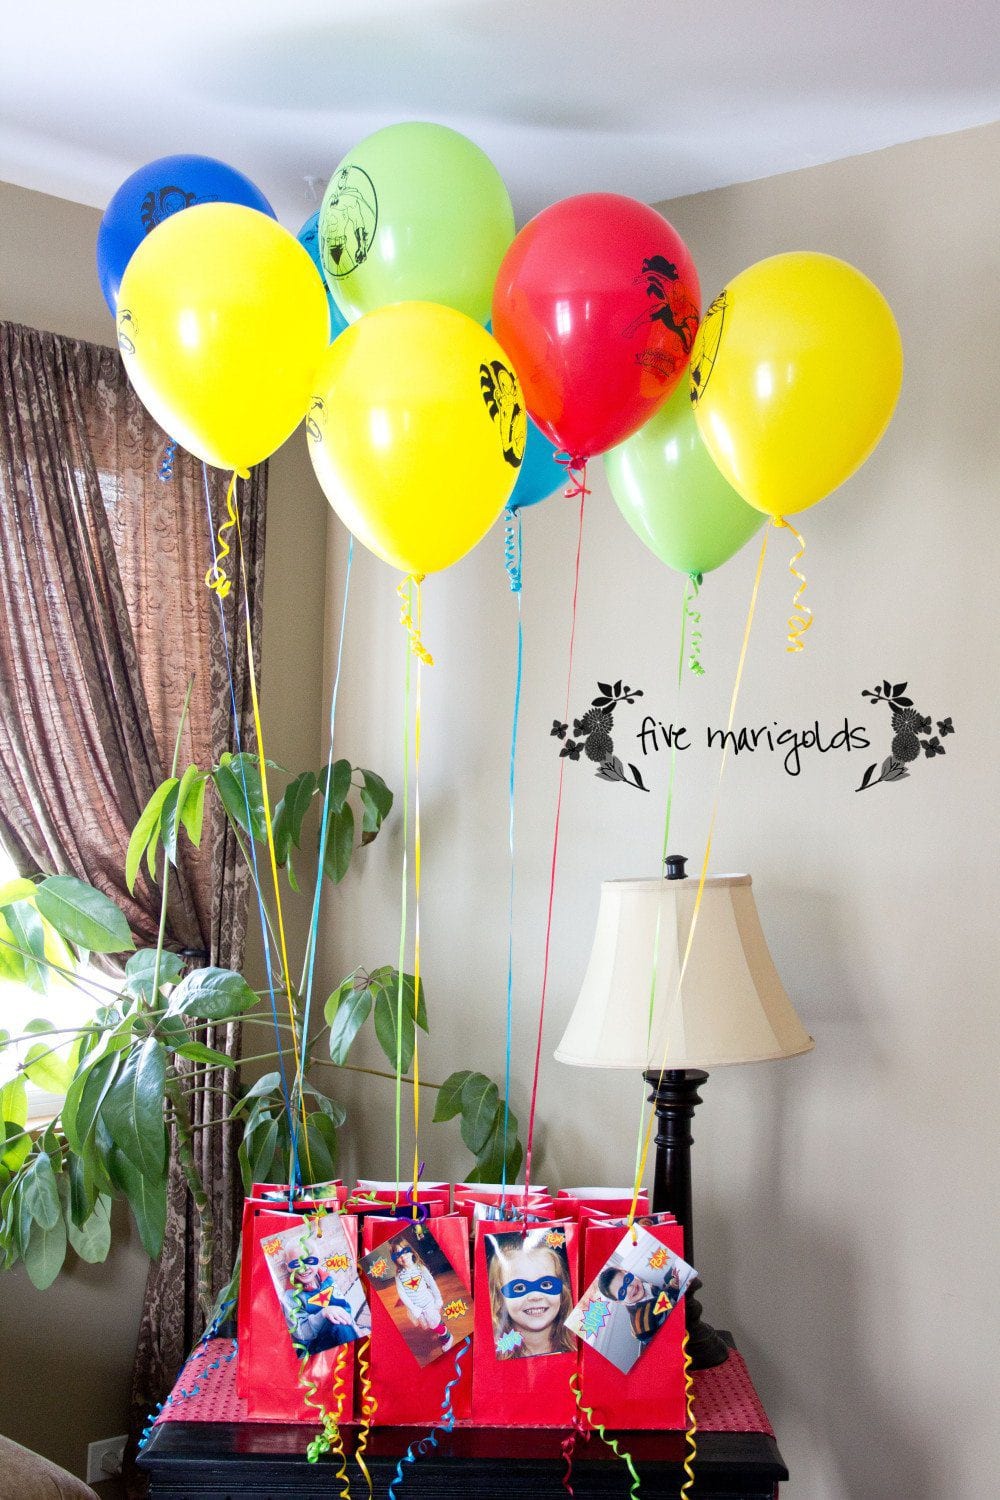
This was Dub’s first party where we invited friends, so I was new to the party favor tradition. I asked all the parents in advance to send me a photo of their children so I could personalize each goodie bag with their photo. I added free superhero overlays like masks and emblems from Lil Blue Boo in PhotoShop and they were a huge hit!
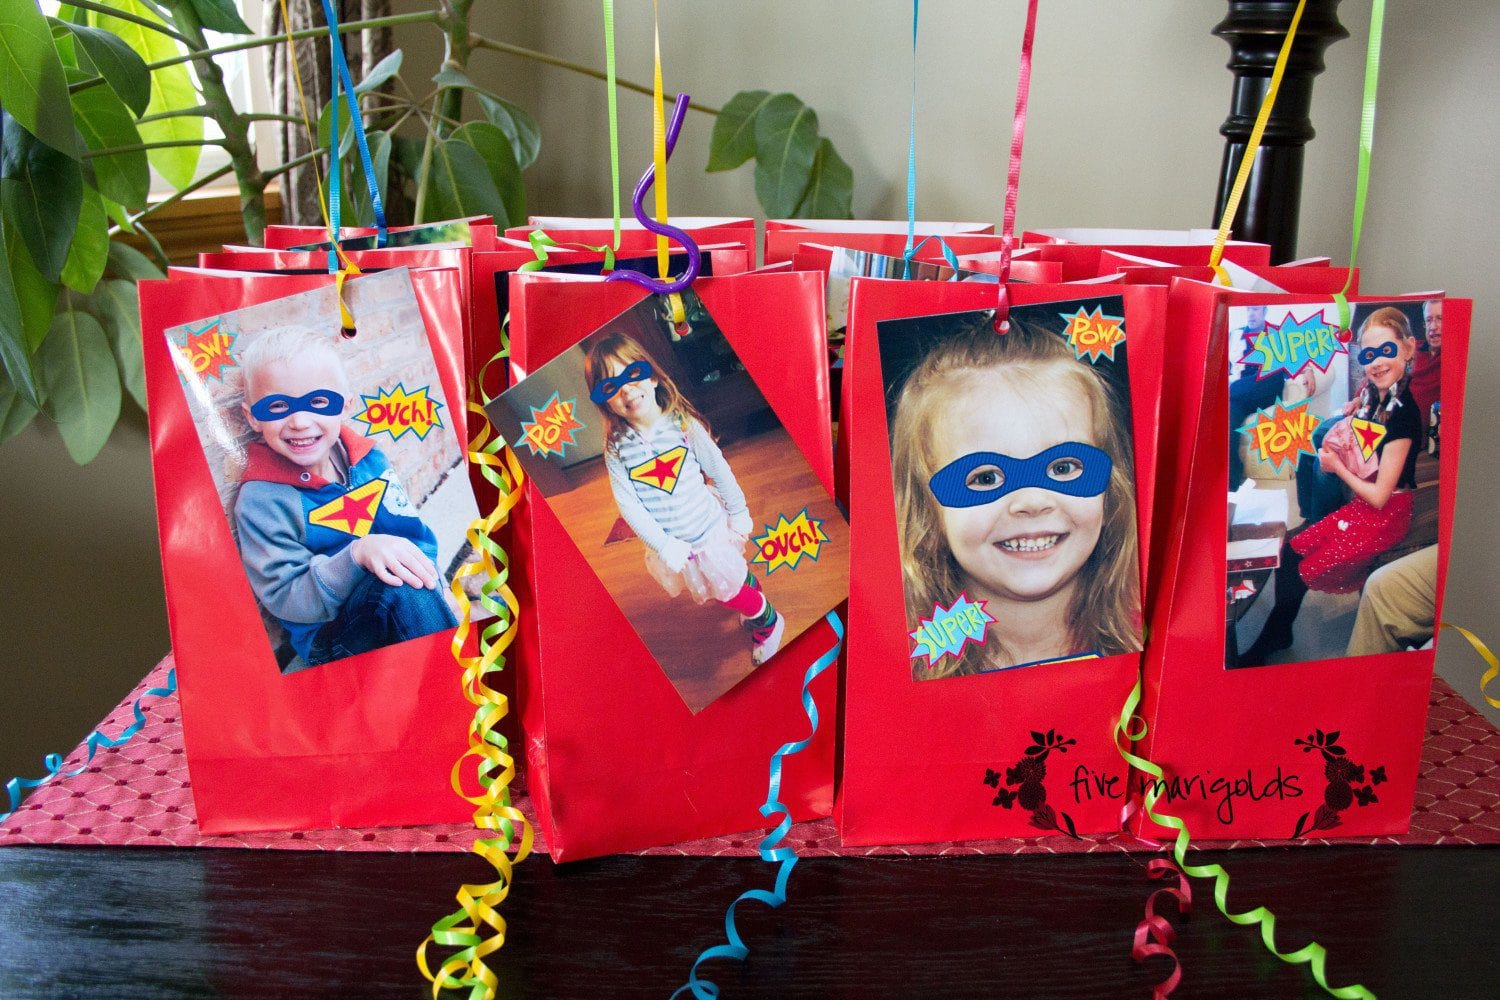
As much as I love having balloons to decorate for parties, I hate watching them pathetically deflate in the days following (my kids refuse to throw them away until the bitter end!) So, I attached a balloon to each goodie bag for a festive display that our little guests could take home with them. This was an inexpensive favor with big impact! The kids were thrilled to take them home and I was just as thrilled to see them go.
I had to figure out how to entertain all these kids in our teeny home. So I set up a superhero mask making station. I pre-cut the masks in craft foam and bought self-stick foam stars and letter so kids could decorate them and add their names.

Next, I really wanted to create a photo booth. I bought some polka-dot wrapping paper that I just taped to the wall. I made some photo booth signs in PhotoShop that matched the cupcake toppers, and printed them on 8.5×11″ sheets of white card stock. I cut them out and taped them to the cardboard tube that comes on dry cleaning hangers – it was what I had on hand! Or, if you’re not the DIY type, you could buy some here.)

Dub and a very pregnant me in the photo booth.

My goal was to get pictures of all the kids at the party to put on the thank-you note. What I didn’t count on was how shy the kids would be. I had to beg to get them all to pose together so I could get my thank-you card shot! But I got it, and here’s how it turned out:

I designed the back like a true post card with a fill-in-the-blank thank-you message for Dub to personalize. I heard later that our little guests were thrilled to see themselves in the card.
So, there we have it! Dub’s 5th birthday. For more superhero birthday ideas check out my Pinterest board.
I’ve linked directly to the customizable invites and thank you notes in my Etsy shop. If you would like me to offer free downloads of the cupcake toppers and photo booth signs I used, please let me know in the comments below!
It was really clear that for Dub’s second birthday it needed to be all about trains. So off we went – chugga, chugga choo choo! Dub was about to be two!
I searched the internet for train birthday cakes I thought I could pull off. I didn’t find anything especially helpful in terms of tutorials, so I had to eyeball it using carved pound cake (slightly frozen works best) and various garnishments to make it look like a train. We used my favorite almond-flavored pound cake from Tastefully simple since we’re not otherwise big pound cake fans. Frosting this sucker was the worst part – I found the cake to be crumbly, even when slightly frozen, so we had to cake the frosting on to disguise them.
Notice the chair cover in the background. I had my mother make covers like this for each of our kids to use on special days: birthdays, first days of school and other celebrations. Since all of our family lives out of state, this travels with us for out-of-town celebrations, and the kids know that when they wake up and see this on their chair in the morning – that we’ll be celebrating them that day. It’s become such a fun tradition for all of us!

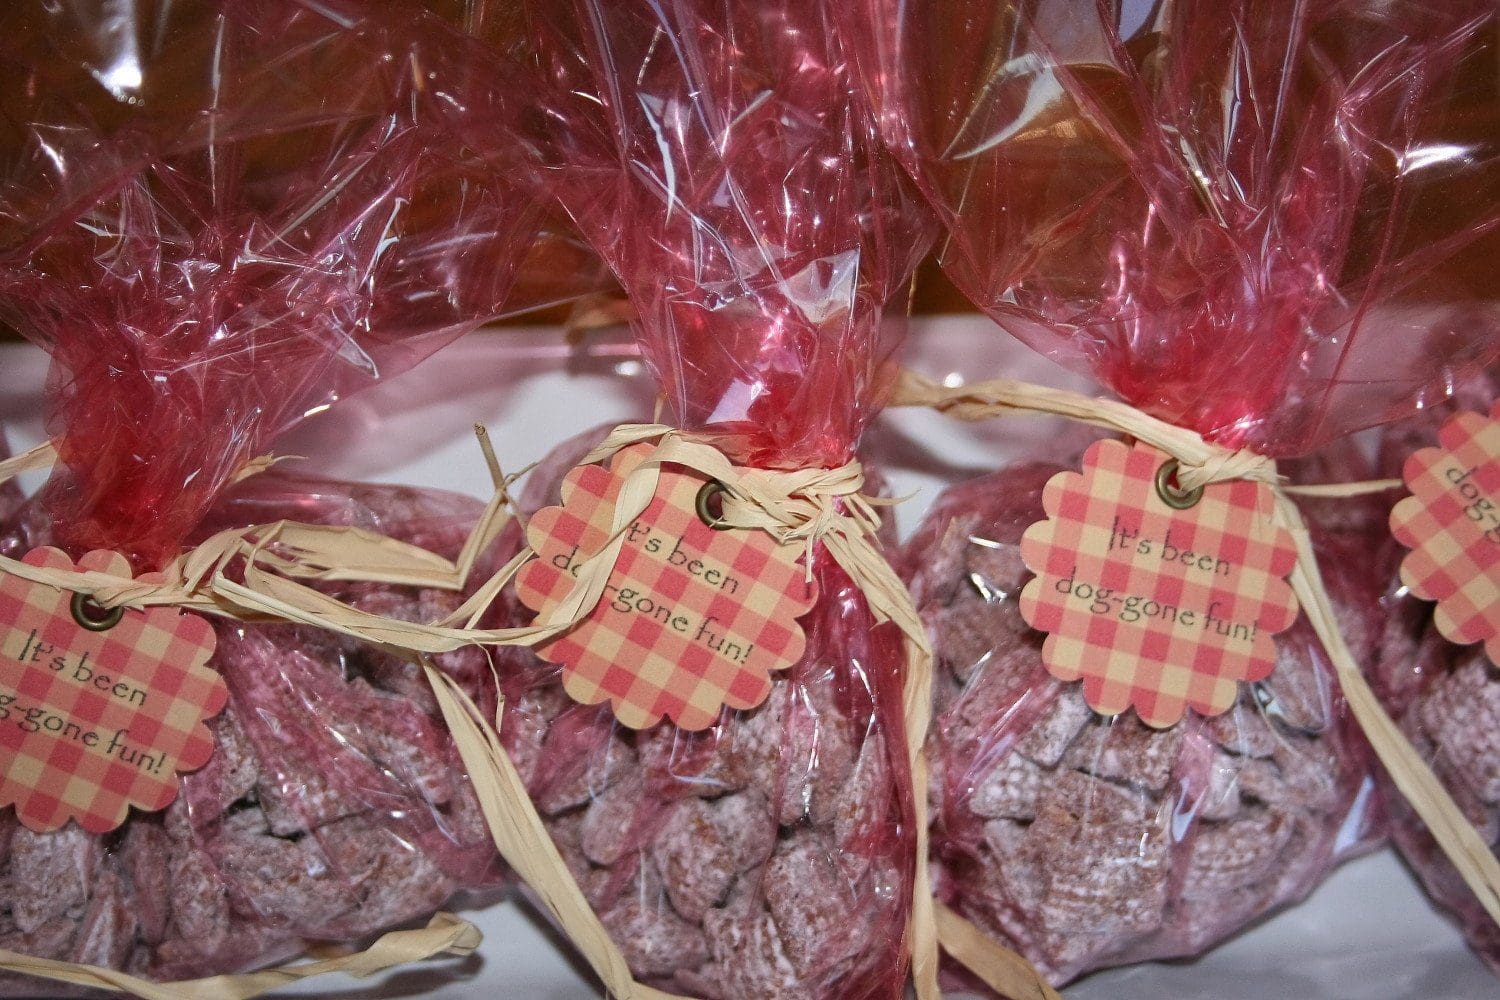
For Dub’s first birthday, I knew I wanted to do a puppy dog theme. Now, I just love a good themed birthday, but really we don’t go overboard for parties. This was especially true for his first – we just invited a few family members and held at his grandma and grandpa’s home, near where most of our family lives.
We made puppycakes using this tutorial from Family Fun magazine. My photography at that time leaves very little to be desired, but you get the idea.
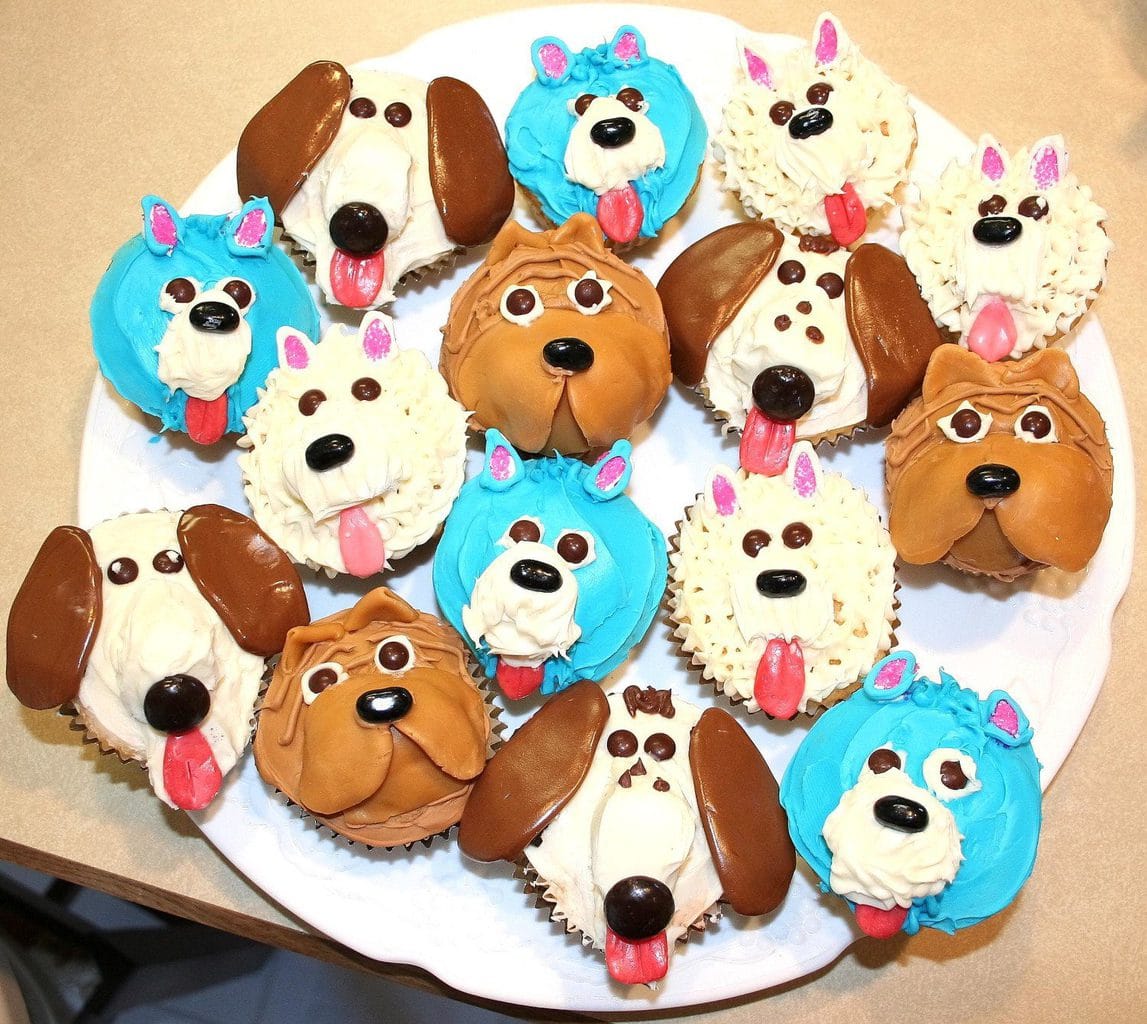
And, of course, gave puppy chow as party favors with hangtags that read, “It’s been dog-gone fun!”