Minecraft Steve Lego Birthday Party Favor

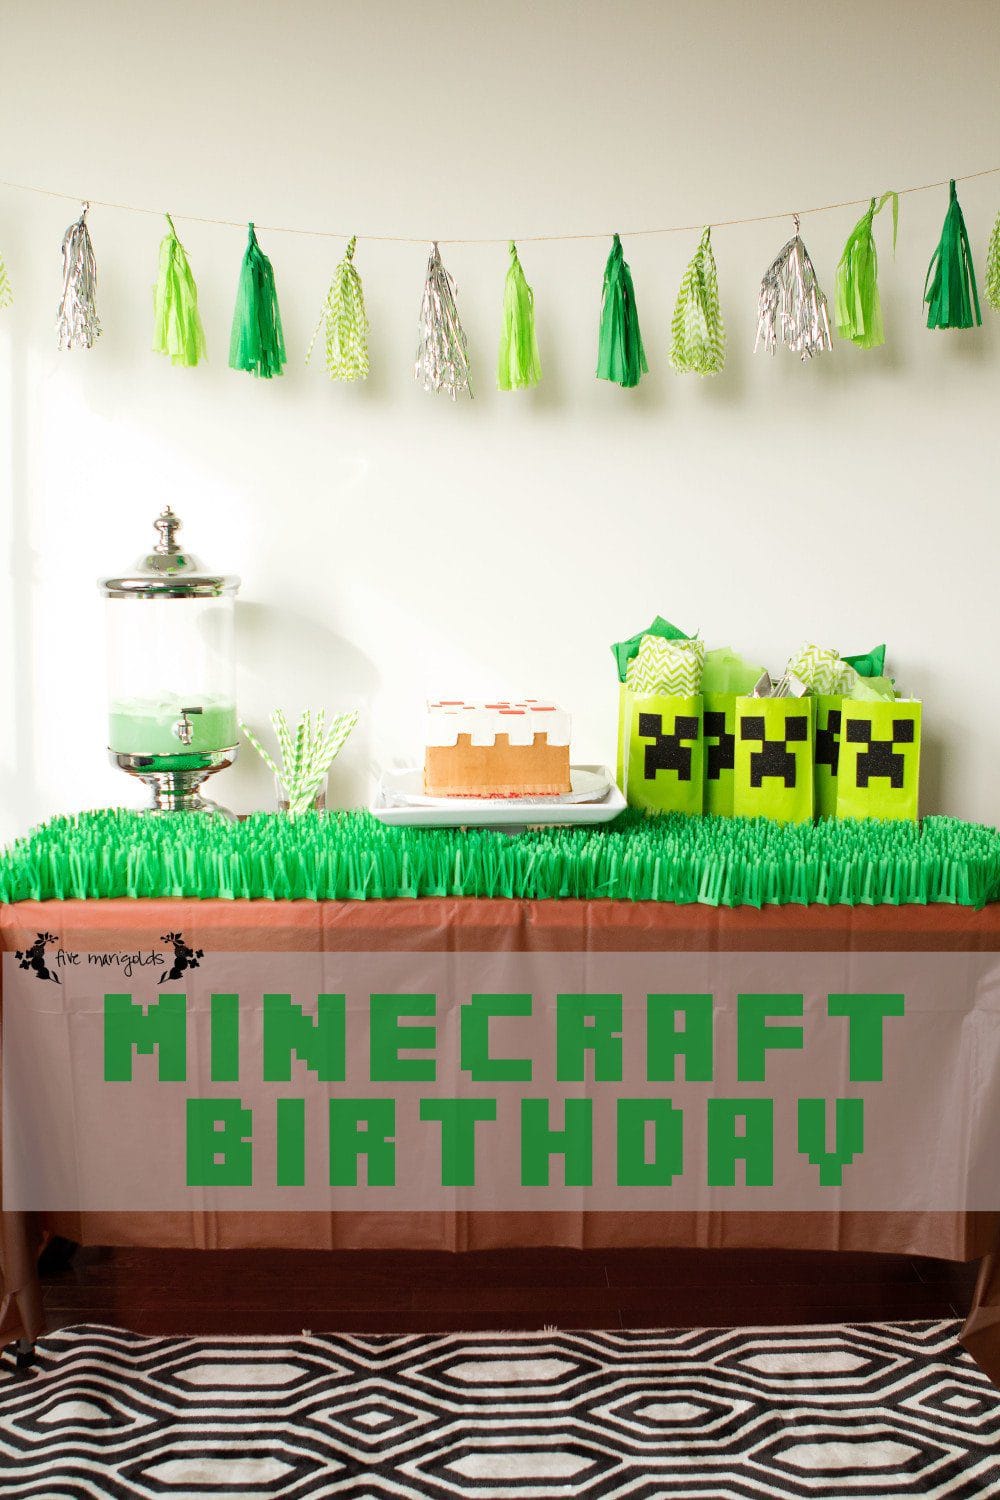
For Dub’s birthday this year, he wanted everything Minecraft. He also loves Legos so, naturally, Lego Steve from Minecraft seemed like the perfect party favors.

I did a lot of research trying to find an easy way to do this. To be honest, I was hoping there would be a sale of Minecraft Lego lots on ebay that would allow me to phone this one in, but it was not to be.

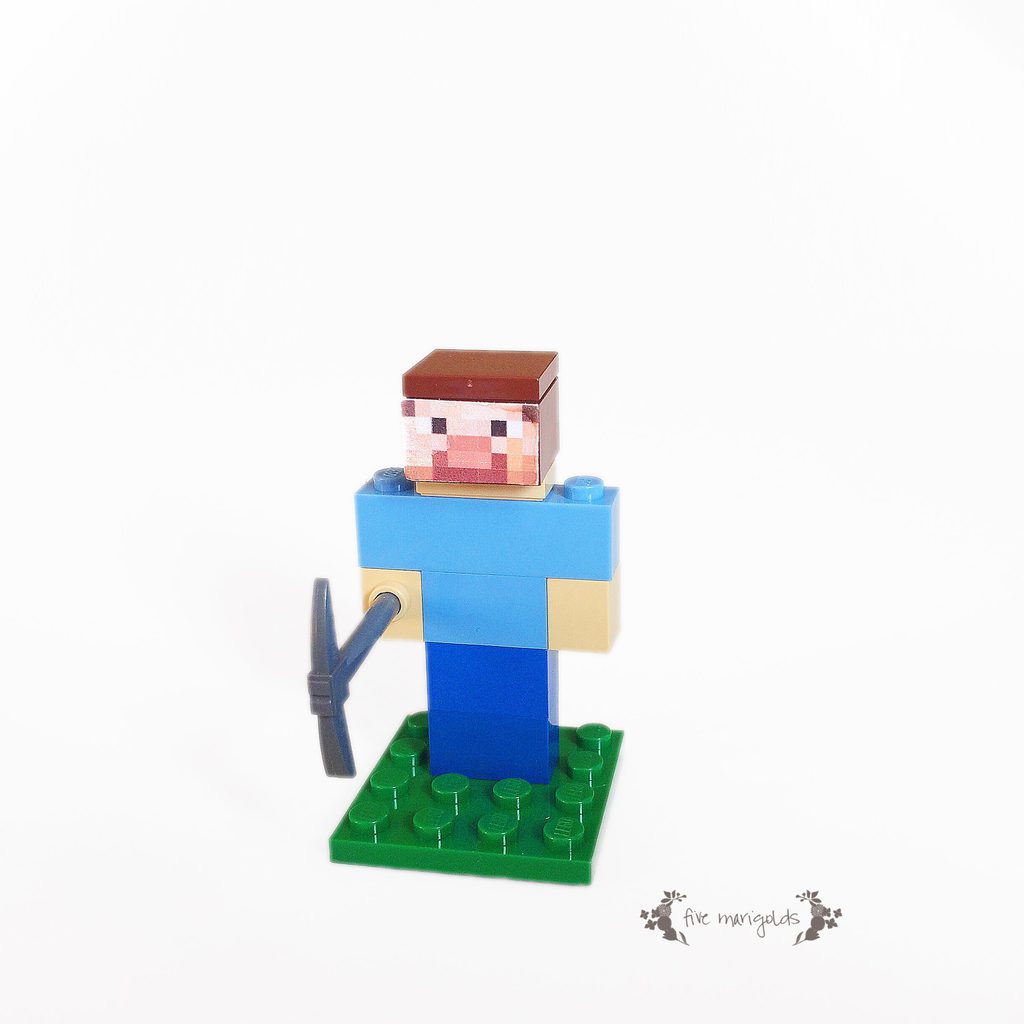
So, I ended up making a Minecraft Lego Steve myself using the Lego Pick-A-Brick feature.

Minecraft Steve Lego Favor | Five Marigolds

While you can do this in-store if you have a Lego retail location near you, they have a varying selection, so I saved myself the trip and did my shopping online. I wanted to be able to have all the pieces I needed for Minecraft Steve! This is where I insert my Lego PSA – I found out after I placed my order that Pick-A-Brick orders can take up to 18 business days! That’s almost a month! So, this Lego Minecraft Steve favor only really works if you are planning out by at least a month to ensure your Bricks get to you in time.

Here’s what I ordered to make 15 favors:

Item#, color  – quantity

  • 300423, blue – x30
  • 4113915, yellow – x15
  • 4155708, yellow – x15
  • 4163696, light blue – x15
  • 4179833, light blue – x15
  • 4211210, brown – x15
  • 4243821, green – x15
  • 4271949, brown – x15
  • 4579260, yellow – x15

For the pick axe, I had to go to Ebay where I got a great deal paying $1.47 total for 15 axes. That brought the total to $26.21 for 15 favors, or $1.74, each. (I didn’t see any swords or pick axes in the Pick-A-Brick section when I was ordering. They do have a “mini Fireman’s axe” or a “warrior weapon,” though.)

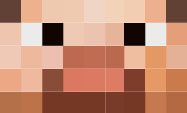
Then, I went to work making  a face for Minecraft Steve in PhotoShop. I measured it to the size of the 2×2 Lego and then I printed it on Avery label paper. Removing the paper backing first,  I cut down each face sticker to the exact size and then replaced it on a small square of the paper backing to place in the favor bag.

Steve Lego Face Free Printable | Five Marigolds

I took a photo of the complete Lego Minecraft Steve to include with all the kits. The kids had a lot of fun putting Lego Steve together while they were still at the party, and had a great time showing off their new toy when they were done.
Minecraft Steve Lego Favor Insert Printable web| Five Marigolds

I placed the Legos in a small jewelry ziplock bag. Then, I made a simple tag that I stapled to the top of the sealed bag as a finishing touch.

Minecraft Lego Steve Favors | Five Marigolds

This was a huge hit among the 6 and 7 year old crowd!

While this Lego Minecraft Steve party favor does take a bit of advanced planning, you and your child will will have so much fun sharing these unique and fun activities for the kids to do!

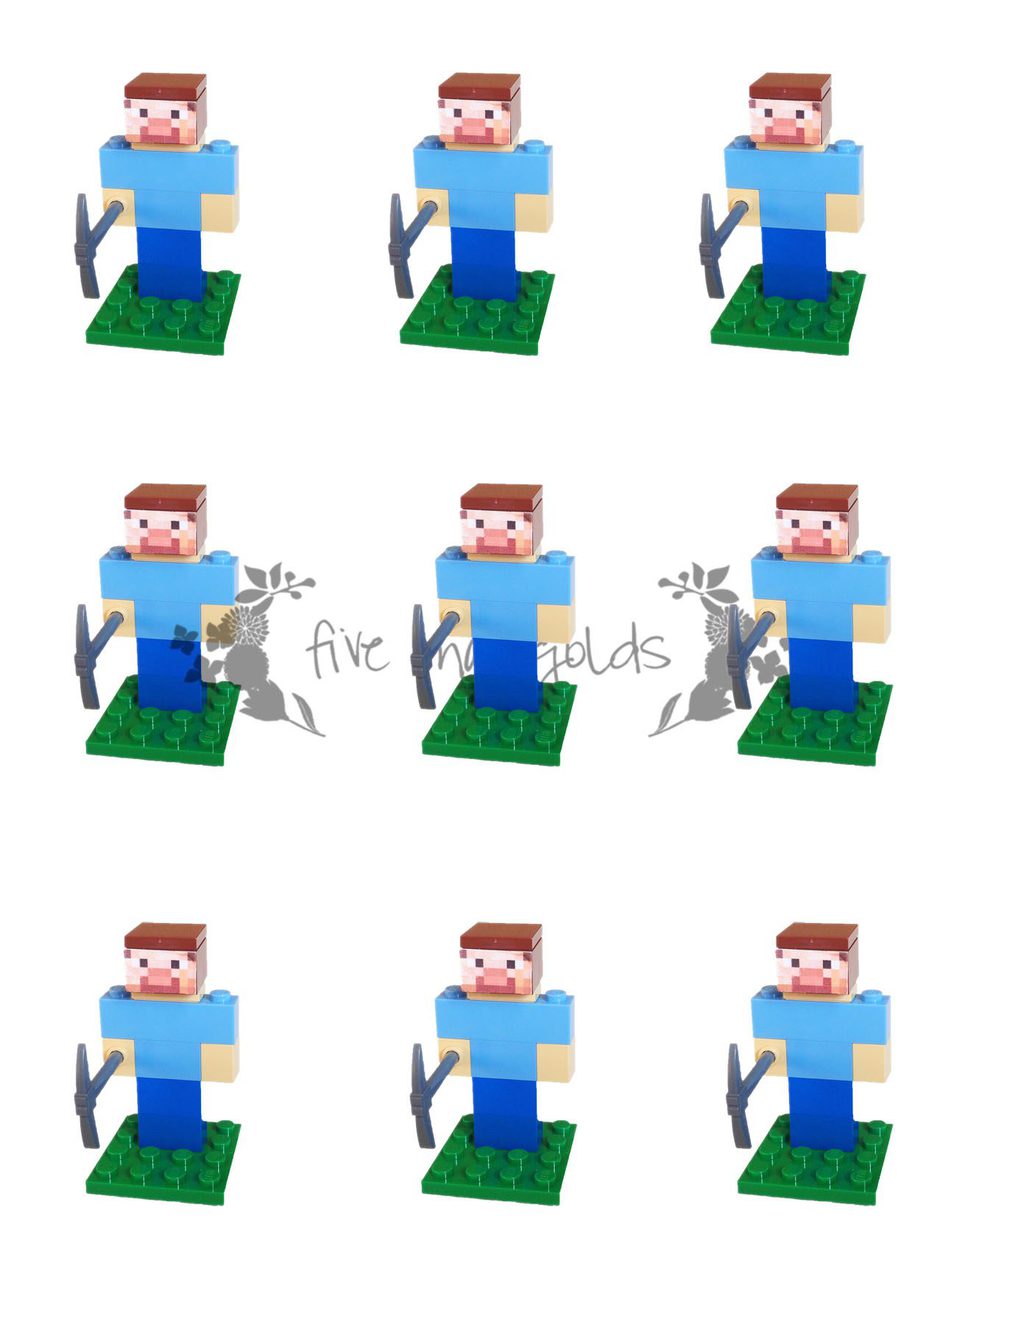
Thinking of making a Lego Steve for your Minecrafter’s party? You can get a head start by downloading Steve’s face here (compatible with Avery 5260* labels), the finished Steve image inserts here, and the favor tags here.  Enjoy!

MORE FREE MINECRAFT PRINTABLES: Like these printables? Be sure to check out my other free Minecraft Printables here and here.

Find my other Minecraft Birthday Party posts here:

Minecraft Birthday Party on a Budget | Five Marigolds

DIY Minecraft Birthday Party

Minecraft Birthday Party Tinsel Tassel Banner Tutorial | Five Marigolds

Minecraft Tinsel Tassel Bunting Tutorial


Minecraft Birthday Party

This year, Dub wanted his party to be all about Minecraft. I didn’t want our home to look like it threw up Minecraft-licensed decor, so I went with something that we all could get excited about. We weren’t having a big celebration at home either, so I wanted to keep this simple and fairly inexpensive. Minecraft Birthday Party | Five Marigolds

First: the centerpiece du jour: his Minecraft cake. Kind of a boring concept, but this is a representation of THE pixelated cake featured on the video game. I was more than happy to outsource this portion of the party and Dub was in love with how it turned out. It was exactly what he wanted!

Minecraft Birthday Party Cake | Five Marigolds

Next, I created the theme using a brown dollar store tablecloth and some tissue paper “grass.” Super inexpensive for one package to cover this table, and the kids were fascinated by this!

I created a simple and inexpensive tissue paper bunting that added some visual interest in the party theme color (tutorial here).

Finally, I like to decorate with party favors, because it’s the decoration that cleans itself up as the guests leave.

I bought some green lunch bag sized paper bags and cut felt into the shape of a Creeper face. Really, this would have been so much easier with black construction paper and my Silhouette SD, but black felt was what I had on hand so that’s what I used.

Minecraft Birthday Party Favors | Five Marigolds

I filled the bag with goodies like gold and silver ore, Mike & Ikes, a growing green bug, and I repurposed my Minecraft Valentine printable to wrap boxes of Nerds candy.

The highlight of the goodie bags was a Lego Steve creation I made with the help of Pinterest and the Lego Pick-A-Brick tool.

Minecraft Birthday Party Favors. | Five Marigolds

*This post contains affiliate links. Please read the full disclaimer on the right sidebar. Thank you for your support!

Find my other Minecraft Birthday Party posts here:

Minecraft Birthday Party Tinsel Tassel Banner Tutorial | Five Marigolds

Minecraft Tinsel Tassel Bunting Tutorial

Minecraft Lego Steve Favors | Five Marigolds

DIY Minecraft Lego Steve Favors


Tutorial: Tinsel Tassel Party Banner

I absolutely love the look of these tinsel tassel banners for party decor. Even better? They’re super easy and inexpensive to make.

Dub really wanted a Minecraft-themed birthday party, but I didn’t want a licensed decor explosion, so I began thinking of ways to decorate with color. With lots of Pinterest inspiration, I decided I wanted to give this a try. However, I was surprised to find there aren’t a lot of tutorials out there so I am sharing a quick and dirty tutorial of my own.

I set to work on this particular banner with four colors of tissue paper, green, lime green, chevron and silver metallic (I linked to some examples because I initially had a hard time finding these).

1) First, I took a stack of 8 sheets of tissue in each color and cut them the short length of the pre-cut sheets (approximately 20″) and cut them about 8″ wide.Tinsel Tassel Banner Tutorial | Five Marigolds

2) I then folded the stack of sheets in half and began cutting them in 1/4″ strips, stopping about 1″ from the fold. I used a rotary cutter and mat to make quick and more precise work of this, but regular scissors will do.

Tinsel Tassel Banner Tutorial | Five Marigolds

Tinsel Tassel Banner Tutorial | Five Marigolds

3) I then unfolded the papers and, taking 2 sheets at a time, began rolling them tightly at the center. Once each set of 2 was rolled at the center I began gently twisting the rolled portion. Once it was lightly twisted I folded it in half and began twisting the rolled portions together. When you’re done it will look something like this. Perfectly imperfect.Tinsel Tassel Banner Tutorial | Five Marigolds

4) Thread the tassels through a string or ribbon. I made a single simple knot at each tassel to keep them in place.

Tinsel Tassel Banner Tutorial | Five Marigolds

All in all, this was a pretty quick and easy project that took me maybe 20 minutes total to complete. I also love that if you source your papers from the dollar store, you could complete three of these banners for just $4! (meaning, each banner is just over $1, with plenty of paper to spare for favors or gifts). I have a feeling various themed tinsel banners will be showing up at more parties around here!

Dub’s party is not for a few more weeks, so I’m letting it hang on our mantle for St. Patrick’s Day. How’s that for multi-purpose party decor?

Find my other Minecraft Birthday Party posts here:

Minecraft Birthday Party on a Budget | Five Marigolds

DIY Minecraft Birthday Party

Minecraft Lego Steve Favors | Five Marigolds

DIY Minecraft Lego Steve Favors


Healthy (ish) Breakfast Cookies

You will love these delicious and healthy breakfast cookies. With wholesome ingredients and honey-sweetened goodness, they are sure to be a hit in your home. 

Are you tired of the same old breakfast routine? Want to try something new and healthy, but don’t have the time to cook? Look no further than healthy breakfast cookies!

Healthy Breakfast Cookies featuring Bananas, Oats, Honey, Almond Butter and Chocolate Chips | Five Marigolds

Healthy Breakfast Cookies featuring Bananas, Oats, Honey, Almond Butter and Chocolate Chips | Five Marigolds


Healthy breakfast cookies are not only easy to make but also packed with nutrients to start your day off right. They are perfect for those busy mornings when you don’t have time for a sit-down breakfast.

The banana and honey combine to give it a natural sweetness, and the almond butter and oats provide a protein boost and loads of fiber. And who doesn’t love chocolate chips, right?

These healthy breakfast cookies are not only great for breakfast, but they are also perfect for a grab-and-go snack on the run as well. 

I’ll often mix up the dry ingredients before I go to bed, and in the morning just add the banana, nut butter, and honey and pop them in the oven. So good! Here is the recipe with my preferred ingredients.

Ingredients You Need:

  • 2 1/3 C. quick oats
  • 3/4 t. salt
  • 2 bananas, mashed
  • 1 C. nut butter (I prefer almond butter)
  • 1/4 C. honey
  • 1/3 C. mini semi-sweet chocolate chips

Making your Healthy Breakfast Cookies

  1. Preheat oven to 325 degrees.
  2. Mix all the ingredients together, folding in the chocolate chips at the end.
  3. >Scoop 3 tablespoons per cookie onto a parchment-lined baking sheet  – I used my Pampered Chef large scoop> to make easy work of this – and gently flatten to the desired shape.
  4. Bake for 15 minutes and let cool on a baking rack.

I have a serious sweet tooth in the morning, so I’ve long been on the hunt for sweet breakfast recipes that are healthy’ish AND taste good. It’s been a long journey! After a testing a  lot of recipes and coming up short, I’ve finally found something that balances a little of both – it’s super yummy, and the ingredients are in the healthy’ish zone that I can feel good about serving my kids. Rich flavor – with no flour, butter or refined sugar.Another thing I love about these cookies is that they are really satisfying. I’m almost always hungry within 30 minutes of breakfast, but not with these.  Ladies and Gentleman: I proudly introduce you to Banana Chocolate Chip Breakfast Cookies.

Makes around 15 cookies. These stay good for about three days or can be frozen for later. Be sure to separate cookies with parchment paper in storage.

Are you a fan of breakfast cookies? Let me know what you think in the comments below!

Source: Sally’s Baking Addiction

big boy room

big boy room

Assembly Home gray rug
urbanoutfitters.com

Aidan Gray storage basket
laylagrayce.com

Jonathan Adler throw pillow
bloomingdales.com

Home decor
$41 – cottonon.com

Metal wall art
craftcuts.com

Pottery barn furniture
potterybarn.com

White chair
ikea.com

FUFFLA
ikea.com


Easy, Inexpensive Favor Bags

Paper Bag Party Favors | Five Marigolds
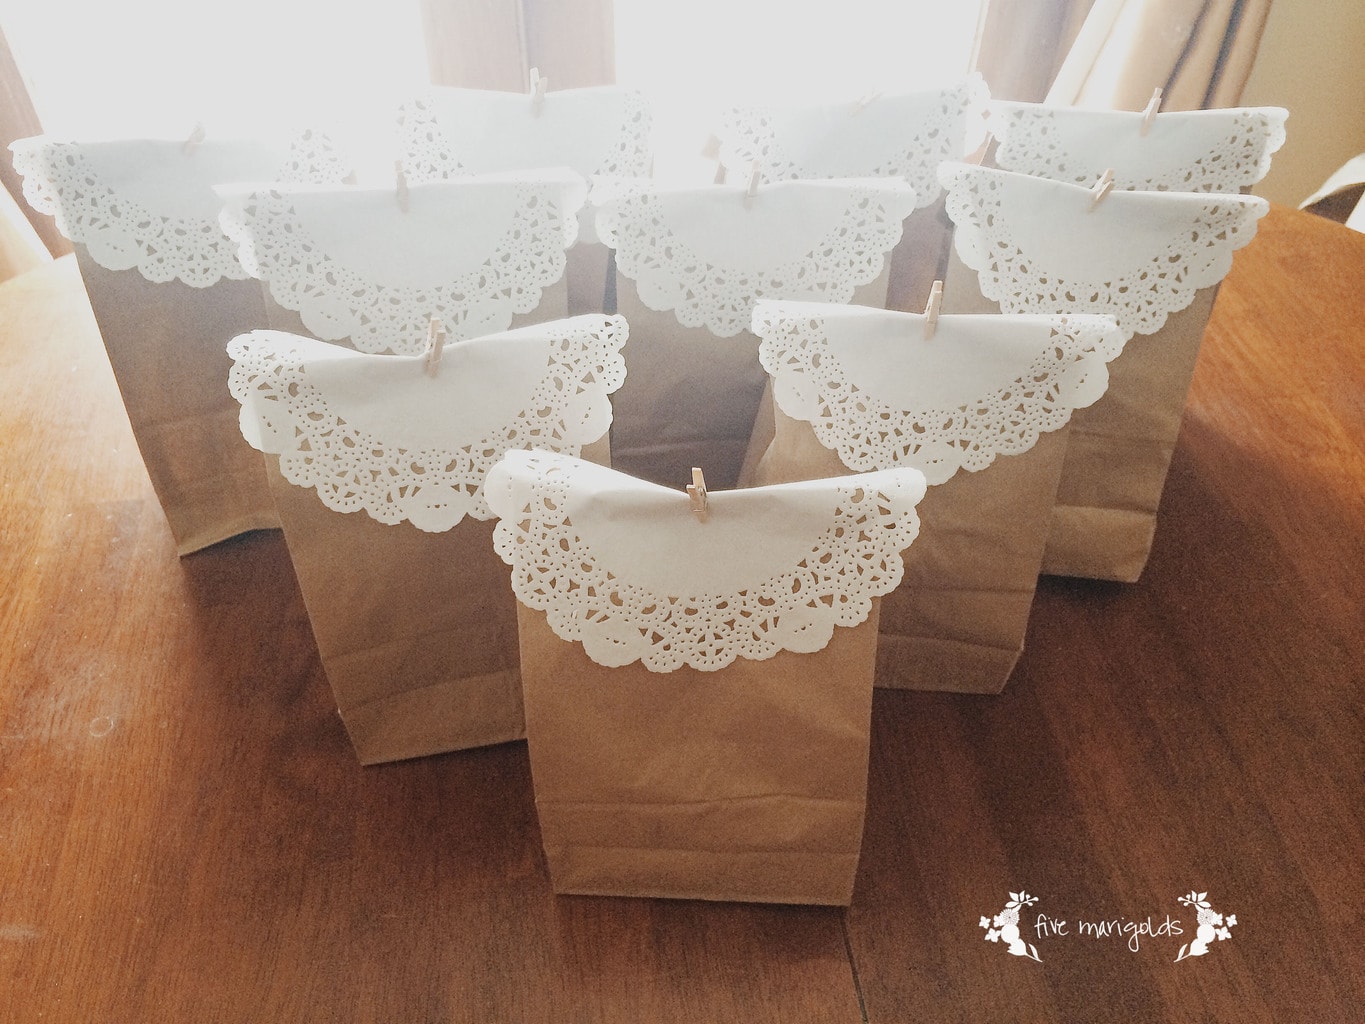
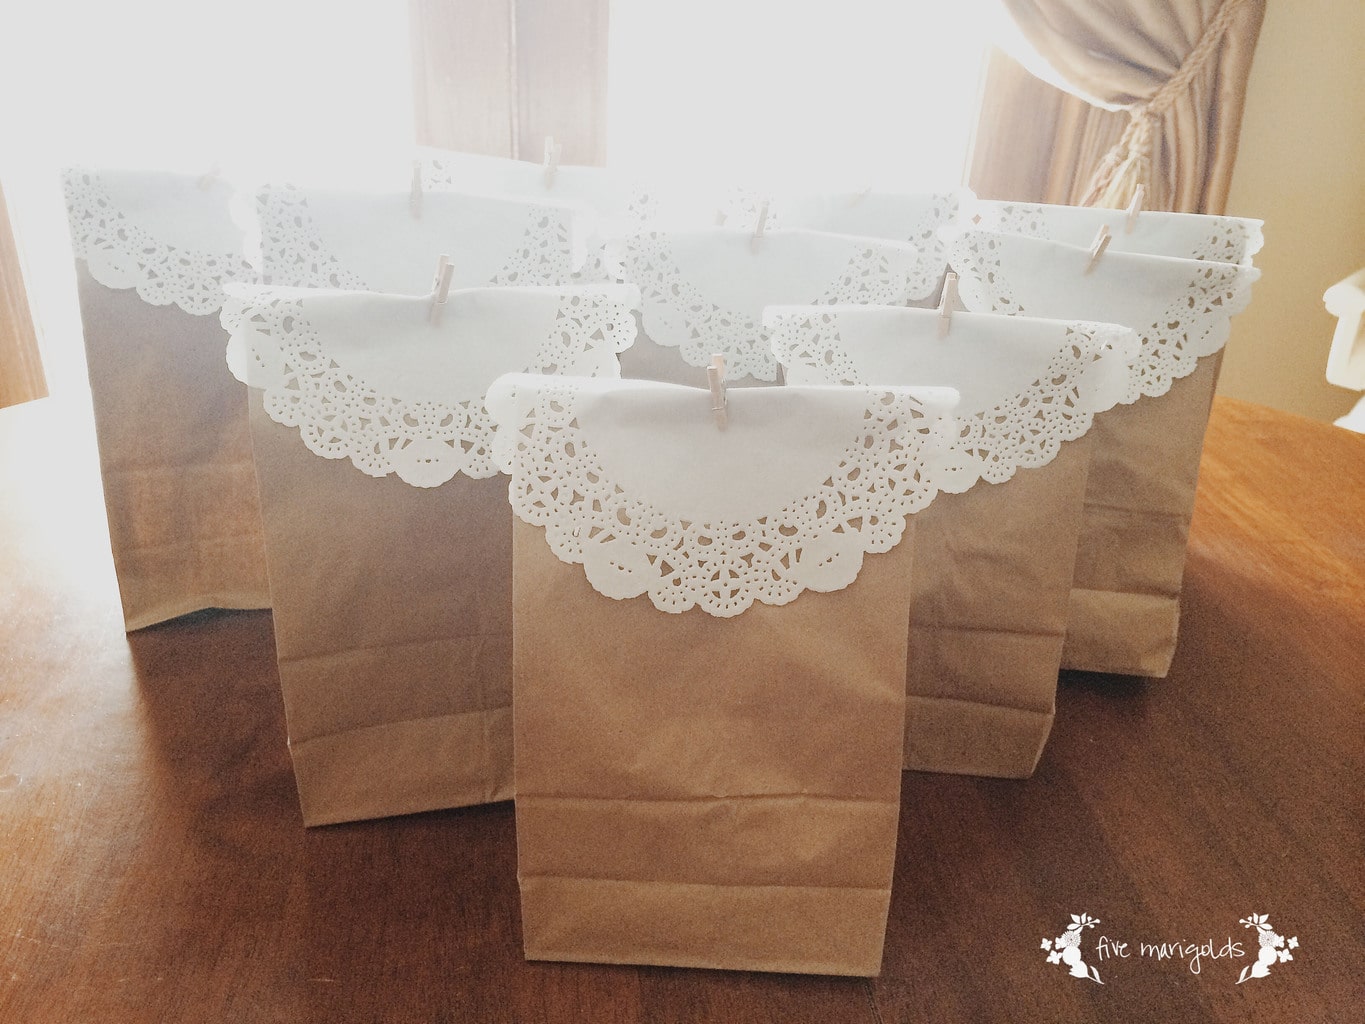
Dress up a common paper lunch bag to be something extra special!  EClaire needed to take favor bags to school for her half birthday (summer birthday problems!). I had a few awkwardly shaped items so I needed a decent-sized bag, but I didn’t want to spend much.

As usual, I headed to the Dollar Tree fro some paper lunch bags and doilies. Then, I secured them with these tiny craft clothespins that you can get at Hobby Lobby or here on Amazon. I love how these turned out, and you can make 40 for just $6. Next time, I love the idea of trying these for birthday party favors with colorful doilies and clothespins.

These would be great for Valentines, Birthday parties or even for quick and easy gift wrap for small gifts.

Paper Bag Party Favors | Five Marigolds  Paper Bag Party Favors | Five Marigolds Paper Bag Party Favors | Five Marigolds


Free Valentine’s Day Printables

44
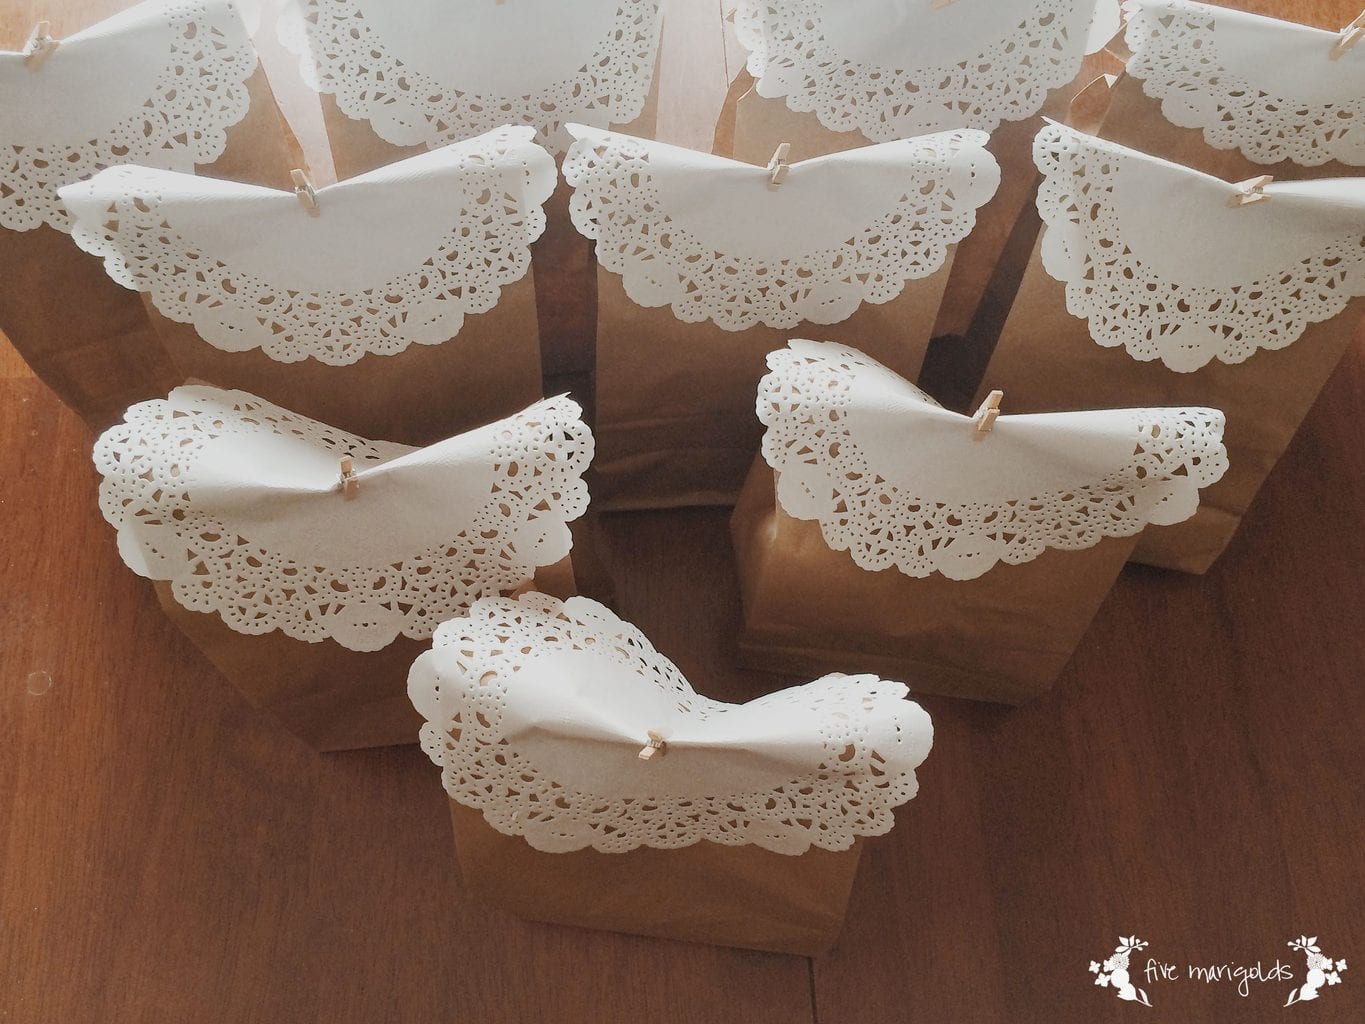
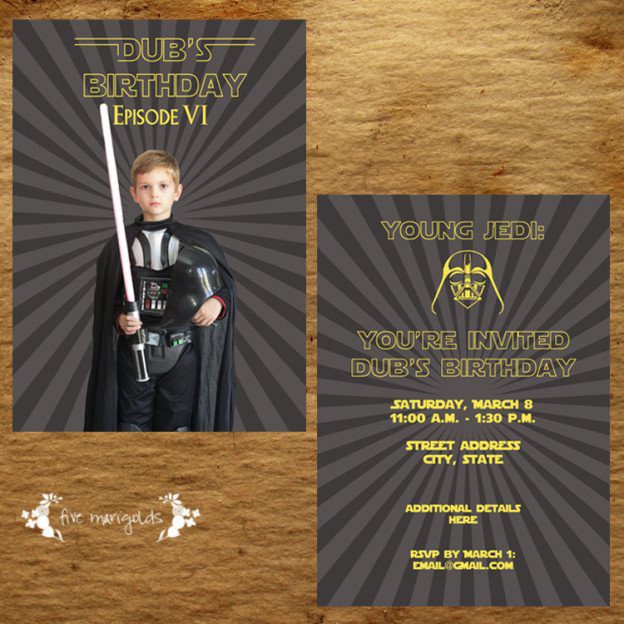
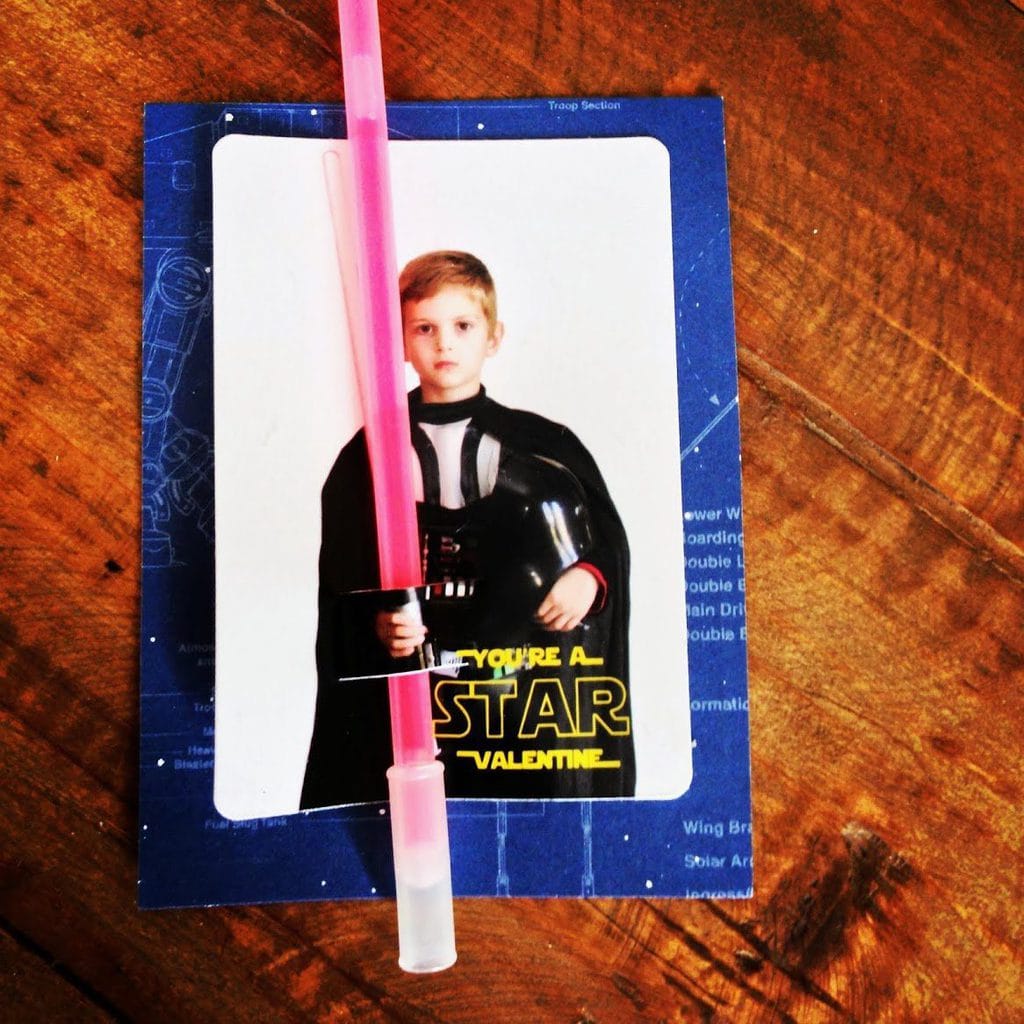
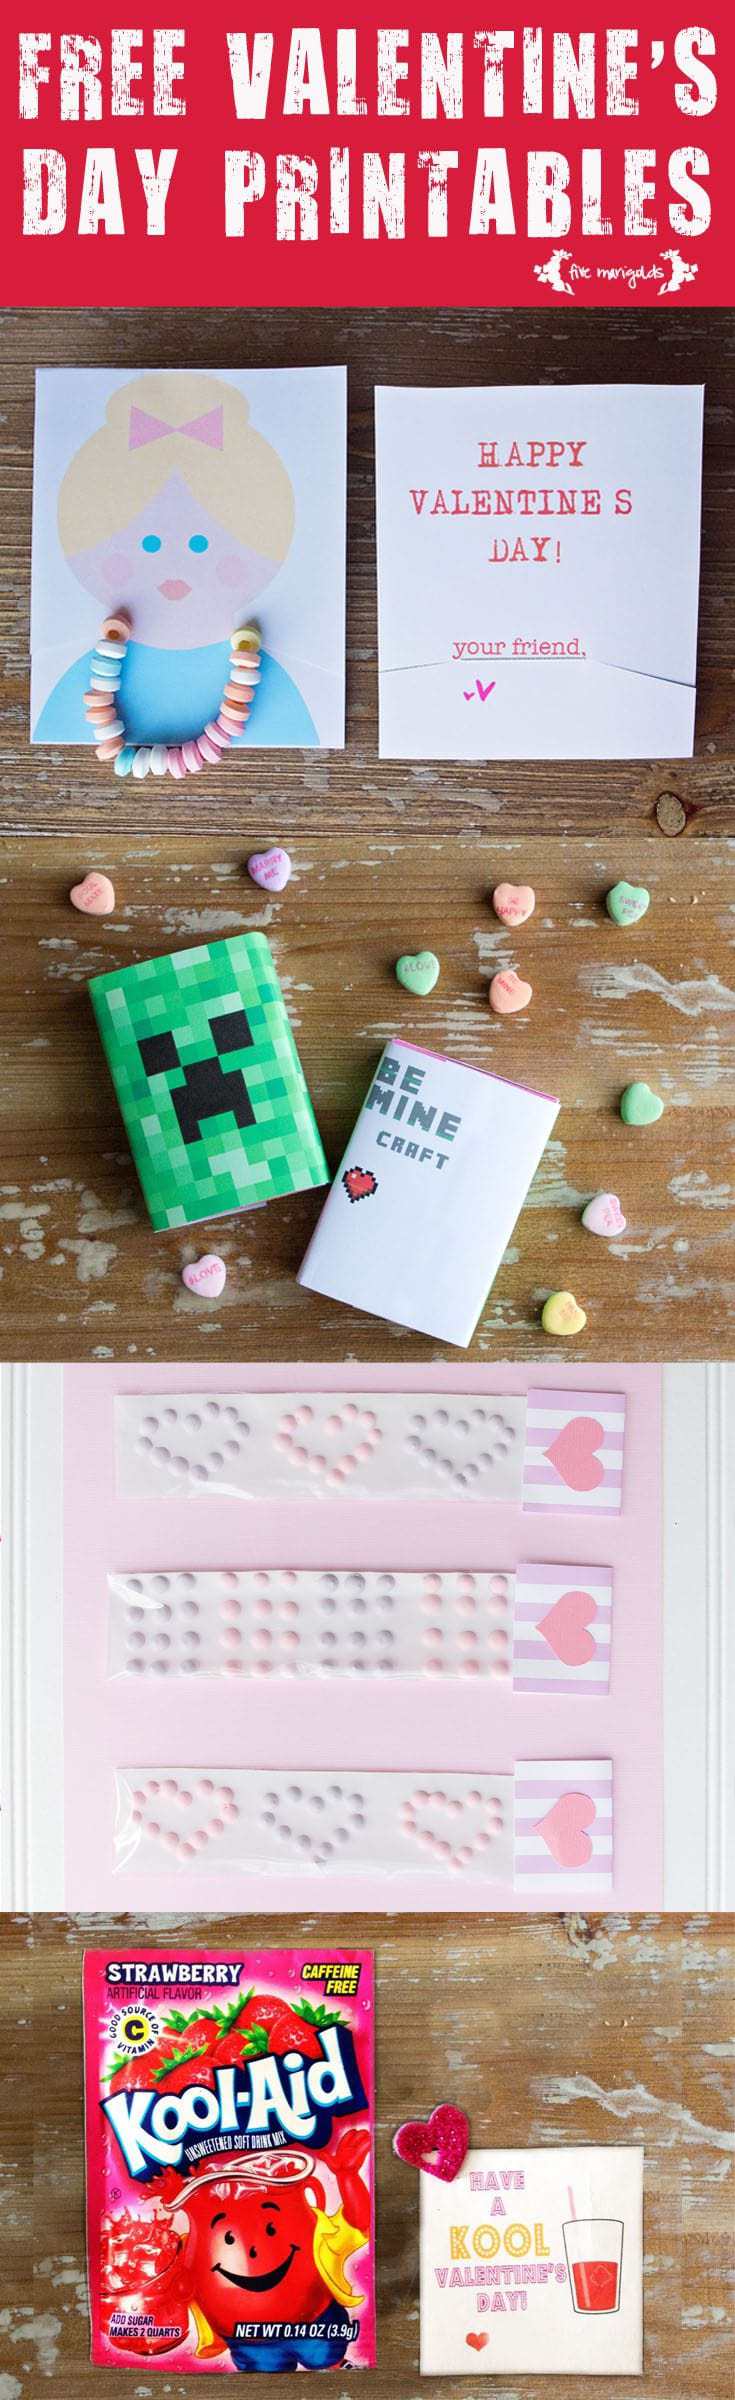
I just love Valentine’s Day! Such a fun day for kids to express friendship to one another. Dub loves tearing open the goodies, but EClaire really loves to see the creativity of the Valentines and read the messages from her friends.

Today I’m sharing printables and ideas for Valentine’s Day.

Candy Necklace Valentine

Candy Necklace Valentine Printable | Five MarigoldsI designed these for EClaire’s princess party this summer, and adapted them again for Valentine’s to be more inclusive of boys in her class.  Just print these out, cut two slits,  add the candy bracelet (I get mine at Dollar Tree 10/$1) and sign the back. Find the original post and download here!


Be Minecraft Valentine

Be Minecraft Valentines Printable | Five Marigolds
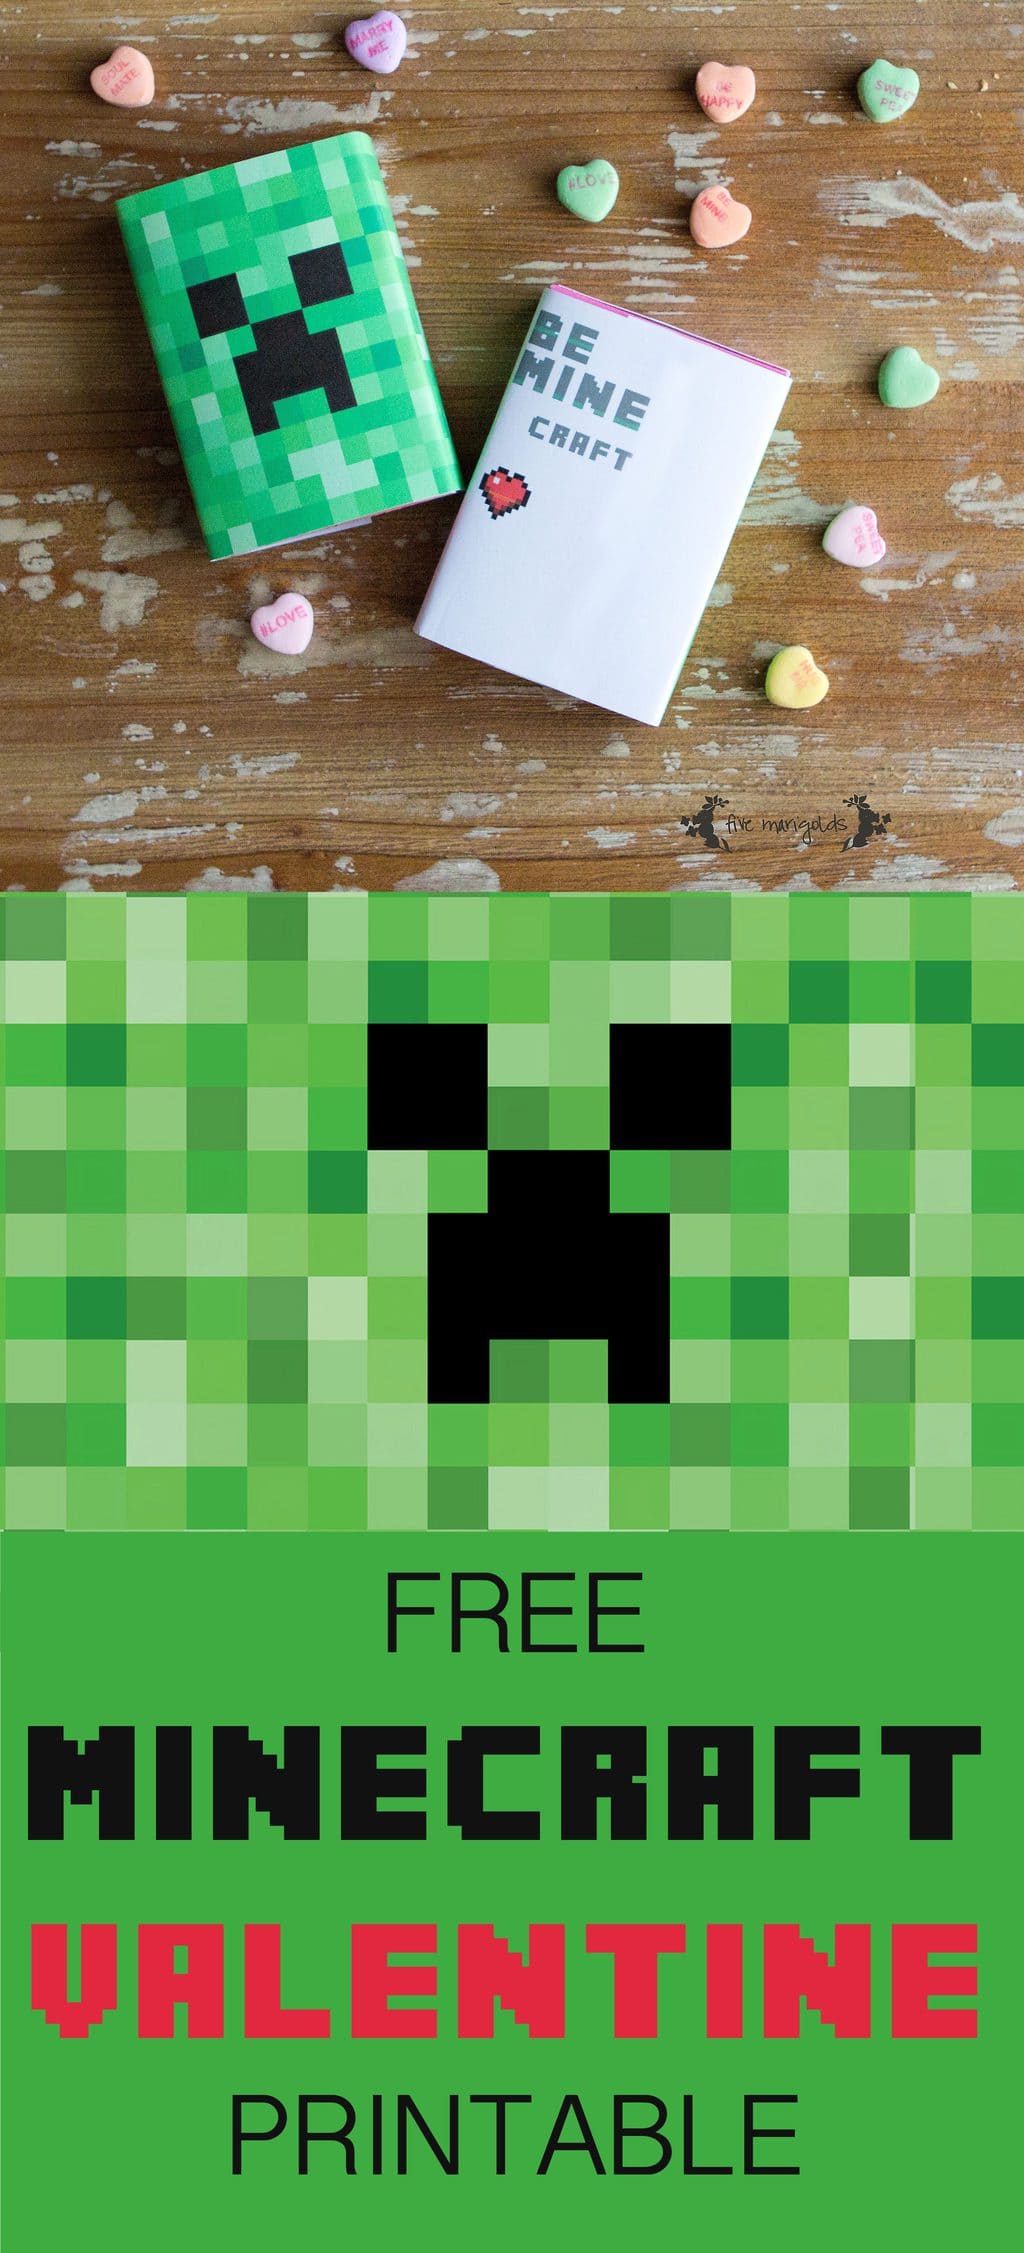
Dub is obsessed with Minecraft! So, I created this “Be Mine (craft)” printable to wrap a box of Conversation Hearts for an inexpensive Valentine. Just seal with some stick glue and sign the back.  Find the orignal post and download here.

Straw Valentine

This Valentine by Paging Super Mom was a hit among the preschoolers Dub gave this to years ago – and their parents who loved the non-sweet Valentine. I used the heart shaped curly straws from Hobby Lobby (10/$1) and signed his name on the printable in PhotoShop. Super cheap and easy.

Kool-Aid Valentine

Kool-Aid Valentine Printable | Five MarigoldsLast year EClaire had so much fun putting these Kool Valentines together! Simply download the printable here and affix to the back of Kool-Aid packets with a heart sticker. I digitally added her name, but you can sign yours for a more personalized touch.

Candy Buttons Valentine

Valentine Candy Buttons | Five MarigoldsI absolutely loved the candy button favors I made for EClaire’s princess party this summer, so I recreated them for some homemade and very inexpensive Valentines. The kids think this is such a novelty that it’s always a hit! Find the full instructions here.

There you have it, just a few of the Valentines we’ve given over the years. What do you think? Will you be using any of these this year? Please take a moment to tell me about it, below!

Free Valentine's Day Printables | Five Mariolds


In addition to being featured in the fab blogs shown on the buttons to the right, this post was also featured on Huckleberry Love.

Be Minecraft Valentine’s Day Printable

Is your little one obsessed with Minecraft? I feel you. Dub has the game, the app and the collection of hardcover books that he studies relentlessly. It’s Minecraft hysteria up in here.

Be Minecraft Free Printable Valentine | Five Marigolds

I knew I had to make his Valentine Minecraft-themed. I just wasn’t finding the right thing, so I had to create it myself. I was most inspired by this adorable candy wrap by Simple as That, but really didn’t want to buy a full box of Mike & Ike candy for each of his classmates *cough*cheap*cough* and I was too lazy to cut out those adorable tags of hers. I know, this says a lot about me.

So I went to work creating a wrap for a standard box of conversation hearts. Once it’s printed, I helped cut out the wraps, and then I put Dub to work wrapping the box, using stick glue to seal it on the side, and he signs the back. Done (I love when a good plan comes together).

Want to use these for yourself? Download the free printable here.

What do you think of these Be Minecraft Valentines?  Tell me about it below – I love your feedback! Minecraft Valentine | Five Marigolds

MORE FREE MINECRAFT PRINTABLES: Like these printables? Be sure to check out my other free Minecraft Printables here and here.

Candy Necklace Valentine’s Printable

Remember the Princess Candy Necklace favors i made for my daughter’s birthday? Well, I’m all about upcycling my work, so I made a few modifications so we can use them for EClaire’s classroom Valentines. The party favors have been such a hit among all my readers, so I’ve decided to offer these up as a free Candy Necklace Valentine printable, as well.

Princess Candy Necklace Party Favors | Five Marigolds

Just print these out, two-sided, on some card stock, cut a slit on either side of the card and finish with a candy bracelet!

Candy Necklace Valentine Printable | Five Marigolds

>>Download your free

Candy Necklace Valentine Printable here<<

Candy Necklace Valentine Printable | Five Marigolds

Click here to get the princess version, perfect for birthday party favors!

If you love these and plan to use them for your Valentines, please take a moment to tell me about it in the comments!

get more free valentine’s day printables!

Looking for more great Valentine’s Day printables like this? Try my other popular free options:


Candy Necklace Valentine's Day Printables

These are so adorable! Printable candy necklace birthday party favor cards.

Family Growth Chart for less than $15

We recently made the decision to sell our “starter” home and build a new home that better accommodates our growing family. We bought this home just months before our wedding, had three babies here and many, many precious memories as a family. We’re ready for the next chapter, but this sentimental mom is feeling a bit emotional about it, as well.

The moment we signed the papers to build our new home I was immediately motivated to take on a project I’ve been meaning to for a long time – make a family growth chart that we can take with us – wherever we go. Our former growth chart was done the old fashioned way – with pencil on the wall of our kitchen (that I still can’t bring myself to paint over even since I’ve made this beautiful new chart).growth chart2

I’d once tried my hand at an embroidered chart that was supposed to be  cute and charming, but didn’t end up looking quite as polished as my inspiration. I also  found that I was too lazy to embroider once a year. My laziness factor is high.

So I moved on to those cute reclaimed signs I’ve seen all over Pinterest.

I started with a 3/4″x7″x8′ piece of cedar lumber that I purchased at Home Depot for less than $9. First, I enlisted Dub to weather it for me. I gave him chains and a hammer and let him have at it. I stained it with leftover stain that I used on our stairs for our garage makeover.

From there, I had to get measuring – my least favorite part. Our family is really tall, so I cut my board to 6′ tall and painted 1′ white stripes using leftover paint from the garage makeover. These are some terrible progress photos, but you get the idea.

Family Growth Chart for Less Than $15 | Five Marigolds

I actually liked the way this looked when I was done, but I went ahead and sanded it to give it a more distressed look.Family Growth Chart for Less Than $15 | Five Marigolds

Family Growth Chart for Less Than $15 | Five Marigolds

Then, I used my silhouette to create the measurement marks. I barely use my Silhouette but I used it for this, figuring it would make the measuring much easier for me. I measured it on the computer, cut it out on the Silhouette and then used transfer paper to stick it right on the board without having to re-measure.

Family Growth Chart for Less Than $15 | Five Marigolds

I’m super happy with the way that it turned out! I can’t wait to hang this measurement chart in our new home next year. I can see keeping this chart in our home forever, and measuring little grandbabies someday.growth chart2_1

Postscript: after completing my chart, I stumbled upon this cute version by Handmade Charlotte

growth-chart6-handmade-charlotte-powerofpaint-dot-net

If I had to do it over again, I think her way of painting the numbers would be a lot cheaper and easier. However, I’d still want to make the measurement marks so that I could tell visually exactly how tall the kids are. Everytime they get measured they want to know EXACTLY how many feet, inches and centimeters tall they are. Because that matters to 4 and 6 year olds.

What do you think? Do you have a family growth chart in your home?


Shop your kids’ closets for Halloween

Shop your kids' closets for Halloween | Five Marigolds

Shop your kids’ closets for Halloween | Five Marigolds

Shop your kids' closets for Halloween - Luke Skywalker| Five Marigolds

Shop your kids’ closets for Halloween – Luke Skywalker| Five Marigolds

Make a tooth pillow for the Tooth Fairy using upcycled baby clothes | www.fivemarigolds.com

Tooth Fairy Pillow Using Upcycled Baby Clothing

Looking for a  way to upcycle those baby clothes you can’t part with? When Dub lost his first loose tooth, I decided to use his baby clothes to create a tooth pillow – a tradition my parents started with me. The concept is that the tooth pillow makes it easy for the Tooth Fairy to find baby teeth and deposit money (I’ve heard she hates to loose those first baby teeth!).

To make the pillow, I combined a chambray shirt and a little plaid shirt, with snap button pockets, that Dub wore as a baby. He actually helped me dig through his baby clothes to find just the right combo.

Tooth Fairy Pillow Using Upcycled Baby Clothing | Five Marigolds

Here he is at just 3 months old sporting one of the shirts.

Tooth Fairy Pillow Using Upcycled Baby Clothing | Five Marigolds

My mom used her fancy sewing machine to embroider some letters and voila! An easy, free tooth pillow that he absolutely loves.

Do you have any Tooth Fairy traditions?


12+ Back To School Outfits for less than $165

12+ Back To School Outfits for less than $165


Princess Party Favors: Candy Necklace Cards

Planning Eve’s birthday party each year is always so much fun coming up with new themes. And this year we’re doing a Princess Birthday Party. Making adorable decorations and favor bags has been a blast. Get all the details on how to make these Princess party favor candy necklace cards for your next party!

Princess Party Ideas

There are so many princess birthday party ideas flooding the internet. After wading through endless princess stuff, I decided to use more of a traditional princess theme rather than a Disney princess party. I knew I wanted some custom party favors, but I didn’t really find anything out there I loved for purchase, so I decided I needed to create my own.

First up was the princess crown Candy Button favors. I love the nostalgic feel of the old-fashion candy combined with ultimate princess accessory.

Next up, candy necklace cards. These cute candy cards were the hit of the party. The girls just couldn’t love them more. Who wouldn’t love candy jewelry, right?

Princess Candy Necklace Party Favors | Five Marigolds

Continue reading

Homemade Birthday Cake Ice Cream

Homemade Birthday Cake Ice Cream | Five Marigolds We’ve established that I’m a big fan of ice cream. But, cake. Oh how I love cake, too! Eve chose Birthday Cake ice cream as one of her flavors for our ice cream truck and it didn’t take me any convincing to agree. I set to work researching recipes, but yet again found that most recipes called for eggs, which was not what I was going for.

So took my favorite ideas from the interwebs, then adapted a basic vanilla ice cream recipe to create this fabulous birthday explosion for the tastebuds.

What you’ll need:

  • 1 C. Whole Milk
  • 1/4 C. Granulated Sugar
  • 1 Box Yellow Cake Mix, separated (I used Funfetti)
  • 2 C. Heavy Whipping Cream
  • 1 t. Vanilla Extract
  • Buttermilk Icing (I made 1/2 of this recipe and used about 1/2 of that. You could also use store bought icing!)
  • Sprinkles, if desired

What to do:

  1. Reserve half of your cake mix, and prepare the remainder in an 8″ or 9″ round pan. When it’s done, remove it from the pan and place it in your freezer.
  2. Place small drops of buttermilk icing on a small sheet of freezer paper, and then place it in the freezer to set up. I used an icing bag and a small round tip to make mine uniform because I was photographing it, but you don’t need to make these pretty. I also colored my icing to make it festive and pretty.Homemade Birthday Cake Ice Cream | The Scoop
  3. Mix the milk, sugar, and 1/2 C. cake mix until the sugar and mix are dissolved.  Stir in the heavy cream and vanilla, and place the mixture in the fridge.
  4. Cube 1-2 cups of the frozen cake into the size of croutons.
  5. Place the liquid mixture into your ice cream maker* about 20 minutes until it thickens. Then, slowly pour the 1-2 cups of cake cubes and desired sprinkles into the machine until it is lightly mixed.
  6. Place the mixture into a sealed container in the freezer for at least 2 hours or overnight.

*No ice cream maker? No problem. Freeze the chilled liquid mixture for 2-4 hours or until slightly thickened/frozen and then gently stir in the cake cubes and sprinkles. Chill overnight.

Homemade Birthday Cake Ice Cream | Five Marigolds
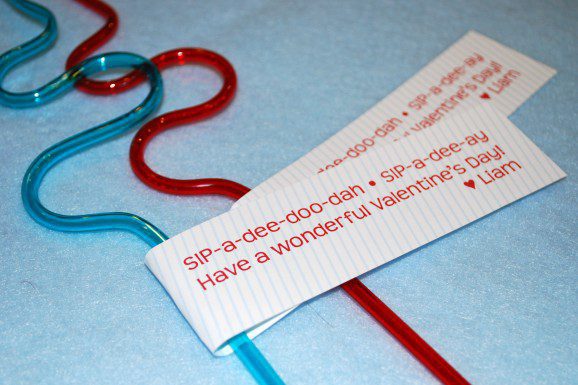
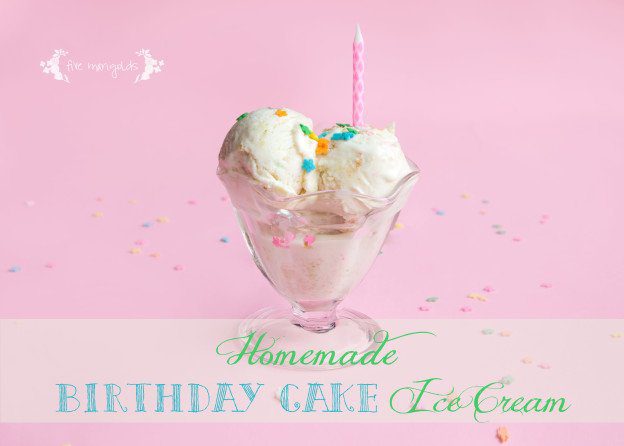
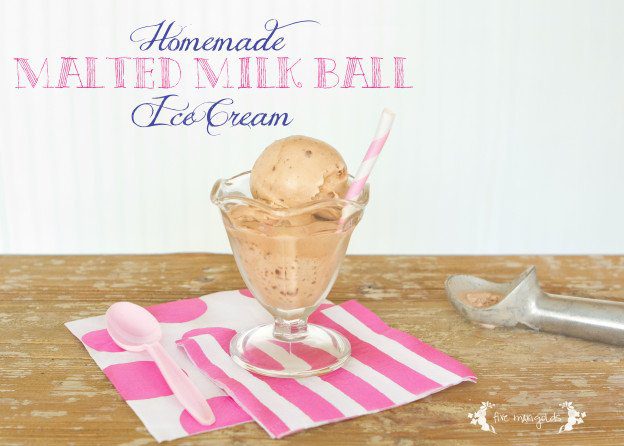
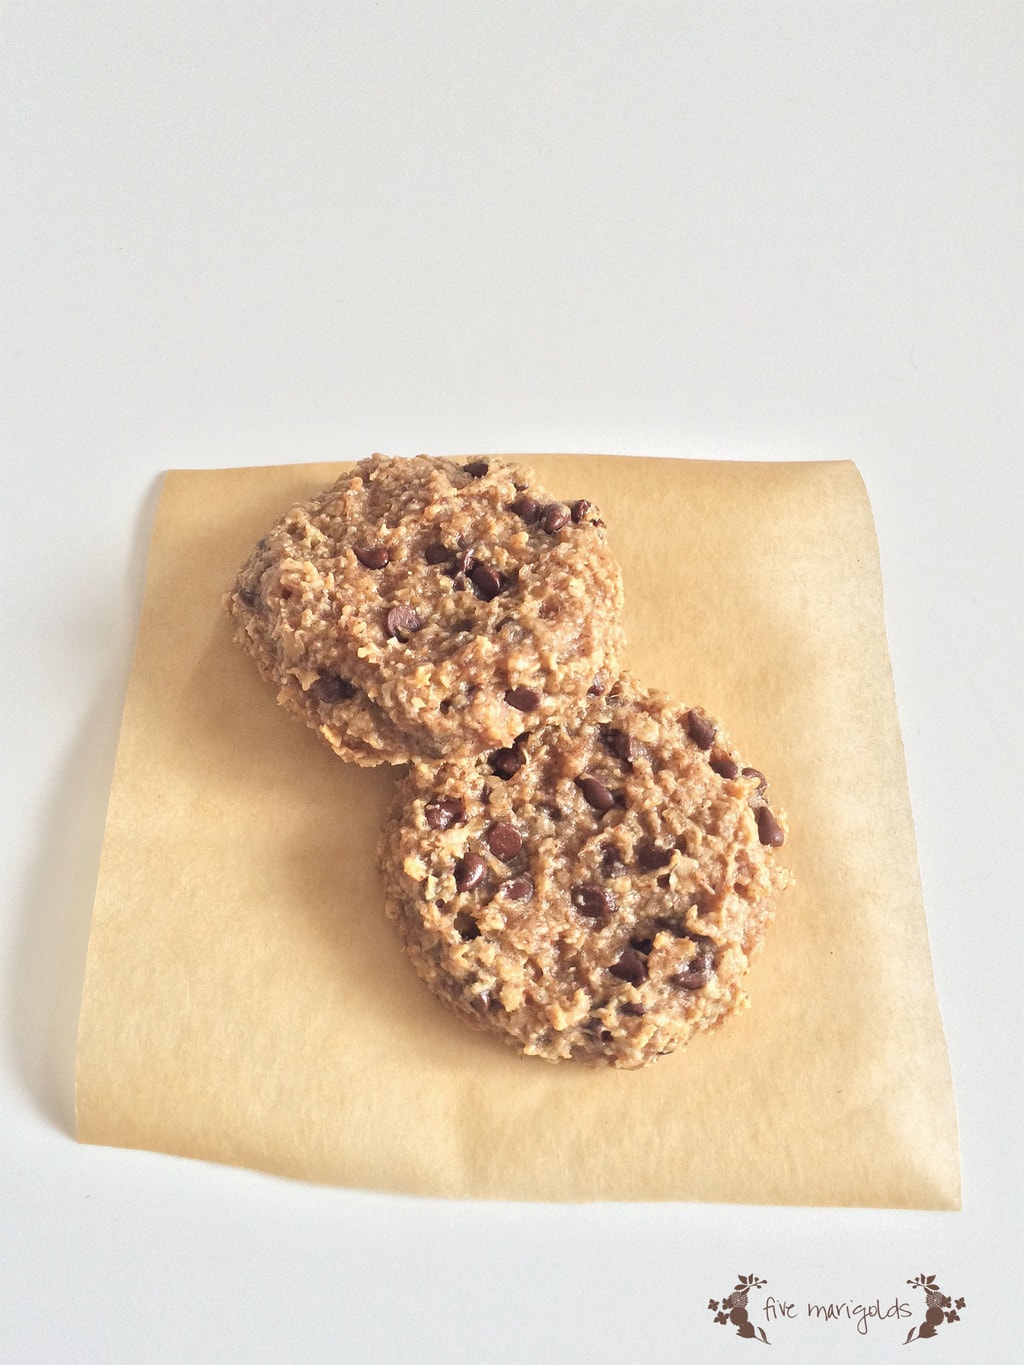
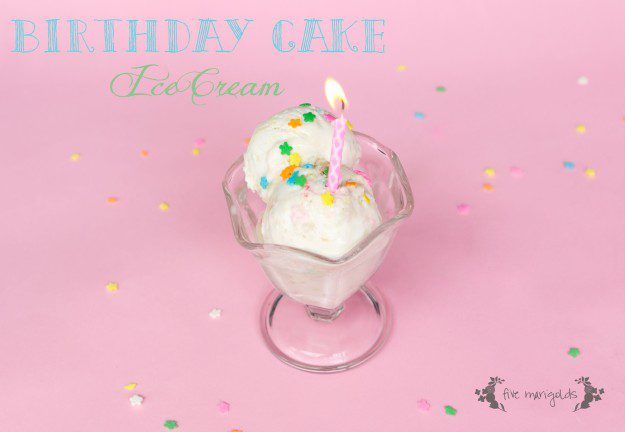
YUM! Your kids will beg you to make this recipe again and again. I hope you enjoy this recipe! Please tell me what you think in the comments below.

Sweet Treat: Easy Homemade Candy Buttons

There’s just something about Candy Buttons. These nostalgic candies are surprisingly easy to make, and are perfect for birthdays, party favors, or just a fun sweet treat.

To make Candy Buttons, all you need to do is prepare a simple royal icing recipe. You can use the recipe listed on the can of Meringue Powder, but I used the following recipe, inspired by Sweet Sugarbelle:

What you’ll need:

  • 1 lb. confectioner’s sugar (4 3/4 cups)
  • Meringue powder (about 1/4 cup)
  • 1/3-1/2 cup water
  • 1-2 tablespoons flavored extract (I used almond extract because it’s what I had on hand, but there are tons of fruity flavors at the craft store that would be fun to try!)
  • Food coloring
  • Electric mixer
  • Freezer paper
  • Icing bag and small round tip (or a resealable bag with a tiny corner cut off would work in a pinch)supplies

To prepare:

  1. Whisk the dry ingredients together.
  2. In a separate measuring cup, mix the flavored extract into the water.
  3. Slowly begin pouring the liquid mixture into the powder mixture while it mixes.
  4. Mix the frosting on medium-high speed until the frosting forms stiff peaks (around 7 minutes)
  5. Add food coloring to achieve desired color. (I first made pink frosting, and later added a few drops of blue to make purple to get two colors out of one batch.)

Next, tear off a sheet of freezer paper – large enough that you can fit a large batch of buttons on (you won’t cut the paper until these are dry).

Fill your pastry bag (I used my Pampered Chef Decorator Bottle Set*) with frosting and twist the top, removing excess air. Now, simply pipe evenly sized dots across the paper. If possible, print a template in advance and place it below the freezer paper. Be sure that the design will fit into your final packaging. If you’re using pretzel bags for your packaging, your design will need to be approximately 2.15 x 5″ to fit the pretzel bags I would be placing them in.Candy Button Crown Template | Five Marigolds

Candy Button Heart Crown Party Favors _ Five Marigolds_45m
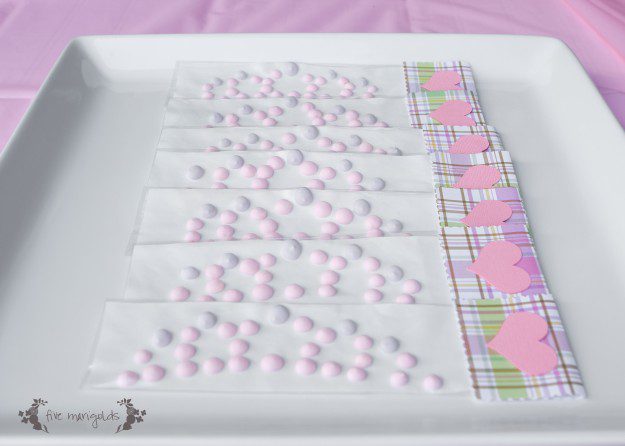
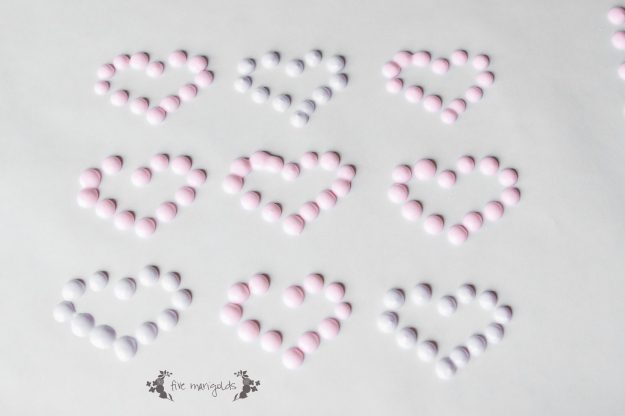
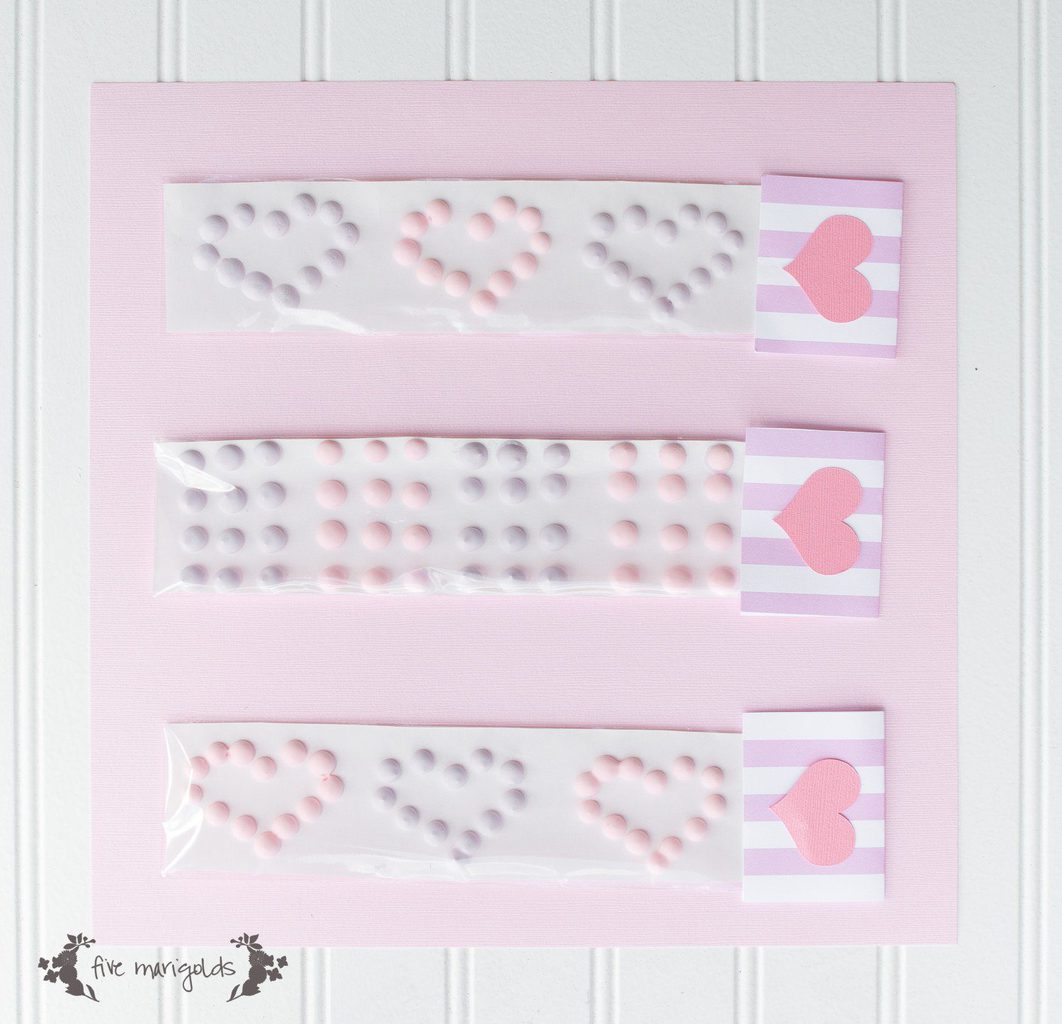
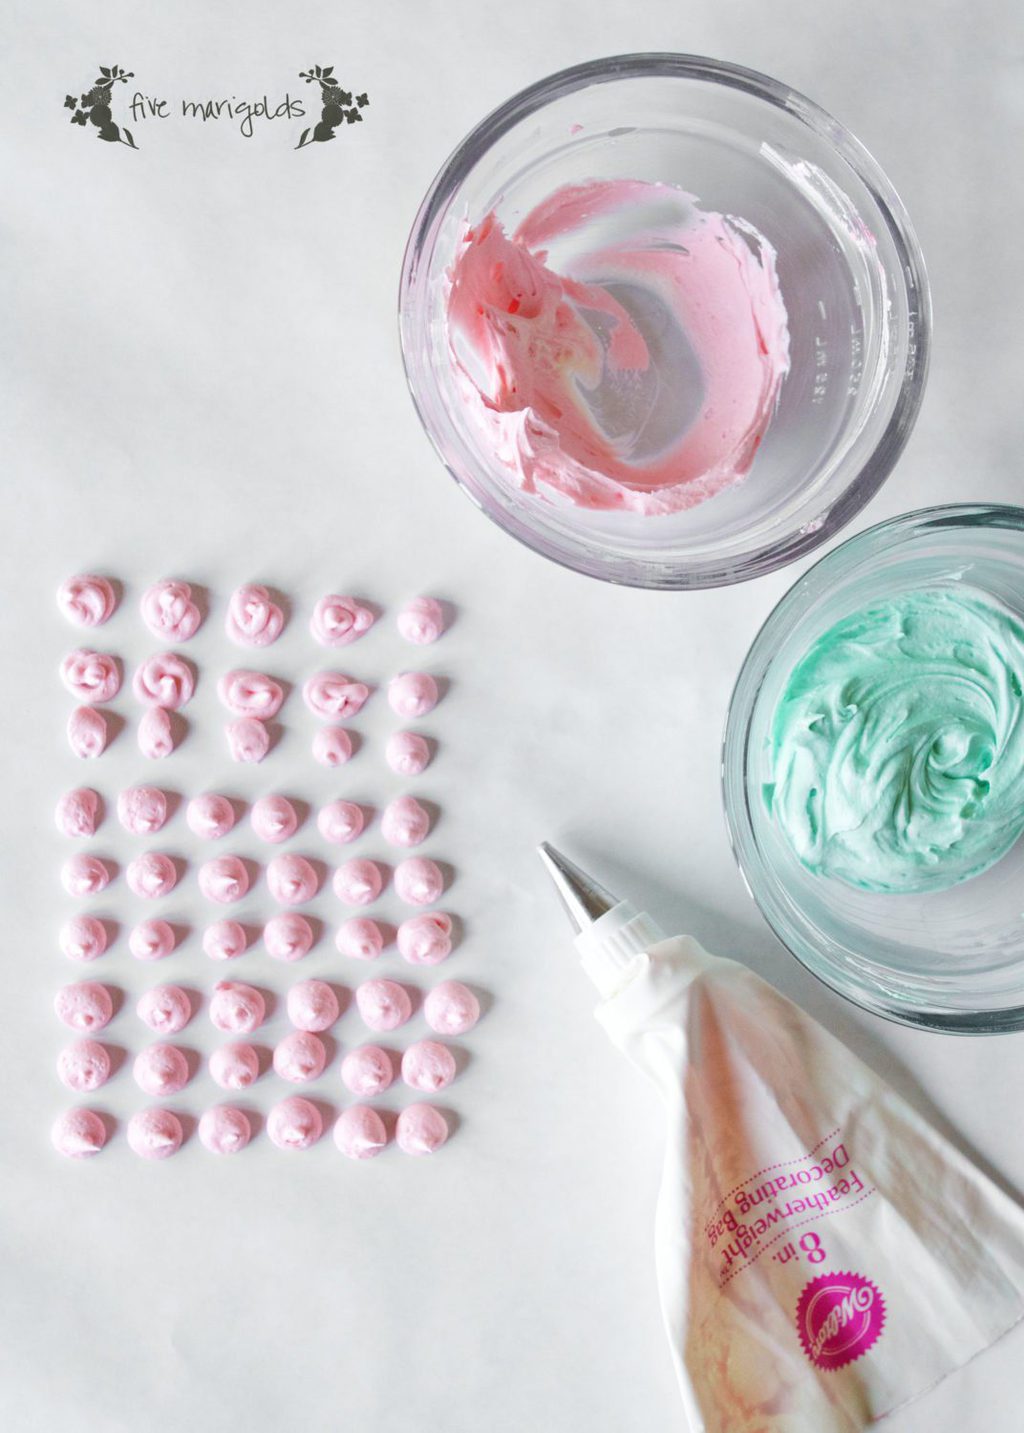
Let the Buttons sit overnight to dry. Any excess frosting will keep in a resealable bag refrigerated for two weeks.

Now for the fun! Once the Buttons have set up overnight, you can begin cutting the freezer paper to your desired shapes.Candy Button Heart Crown Party Favors _ Five Marigolds_35m

Package your Candy Buttons for the occasion. I placed them in Wilton pretzel bags that I got at JoAnn’s for $1.37 using my 40% off coupon. Think of the possibilities! Birthday party favors, Valentines, and more!Candy Button Heart Crown Party Favors _ Five Marigolds_15m

Valentine's Candy Button Hearts _ Five Marigolds5m

Valentine Candy Buttons


In addition to being featured on the fab blogs listed on the right of this blog, this post was also featured on Huckleberry Love.


Homemade Malted Milk Ball Ice Cream

I just love the tasted of malted milk powder! As a kid, my mom would often top plain vanilla ice cream with sprinkling of this powder, and our favorite ice cream shop in town had a popular malt with 2x the malt powder. Yum!

I wanted to introduce my kids to the same flavor, so when we came up with the idea to create our own ice cream truck, I went on the search for a good Malted Milk Ball ice cream. Unfortunately every recipe I found included eggs, which I didn’t want to mess with. So, I came up with the following recipe using our Cuisinart Ice Cream Maker*.

What you’ll need:

  • 1/2 C. Malted Milk Powder (I used the chocolate flavor because it was all I could find at the grocery)
  • 1/2 C. Granulated Sugar
  • 1/8 C. Brown Sugar
  • 1 C. Whole Milk
  • 2 C. Heavy Whipping Cream
  • 1 T. Vanilla Extract
  • 2 Cups Malted Milk Balls, chopped + more for garnishing, if desired

What to do:

  1. Whisk together the dry ingredients in a mixing bowl.
  2. Add the milk and use a mixer or whisk until the sugars are dissolved.
  3. Stir in the cream and vanilla.
  4. Set it in the fridge to cool at least 2 hours or overnight.
  5. Pour the chilled mixture into your ice cream mixer* for 15-20 minutes or until it’s thickened.
  6. Slowly pour the desired amount of Milk Balls into the drum while the ice cream mixes, or fold it in at the end.
  7. Freeze in an airtight container for about 2 hours. Enjoy!

The result? Amaze-milkballs.  Ahem.

Homemade Malted Milk Ball Ice Cream | Five Marigolds

What do you think? Are you a fan of Malted Milk Ball ice cream? I’d love to hear your favorite ice cream flavor in the comments below.

*No ice cream maker? No problem. Once you’ve reached step five, simply put the container in the freezer for 2 hours or until it begins to freeze slightly. Stir in the malted milk balls and stir after another hour to evenly distribute, if necessary.  

Homemade Malted Milk Ball Ice Cream | Five Marigolds

Homemade Cookie Dough Frozen Yogurt

Cookie Dough Frozen Yogurt Recipe | Five MarigoldsDub has the heart of an entrepreneur. And marketer. He’s always saying things like, “I want to open a restaurant and name it ____,” or, “I wish I was old enough to start my own ______ business.” I love this quality about him, so this summer I wanted to show him that he can bring his ideas to life.

We chose to hone his kidpreneurial ambitions through his dream of owning an ice cream truck because, his mom really likes ice cream what better timing than summer? He immediately knew he would name it “The Scoop” and his pitch would be “Get a scoop, double scoop at The Scoop!” I encouraged him and Eve to brainstorm some ice cream flavors. They each came up with two ideas and we’ve been enthusiastically experimenting to finalize our menu.

Today we landed on our first unanimous winner.  It’s a frozen yogurt that’s just as tasty as ice cream, with a super-sweet cookie flavor blast for the tastebuds.

Cookie Dough Frozen Yogurt Recipe | Five MarigoldsWhat you need:

  • 1/2 C. unsalted butter, softened
  • 1/2 C. packed brown sugar
  • 1/4 C. granulated sugar
  • 2 t. vanilla or almond extract (I’m a huge fan of the almond extract for this recipe!)
  • 1 C. flour
  • 1/4 t. baking soda
  • 1/4 t. salt
  • 1/2 C. mini chocolate chips
  • 1/2 C. crushed crunchy-style chocolate chip cookies (around 4 Chips Ahoy cookies)
  • 1 C. vanilla yogurt – I highly recommend Dannon Lite & Fit Vanilla yogurt for the best flavor

Directions:

  1. First, mix the butter and sugars with a mixer.
  2. Then, in a separate bowl whisk together the flour, baking soda and salt. Add chocolate chips and crushed cookies.
  3. Gently fold the flour mixture into the sugar mixture until well combined, then thoroughly mix in the yogurt.
  4. I like to use my CuisinArt Ice Cream maker for this recipe. Make sure to freeze the vessel for at least 48 hours before churning. 
  5. If you don’t have an ice cream maker, freeze overnight in a sealed container, then fight the urge to eat it for breakfast.

Cookie Dough Frozen Yogurt Recipe | Five Marigolds

That’s it! No fancy ice cream maker necessary. Try it for yourself and let me know what you think!Cookie Dough Frozen Yogurt Recipe | Five Marigolds

For those of you who have asked where I got the ice cream container, I found it on a clearance shelf at TJ Maxx, but you can also buy it online in several colors on Amazon. I’m going to buy several so I can have several flavors sitting in my freezer at once 🙂

Inexpensive, Easy Chore Chart for Kids

This summer is the first summer I’ll be at home most days with the kids since I started my freelance adventure last fall. My 6 and 4 year old are bright, exuberant kids and I knew I’d have to add structure their days if I wanted any sanity. However, with my freelance work I don’t have the ability to be there every moment to guide their day (and who would want to?). It’s also great for fostering their independence as well.

I went to work trying to find chore charts, but none of them were quite right. My 4 year old can’t read the text chore charts, and many of the picture charts were geared toward very little children, or had unattractive graphics.

After doing some research I landed on four requirements:

  • I wanted a photo chart that my four year old could understand and interact with on her own;
  • I didn’t want to spend much money;
  • I wanted the flexibility to change their days up, but I also didn’t want to have to print a new one each week; and
  • I needed something I could mount to the fridge somehow – I didn’t want a chart that required wall space.

I landed on the concept of a magnetic chart with two categories: “Doing” and “Done.” I saw a few examples that I liked and got to work emulating those based on my needs. However, I needed clip art. It was SO hard to find cute clip art that would work for this! That’s when I stumbled upon Audrey Schilaty‘s blog. She had the exact chart I wanted – for free! Really, it’s the nicest free resource I’ve found. She offers both personal care and chore images, and I used a small combination of both (sad but true: I forget to have my children brush their teeth all to often).

I made it my own with a few modifications:

  • I drafted my own simple “Doing” and “Done” text document and used just the images I needed from her selection, so it would all print on one page, saving me money.
  • I printed it on a glossy sheet of photo paper that I had on hand, and then just placed it on an 8.5×11 sheet of adhesive magnet. You can buy packages of adhesive magnet sheets at office supply stores, but I found the most inexpensive option for heavy sheets – I got mine for just $3.59. I cut the small pieces to size, added them to the fridge, and voila – a clean, easy and inexpensive chart.

Magnetic Chore Chart | Five Marigolds

The kids woke up the first day and had moved two magnets over before I had a chance to remind them about it! So far, it’s been a great success.

DIY Magnetic Chore Chart | Five Marigolds

I encourage everyone to check out Audrey’s great blog. And, if you’d like a copy of the 1-page version of the printable I used to create my chart using her images, just click the image below!

Chore chart printable | Five MarigoldsThere you have it – a chore chart for just $3.59. What are your tips for keeping the kids structured in the summer? Let me know in the comments below.


*This post contains affiliate links. Please read my full disclaimer on the right sidebar. Thank you for your support!


Star Wars Birthday Party – Invites And Thank You Postcards

My final post in the Star Wars birthday party series is to share the custom invitations and thank you cards I designed.

Each year, I’ve been lucky that my children have chosen Halloween costumes that match their birthday party themes for the following year. Dub chose to be Darth Vader, so I used his Halloween costume for the front of the invitation. I created a simple background in PhotoShop, and used the free Star Jedi font.

Custom Star Wars Birthday Party Darth Vader Invitation | www.fivemarigolds.com

I used the same background on the back, added the party details, and created a Darth Vader silhouette.

Custom Star Wars Birthday Party Custom Thank You Postcard | www.fivemarigolds.com

During the birthday party, I made sure to get one shot of all of the kids in the photo booth, wearing their jedi robes and using photo booth props. I used this image for a custom thank you postcard. On the back, I created a simple template that Dub could fill in himself. I love the idea of the postcard because it helps him learn the proper etiquette of showing thankfulness.  Sincere, personal, and to the point! And, it’s a little less expensive to mail 🙂

Finally, just to prove how much I utilize those Halloween photos, I also used it for Dub’s Valentine’s card. I wonder if he’ll be sick of Darth Vader by this Halloween?

Star Wars Darth Vader Valentine | www.fivemarigolds.com

Star Wars Darth Vader Valentine | Five Marigolds

See also:

R2D2 Star Wars Cake | Five Marigolds

Star Wars Birthday Party, Part I

Star Wars Storm Trooper Favor Bags | Five Marigolds